Posted by Alessandra on Monday May 24, 2010
Filed under :Brazilian Recipes, Rice, Side Dish
Brazilians eat rice pretty much every day. I can say that rice is the most staple food of Brazil. I also love it because a basic recipe like the one I will post here can be turned into so many dishes. I like products like that because you can let your imagination run wild! If you keep checking back you will see I will come back to this basic recipe many times during my blog adventure. If you want to read more about rice, check out Wikipedia. They have some great facts on rice!
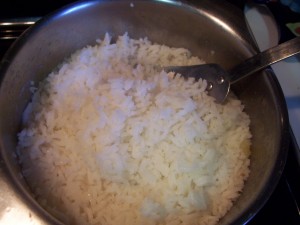
1 c long grain white rice (you can substitute with other type of rice)
2 T minced onion
1 clove garlic, minced
2 T vegetable oil (I use olive oil)
1 1/2 t salt
4 cups water (about)
Place the rice in a colander and rinse thoroughly with cold water; set aside. Heat the oil in a saucepan over medium heat. Cook the onion in the oil for one minute. Stir in the garlic and cook until the garlic is golden brown. Add the rice and salt and stir until the rice begins to get translucent.
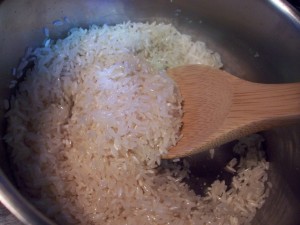
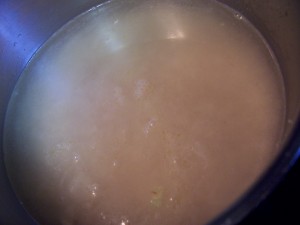
Pour water over rice mixture so the water level is 2 fingers higher than the rice (*do not stir the rice after adding the water)
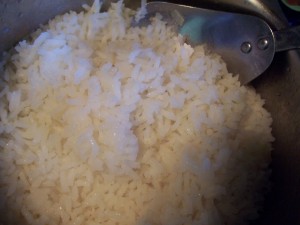
White Rice
Reduce heat to medium-low, cover the saucepan, and allow to simmer until the water has been fully absorbed, 20 to 25 minutes.
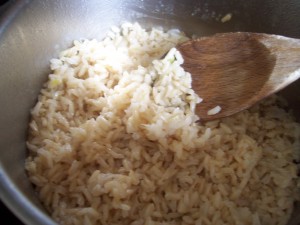
Brown Rice
If you are going to make brown rice make sure you let it cook for at least 45 minutes. You might need to add a little bit more water when the water starts to evaporate, but do not stir the rice! Just add a little water if the rice still hard. When the rice is almost soft you can turn off the heat, cover and let it sit for a while.
I really like brown rice. It is healthy and I love the nutty taste. It does take a little while to cook, but if you plan ahead you can make your rice, cook for the 30-45 minutes required then cover it and forget about it. It is easy and worth the wait!
You can also freeze the cooked rice (individual portions, or big portions). Like I said before, I love brown rice, but my husband doesn’t as much of it. So when I make white rice or brown rice, I will make a big batch and freeze individual portions of it. That way if I am serving rice I have his white rice ready and just need to make my brown. Or vice versa.
*if you stir the rice too mush, it won’t be nice and loose. It will form clumps together, which we in Brasil refer to as “arroz unidos venceremos” = “together we win” 🙂 I only like this type of sticky rice when making Japanese food, otherwise I like my rice nice and fluffy.
Posted by Alessandra on Wednesday May 19, 2010
Filed under :Uncategorized
I thought I should take a picture of a shopping trip for this week! I will try to remember to take more pictures of my shopping trips. I am so used to coming home and putting everything away and I only remember about pictures when I have the last item on my hand to be put away. But I remembered this time, so here it is:
This was at Smiths:
5 -pk (2) Dial Soap Bars
1 -French Mustard
2 -Cholula Hot Sauce
3 -Pkg American Cheese
1 -Double Pkg Always Pads
5- Pkg Flips Chocolate Pretzels
5- 3 Musketeers
14- Chewing Gum
1- Sandwich Thin Bread
1- Bottle of Capers
Total before my Smiths Card: $80.58. Total after Sales, Smiths Card and Coupons: $5.61 (it was supposed to be $4.61. I had a coupon for a free Always Pad and the cashier marked the price incorrect and I didn’t notice it until I got home…oh well)
That is a 93.04 % savings! WOW WOW WOW
Here is a picture:

Now, I am really trying to be good and not eat so much candy and etc… Here are some things I do with the chocolate, gum, and treats I get:
- I send it to my husband’s work. He has a candy dish which makes his co-workers and friends happy.
- I give it to friends/neighbors as a “thinking about you”, “get well soon”, “good luck today” type gifts. It works for many different types of occasions.
- If I am asked to speak in public, I can bring treats to pass around.
- I am always entertaining company. I love to have people over; so those treats are a great way to get people talking and enjoying themselves while I make dinner.
- They are also great to take to peoples’ home for social occasions. I have never seen anyone get upset when bringing them chocolate! 😉
- Since I LOVE to cook and bake, chocolates can be used when making mousses, pie crust, mixed with cake batter and etc.
Hope this has sparked your interest and made you curious about coupons shopping! Remember I teach classes, just contact me for a free class. Also on the right hand side of this page there is a link which allows you to print coupons from your computer! You can start saving TODAY!
Enjoy
Posted by Alessandra on Tuesday May 18, 2010
Filed under :Brazilian Recipes, Desserts
I have never tasted anything like this treat here in the US. It is like a cookie crust filled with this delicious coconut candy. It is very easy to make. You can make it using the small size muffin tins for finger food size or the big size for a full dessert size. Here is how:
For the dough/ cookie:
2 cups Flour
7 T. Butter (soften)
1 Egg
2 T. Sugar
Mix it all together, until it forms a smooth ball. Cover and set aside.
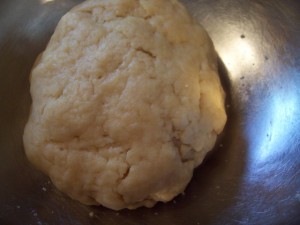
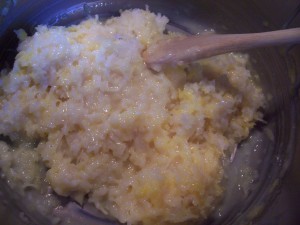
For the filling:
3 C. Shredded Sweetened Coconut
2 Egg Yolks
1 can Sweetened Condensed Milk
1 T. Sugar
1 T. Butter
In a big sauce pan, mix the coconut, yolks, sweetened condensed milk and sugar. In medium heat mix it until it all comes together and starts to separate from the sides and bottom of the pan. Take it off heat and mix in the butter.
Now, use the dough to cover the muffin tins. Make sure you spread it bottom and sides very well.
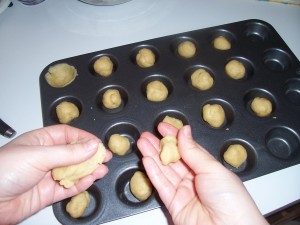
Fill each of them with the coconut mixture.
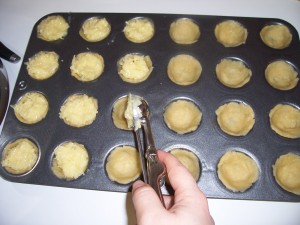
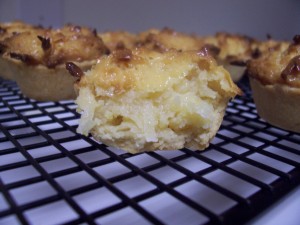
Bake it at 350 until golden brown. About 30 minutes.

YUM…Like I said it is not as creamy as a normal coconut pie, it is more of a candy like texture, but it is very good! Hope you like it 😀
Posted by Alessandra on Tuesday May 11, 2010
Filed under :Brazilian Recipes, Vegetables
This recipe is my weakness. I really have to watch myself when I make this one. It’s just that good! I still remember the first time I had this at my aunts house in Brasil. (yep it is one of those for me, so good you never forget it). I used to go eat lunch at my aunts house on Fridays. She lived close to my school and I only had time to go to her house before going back for school. The first time she served this I looked at it and thought “oh no eggplant! I will just eat one to be polite”. Yeah right! Needless to say she had to make those for me every week. To this day, every time we go back to visit Brasil she has a whole dish ready, waiting for me… yum!
Here it is. Enjoy!
Breaded Eggplant:
1/2 onion (shredded)
1 cup mayo
1 cup bread crumbs
1/2 cup parmesan cheese
1 eggplant
How to make it:
You are going to shred the onion, just like you shred cheese. There will be a lot of juice coming from the onion with the little pieces of onion, so make sure you do this on the plate you will use. Then, mix with the onion the 1 cup of mayo. This will be the wet mixture for the breading part.
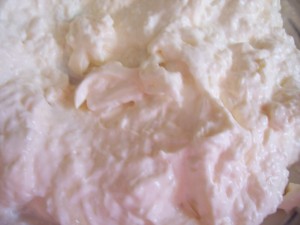
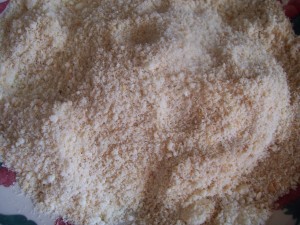
In another plate mix the bread crumbs and the parmesan cheese.
Slice the eggplant, quite thin. I then soak them in water just a little bit. Then I pat it dry with a paper towel and start the breading process. First you dip it in the onion mix.
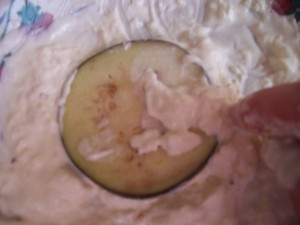
Then in the bread crumb mix…
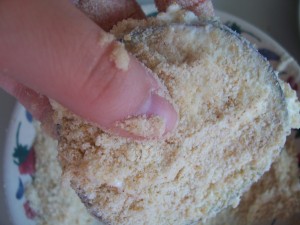
Set them aside in a cookie sheet.
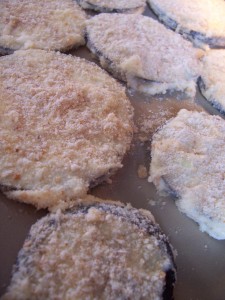
Bake them at 350 degrees for about 30-40 minutes. I will turn them half the way through so both sides get this golden brown color. Ohhh it is so good 😀
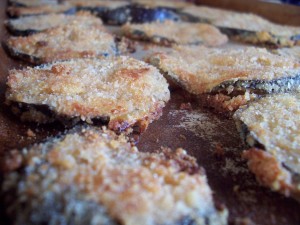
You can serve this as a side dish or here are some ideas that I like to do if there are leftovers:
Eggplant Lasagna: Make your favorite lasagna recipe but use the eggplant instead of noodles. Lasagna in Brasil is a bit different than the ones I have eaten in the US. The most traditional type of lasagna uses layers of lasagna noodles, sliced ham, sliced cheese, bolognese sauce, and alfredo sauce.
Eggplant Parmesan: Layer slices into a casserole dish, then top with a nice marinara sauce and shredded mozzarella. Keep layering until there is not more eggplant left.
Posted by Alessandra on Friday May 7, 2010
Filed under :Beef, Brazilian Recipes
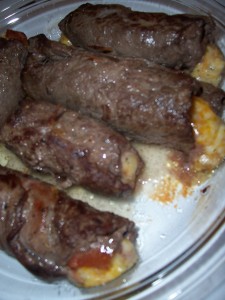
1 (6 oz) log of President brie (click here for $3 off coupon)
1/2 c shredded cheese (cheddar, or parmesan)
1 t Italian Seasoning
8 thin slices of london broil (you can also use chicken)
4 slices of Prosciutto
Salt and Pepper
Oil to brown the beef
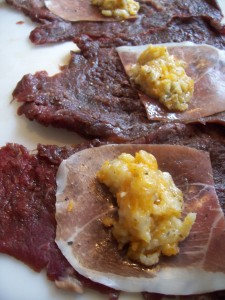
Microwave brie for about 1- 1 1/2 minutes. You just want to soften it a little bit. Add shredded cheese and Italian Seasoning. Set aside.
I like to put all the meat side by side, salt and pepper thin slices of beef. Then top with half slice of Prosciutto and about 1 Tablespoon of cheese mixture. Roll it tight and secure it with a tooth pick.
Fry the meat rolls in a frying pan with a little splash of oil Since the beef is so thin it won’t require much time. You just want to give a little color to the outside. I would say between 2 or 3 minutes per side. Put meat rolls into a oven safe dish and bake for about 20 minutes at 250 degrees.
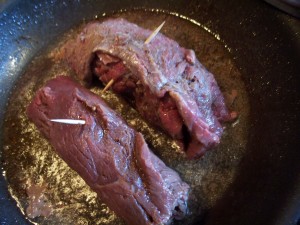
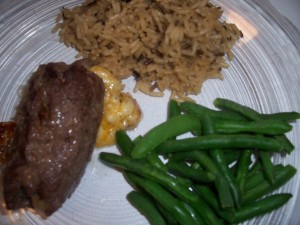
Don’t forget to take tooth pick out before you eat it 😀 Enjoy!
Posted by Alessandra on Tuesday May 4, 2010
Filed under :Breads
I thought I would post my recipe for homemade tortillas in celebration of cinco de Mayo tomorrow! I really like these tortillas. It is a bit of work to roll them out, but they taste so good!!! Also as you’ll see in the pictures, we decided to make them square (easier to cut) and it was a fun little change!
Mix together:
1 tsp salt
3 c flour
1 1/2 tsp baking powder
Cut in 1/4 c margarine or butter with a pastry blender.
Add: 3/4 – 1 c warm water, stir until dough is formed.
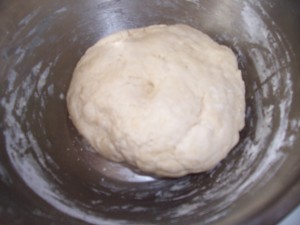
Divide the dough into 8-10 equal size balls.
Roll them thin and round.
tip: If you want them nice and round, use a small plate and cut around it.
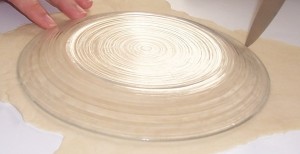
or you can have fun and make it in any shape you like!
Cook on a hot frying pan or gridle about 30 seconds each side.
Suggestions: Serve with taco meat and toppings, make deli rolls or serve with salad.

Depending on the weather they may harden after cooked. To soften the tortillas, just keep them warm. You can use the microwave for a couple of seconds to warm them up. Or you can gently wet a clean dish towel with hot water (damp, not soaked) and keep the cooked tortillas inside while you cook the rest. (It will be just like using one of the tortilla warmers) 😉
Posted by Alessandra on Wednesday Apr 28, 2010
Filed under :Desserts
This is one of my favorite “easy-to-make-in-a-pinch” recipes. It tastes good fresh and even better the day after! It also freezes very well (up to a month) without the glaze. Enjoy!

Adapted from America’s Test Kitchen
2 sticks of unsalted butter
1 3/4 cups flour
1/2 teaspoon baking powder
1/2 teaspoon salt
1/4 cup sour cream
2 tablespoons lemon juice
1 cup granulated sugar plus 2 additional tablespoons
5 large eggs (room temperature)
Syrup
1/4 cup granulated sugar
1/4 cup lemon juice
Glaze
1/2 cup Confectioners’ sugar , sifted
1 tablespoon lemon juice
For the cake:
Grease and dust a bunt cake pan. Sift the flour, baking powder and salt. Set aside. Mix the sour cream and the lemon juice and set aside.
In a mixer, add butter and sugar. Mix it together until nice and fluffy. It will take about 3 minutes (it depends on the mixer). You may have to scrape down the sides of the bowl while it mixes. Slowly add the eggs, one at a time letting it mix very well. With the mixer on low, add 1/3 of the flour mixture, and 1/2 of the sour cream mixture. Repeat, ending with flour mixture.
Pour into prepared pan and bake at 325 for about 55 minutes. It might need some more time. To check, insert a tooth pick into the middle of the cake. If it comes out clean, it is done.
For the syrup:
Mix together the sugar and lemon juice in a sauce pan. Let it simmer until all the sugar dissolves and liquid is a little thick. It will be a thin syrup. When cake is done, let cake cool in the pan for about 10 minutes. Then poke small holes on the cake (with a fork or toothpick) and drizzle about half of the the syrup, turn the cake into a platter and do the same to the top of the cake.
For the glaze:
Whisk powder sugar and lemon juice until it is a thick (but runny) glaze. Sometimes I add just a little bit of water until it comes to the right consistency.
After the cake is nice and cooled to room temperature, drizzle the glaze on top and side of the cake.
This cake is even better the day after it is baked. It is a nice dessert to make ahead of time. I like to decorate it with some raspberries on top. It is a good combination!
Posted by Alessandra on Thursday Apr 22, 2010
Filed under :Brazilian Recipes, Fish
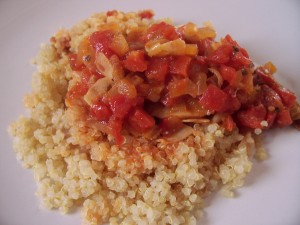
4 cloves of Garlic (sliced very thin)
1/2 Onion (diced)
1 T Olive Oil
1 T Sun Dried Tomato paste
4 Fillets of Cod
Salt and Pepper
1/4 cup Chardonnay (you can substitute chicken broth)
1 T Lemon Juice
1 (14.5 oz) can of diced Tomatoes
Basil (fresh or dried)
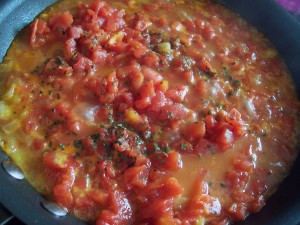
In a sauce pan, sautee onions and garlic in olive oil. Add sun dried tomato paste.
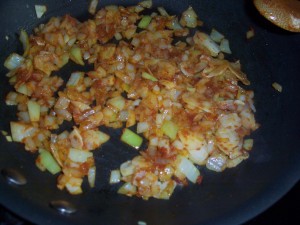
Add wine and lemon juice to onions. Salt and Pepper both sides of cod fillets. Lay fish on top of sautéed onions. Cook fish about 5 minutes in one side.

Turn fish and add diced tomatoes. Cover and let it cook for another 5-8 minutes or until fish it flaky.
Sprinkle with fresh Basil. I like to serve this with Rice, or Quinoa. The sauce is very good, but not very thick. So you want something that will catch the sauce. (like rice, quinoa or bread). You can always take fish out of pan and thicken the sauce with 1 T of cornstarch dissolved in about 2 T water.
Posted by Alessandra on Wednesday Apr 14, 2010
Filed under :Brazilian Recipes, Main Dish
This is a favorite at our house. It is so easy to make and it looks like you spent hours making it. 😉
1.5 lb sliced ham (ask them to slice it thin)
1 lb sliced cheese (I like Swiss, but any cheese will work)
1 box angel hair pasta (cooked al dente)
1 T olive oil
salt and pepper
1/2 c shredded cheddar or parmesan
Spaghetti Sauce
Alfredo Sauce
Cook angel hair pasta as directed on the package. Just make sure cook it al dente. Drain the pasta and add the olive oil , salt, pepper and the 1/2 c shredded cheese.
Take one slice of ham, top with one slice of cheese and a little of the pasta.
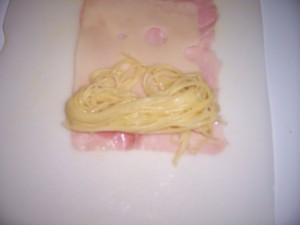
Roll it tight and cut the roll in half. Stand them cut side up and put them into a casserole dish that has been lined with a little bit of the spaghetti sauce (only 2 or 3 tablespoons)
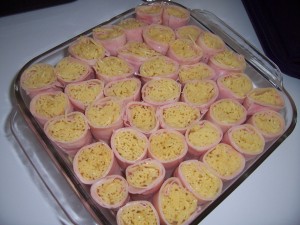
Keep making rolls until you fill your dish. Top with Spaghetti sauce and Alfredo sauce. Bake at 350 until it is nice and bubbly. About 30-45 minutes.
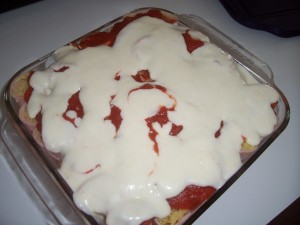
I usually have some ham and cheese left over. It all depends how thin the store will slice them for you. I ask them to slice it thin (both the ham and the cheese). They need to be thin enough to be able to roll well, but not too thin that they won’t hold the pasta inside.
Posted by Alessandra on Thursday Apr 8, 2010
Filed under :Brazilian Recipes, Breads
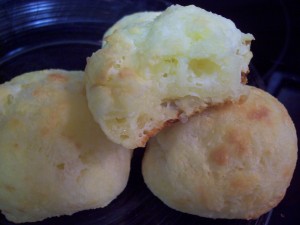
This is a traditional bread we make in Brazil. We use Polvilho to make it. Polvilho is basically tapioca flour/starch. You can purchase tapioca flour at the health food store in bulk. You can also find small bags at the grocery store in the health food aisle. Now all I have to do is try with different cheeses. This bread is very good warm. It is also yummy to cut it in half and make sandwiches or even add a little bit of butter! YUM 🙂 Enjoy!
1 cup whole milk
½ cup water
4 T. butter
1/4 cup oil
1 t salt
2 ¼ c tapioca flour
2 eggs
1 ½ cup shredded cheese*
¼ cup Parmesan
Boil milk, water, butter, oil and salt. Take off heat and add flour. Mix well. It will be clumped together.

Add eggs (one at a time) Mixing well after each egg. Add the 1 1/2 cups of cheese and the Parmesan cheese.
Let mixture cool a little bit. Roll into balls.
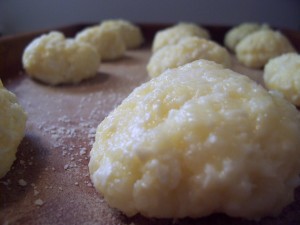
Spray a cookie sheet with oil or butter, and bake at 350 for about 30 minutes or until golden on top.

*I used a white cheese called queso panela (pan cheese)- I bought it at Sams. It will also taste very good with a Cheddar, Colby or even all Parmesan. I do like to mix the cheeses. I also used a Spanish cheese called Cotija, instead of the queso panela. It was good.
Another thing I noticed is that depending on the tapioca flour you use, you may need to add a lot more flour to get to the correct consistency. I have a reader say they added an extra 1 cup of flour. I bet this has to do with the temperature, altitude and flour consistency. Let me know if you have questions.


