Posted by Alessandra on Saturday Nov 4, 2017
Filed under :Breads, Desserts, Other
These are delicious. The dough is a bit time consuming, but easy to make. Think of a mix of a brioche dough and a buttery waffle dough and you got it right! YUM

Liege Belgian Waffles:
4 1/2-5 c flour
1 1/2 T instant dry yeast (if using active make a sponge first)
2 T honey
pinch of salt
1/4 c hot water
3/4 c hot milk
2 eggs
2 t baunilla
2 sticks of butter (room temperature)
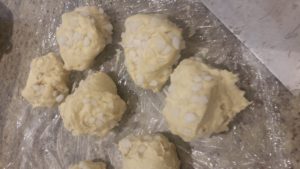
1 cup Belgian pearl sugar (I like the larger sized ones-see picture)
You can do this by hand, but I suggest using a mixer with the dough hook.
Add 4 cups of flour (reserve 1 cup for later), yeast, honey, salt, water, milk and mix until combined. Then add eggs, baunilla and if needed another 1/2 c of flour. Mix for about 5 minutes. You want a soft, wet bread dough texture. After all combined add butter 1 tablespoon at a time until it mixes all with the dough and if needed the rest of the flour. You may need to add even more flour, but don’t go crazy or it will be too hard of a dough. The final dough will be a wet, soft bread dough texture. The butter will give a nice shine to the dough. Just like brioche. Cover it and let it sit room temperature for 2 hours.
After the 2 hours, punch the dough to release some air. Then let it sit again overnight in the fridge.
The next day, bring dough to room temperature and add the pearl sugar (very important step). Mix in the sugar gently, folding the dough into the sugar. It is a lot of sugar. Cut into ball sizes (about 12-14 depending on the size you want)
Let is sit for another 15 minutes and the cook it on your waffle iron.

Make sure you use a Belgian waffle iron. It is a bit deeper than the normal waffle iron and that will help so the waffles aren’t too hard.

There are many ways to serve it. You can eat it just like it is, or spread some biscoff, nutella or a combination of both. It is also delicious with fresh fruit and cream!
Enjoy!
Posted by Alessandra on Sunday Sep 24, 2017
Filed under :Breads
Here is a quick tip to use that older looking bread you have in the house. Cut the bread into small squares and toast it at 350 until crunchy (croutons texture)

Pour it in a food processor and ta-da, bread crumbs! No waste! I like to do this and freeze into bags for later use. A couple more tips:
. Use whole wheat bread
. Season it with garlic, parsley and a touch of lemon zest
. Season it with Basil and garlic for an Italian twist
. Season it with red pepper flakes or powder for a spicy crumb.
There are many variations and possibilities for all your crumbling needs 🙂

Posted by Alessandra on Sunday Apr 19, 2015
Filed under :Brazilian Recipes, Breads
Here are 3 of my favorite Pao de Queijo recipes. The pao de queijo mineiro is my “to go” recipe. It is easy to make and it tastes delicious! Singapura is my second most favorite. I love the cream cheese or catupiry taste on it. The one with potatoes is very good as well, just requires a little bit more time to make since you have to work with the potatoes. Hope you enjoy them!
Pão de queijo Mineiro (delicious)

(green ones were for St. Patrick’s day with basil and garlic and a little bit of green food coloring )
2-3 cups of tapioca starch or flour
salt to taste
1 cup milk
1/2 cup oil
2 eggs
1 1/2 cup of finely grated cheese (I used a mix of Parmesan and cubed cheddar)
Place the 2 cups of flour with a little salt in a bowl. Set aside. Boil together the oil and milk. Add to the dry mixture (it will turn very gooey). mix it together until it turns into a gum consistency. I like to use my kitchen aid, Add one egg and half of the cheese mixture, kneed it with your hands.(of if using a mixer just mix until incorporated) It will be sticky. Add the other egg and rest of cheese. Kneed until it forms a ball.
It should have a cookie dough like texture. If it doesn’t add a little more flour. I usually end up using 2 1/2 cups of flour. (start with 2 and add an extra 1/2)

This mixture will be quite sticky. If you put a little bit of oil in your hands, it will be easier to mold the cheese bread into balls.

Bake at 350 for about 25-30 minutes.
Pão de queijo Singapura

1 cup of tapioca flour (polvilho doce)
200 grm cream cheese (or 100 cream cheese and 100 catupiry)
1 egg yolk
5 tablespoons of parmesan
Pinch of salt
Mix every thing together in a bowl. You will need to mix it with your hands. It may look like it won’t come together, but the warmth of your hands will make it come together.

This dough will be a soft, smooth consistency. When it gets to the soft consistency, make you cheese bread balls

Bake at 350 for about 20-25 minutes
Pão de queijo com batata

250 g of tapioca starch (polvilho doce)
2-3 medium potatoes (boil and smash them while still hot)
250 g of finely grated cheese (I used a mix of Parmesan and cojita cheese)
1/4 cup oil
1/4 cup milk
pinch of salt
2 medium eggs
Mix the tapioca, smashed potatoes, cheese, oil, milk and salt in a bowl with a wooden spoon. Add one egg at the time while kneading it.
This dough will turn into a soft dough almost like play dough. Just kneed it until it holds shape of a ball, then ,make your little pão de queijo balls.
Bake at 350 for about 30 minutes
All of these recipes can be made and frozen, to be cooked later. For more recipes check it here: Pão de Queijo
Posted by Alessandra on Thursday Sep 27, 2012
Filed under :Appetizers, Brazilian Recipes, Breads, Catupiry, Chicken, The Dairing Kitchen
Patri of the blog, Asi Son Los Cosas, was our September 2012 Daring Bakers’ hostess and she decided to tempt us with one of her family’s favorite recipes for Empanadas! We were given two dough recipes to choose from and encouraged to fill our Empanadas as creatively as we wished!

5-1/3 cups bread flour
2 cups of lukewarm water
1 tablespoon dry yeast or (1 oz) fresh yeast
2 teaspoons salt
4 tablespoons oil (you can use oil from the pan where you have cooked the filling)
1 large egg, for egg wash
Directions:
Shift the flour into a big bowl and make a well in the middle. Rub the yeast in with your fingers. In a small bowl, mix the water and the salt.
Now, using your fingers or a wooden spoon, start adding the water and mixing it with the flour-yeast mixture. Keep on working with your fingers or spoon until you have added enough water and all the flour has been incorporated and you have a messy ball of dough.
On a clean counter top, knead the dough for approximately 10 minutes
You could do all the above using a stand mixer, in that case mix the ingredients with the paddle attachment until mixed and then switch to a dough hook and knead on low for about 6 minutes.
Clean and oil the big bowl you used for mixing and place the kneaded dough in it. Cover it with a napkin or piece of linen and keep it in a warm, draught-free place for approximately 40 to 50 minutes.

Once risen, turn the dough back into a floured counter and cut it in half. Cover one half with the napkin to prevent drying.
Spread the other half of the dough using a rolling pin. You can use a piece of wax paper over the counter, it will make it easier to move the dough around. Depending on the shape of your oven pan or cookie sheet, you will make a rectangle or a round.
Now, the thinness of the dough will depend on your choice of filling and how much bread you like in every bite. For your first time, make it about 3mm thin (about 1/10th of an inch) and then adjust from that in the next ones you make.
Assembling the empanada:
If you haven’t used wax paper, either lightly flour or line with wax paper your pan or tray.
Cover the base and sides with the dough. Using the rolling pin or a knife, cut the extra dough.

Place the filling, making sure it is cold and that all the base is covered. Using a hot filling will make the bottom layer of the empanada become soggy. Be careful to avoid adding too much oil from the filling, try to make it as “dry” as possible.

Start preheating your oven to moderate 350°F.
Take the other half of the dough and spread it out to the same or less thinness of the base. You can use a piece of wax paper for this too. Take into account that this “top” dough needs to be smaller around than the bottom, as it only needs to cover the filling.
If not using wax paper, move carefully the top to cover the filling. If using wax paper, transfer the dough, turn upside down, cover the filling and gently peel off the wax paper.
Using your fingers, join bottom and top dough, when you have gone all the way around, start pinching top and bottom together with your thumb and index finger and turning them half way in, that way you end up with a rope-like border. As a picture is worth a thousand words, please watch this video to see how it is done.
When you are finished, make a 1 inch hole in the middle of the top layer. This will help hot air exit the empanada while it’s baking without breaking the cover.
You can use left-over dough to decorate the empanada, using rounds, bows, lines… let your imagination flow and make it pretty!

Using a fork, prick the top layer or, using scissors, make snips that go all the way through the top layer
In a small bowl, beat an egg and add a tbsp of cold water. With the pastry brush, paint the top of the empanada with the egg wash.
Place the empanada in the oven and bake for about 45 minutes. Check that the bottom part is done.

I used a chicken and catupiry filling. Recipe here: Creamy Chicken
Other possible fillings:
Cod
400 gm (14 oz) chopped onion (approximately 1 big onion or 2 medium-sized ones) 2 garlic cloves ¾ cup (180 ml) Olive oil 300 gm (10½ oz) salted cod, washed and cleaned (you put it in fresh water 24 hours before, change the water four times) 100 gm (3½ oz) raisins 100 gm (3½ oz) cured ham or bacon (not smoked) A few strands of saffron
- When vegetables are cooked, turn off the heat. Add the saffron and the raisins. Cut cod and ham (or bacon) in less than bite sized pieces, and add. Stir everything together.
- Add salt as needed (we do this at the end because the amount of salt will depend on how salty your fish remains after the unsalting and how salty your cured ham or bacon is).
- Allow to cool for at least half an hour before filling the empanada.
Filling Directions:
- Finely chop the onion and garlic.
- Heat the oil in a skillet and add the onion and garlic, fry over medium heat until the onion is transparent (you do not want the onion to brown at all).
Tuna fish filling:
Ingredients
400 gm (14 oz) chopped onion (approximately 1 big onion or 2 medium-sized ones) 200 gm (7 oz) tomatoes (peeled and seeded) 1 small red pepper 2 garlic cloves ¾ cup (180 ml) olive oil 1 can (6.5 – 7 oz / 180 gm – 200 gm) of tuna fish in oil, drained 1 hard-boiled egg 1 teaspoon sweet paprika (optional)
Directions:
- Heat the oil in a skillet
- Fry the finely chopped onions, pepper and garlic until the vegetables are soft. Add then the tomatoes, chopped small, and cook until done.
- Turn off heat and add the tuna fish and hard boiled egg, cut into less than bite sized pieces.
- If adding the paprika, do so now and stir into the frittata.
- Allow to cool for at least 30 minutes.
Ground meat filling:
Ingredients
400 gm (14 oz) chopped onion (approximately 1 big onion or 2 medium-sized ones) 200 gm (7 oz) tomatoes (peeled and seeded) 1 small green pepper 2 garlic cloves ¾ cup (180 ml) olive oil 300 grams (2/3 pound or 10.5 ounces) minced (ground) meat 1 teaspoon sweet paprika
Directions:
- Heat the oil in a skillet
- Fry the finely chopped onions, pepper and garlic until the vegetables are soft. Add then the tomatoes, chopped small, and cook until done.
- Add the meat and cook for about 5 minutes.
- Add the paprika, and stir into the frittata.
- Allow to cool for at least 30 minutes.
- Fill the empanada en bake as indicated.
Ham and cheese filling:
Ingredients
10½ oz (300 gm) ham 10½ oz (300 gm) cheddar type cheese (any sandwich cheese will do)
Directions:
- This is the simplest of fillings. You only need to layer prettily the ingredients, starting and ending with ham, to keep the melted cheese inside.
Pork loin and red pepper filling:
Ingredients
10½ oz (300 gm) pork loin (one piece) 1 big red pepper (capsicum) , cut into thin slices 1 small onion, cut into thin slices 2 garlic cloves 1 tablespoon (15 ml) (6 gm) paprika ½ tablespoon (3 ml) dried oregano salt
Directions:
- 24 hours in advance, marinate the pork loin: for this, mix the oregano, paprika and the garlic cloves (very finely chopped) with salt to taste. Rub this marinade all around the meat, put into a sealable plastic bag and keep in the fridge for 24 hours.
- Take the meat out of the bag and cut into thin fillets (about 0,5mm)
- Cover the bottom part of the empanada with the fillets
- Cover the fillets with the slices of onion and pepper. Sprinkle salt on top.
- Cover the empanada and bake in a preheated oven to moderate 350°F/180ºC/gas mark 4. As this empanada starts with all raw ingredients, it will take about 15 minutes longer to bake. Just check that the underside of the empanada is golden. If it is, it’s cooked. If it isn’t, put it in the oven again and check after 10 minutes.
Get creative!!
Posted by Alessandra on Tuesday May 29, 2012
Filed under :Breads, The Dairing Kitchen
May’s Daring Bakers’ Challenge was pretty twisted – Ruth from The Crafts of Mommyhood challenged us to make challah! Using recipes from all over, and tips from “A Taste of Challah,” by Tamar Ansh, she encouraged us to bake beautifully braided breads.

Challah (Honey White)
(from Tammy’s Recipes) Servings: 2 loaves
Ingredients
1 ½ cups warm water separated
1 Tbsp sugar
2 Tbsp dry active yeast
½ cup honey
1 Tbsp oil (light colored vegetable oil, or olive oil if you prefer)
4 large eggs
1 ½ tsp salt
5 cups all-purpose (plain) flour, plus more as needed (up to 8 or 9 cups total)
1 egg beaten with 1 tsp. water
Directions:
1. In mixer bowl/large mixing bowl combine ½ cup warm water, 1 Tbsp. sugar and 2 Tbsp. yeast. Allow to proof approximately 5 minutes until foamy.
2. To the yeast mixture add the remaining water, honey, oil, eggs, salt and 5 cups of flour. Knead (by hand or with your mixer’s dough hook) until smooth, adding flour as needed. Knead for approximately 10 minutes.
3. Transfer dough to a clean, oiled bowl, turn to coat or add a bit more oil on top. Cover bowl with a kitchen/tea towel. Leave to rise in a warm place until doubled, about 1 ½ hours.
4. Punch down the dough, divide it into two sections. Use one half to make each loaf (shaped or braided as desired).

5. Place loaves on parchment lined or greased baking sheets, cover with a towel, allow to rise 30 minutes.
6. Preheat oven to 325 degrees.
7. Brush tops loaves with egg wash. (Sprinkle with seeds or toppings here if wanted.)
8. Bake loaves 30-40 minutes until done.
9. Cool on wire racks.

Posted by Alessandra on Tuesday Mar 27, 2012
Filed under :Breads, The Dairing Kitchen
Sara and Erica of Baking JDs were our March 2012 Daring Baker hostesses! Sara & Erica challenged us to make Dutch Crunch bread, a delicious sandwich bread with a unique, crunchy topping. Sara and Erica also challenged us to create a one of a kind sandwich with our bread!
I used the bread recipe posted here : Buns in the oven

Dutch Crunch Topping
Servings: This recipe should make sufficient topping for two 9×5 loaves (23cmx13cm) or 12 rolls. If you make only 6 rolls in the first soft white roll recipe, you can cut the topping recipe in half. We’ve provided this recipe first because it is the mandatory aspect of the challenge. Note, however, that you should not prepare the topping until the bread you’ve selected to bake is almost finished rising (~15 minutes from baking).
Ingredients
2 tablespoons active dry yeast
1 cup (240 ml) warm water
2 tablespoons sugar
2 tablespoons vegetable oil
½ teaspoon salt
1½ cups rice flour (white or brown; NOT sweet or glutinous rice flour) (increase by 1 cup or more for home-made rice flour)
Directions:
1. Combine all ingredients in a large bowl and beat with a whisk; beat hard to combine. The consistency should be like stiff royal icing – spreadable, but not too runny. If you pull some up with your whisk, as shown below, it should drip off slowly. Add more water or rice flour as necessary. Let stand 15 minutes.

Soft White Roll
Servings: Six sandwich rolls
Ingredients
1 tablespoon active dry yeast
¼ cup warm water (105-110º F) (No need to use a thermometer – it should feel between lukewarm and hot to the touch)
1 cup warm milk
1½ tablespoons sugar
2 tablespoons vegetable oil (plus additional olive or vegetable oil for greasing bowl during rising)
1½ teaspoons salt
up to 4 cups all purpose flour
Directions:
1. In the bowl of an electric mixer or large mixing bowl, combine yeast, water, milk and sugar. Stir to dissolve and let sit for about 5 minutes (The mixture should start to bubble or foam a bit and smell yeasty).
2. Add in vegetable oil, salt and 2 cups of flour. Using the dough hook attachment or a wooden spoon, mix at medium speed until the dough comes together
3.Add remaining flour a quarter cup at time until the dough pulls away from the sides of the bowl, as shown in the photo below
4. Turn out onto a lightly floured surface and knead for about 4 minutes, until smooth and elastic.
5. Place in a lightly greased bowl and cover with plastic wrap. Let rise for 1 hour, or until doubled (or more) in size
6. Once the dough has risen, turn it out onto a lightly floured surface and divide it into 6 equal portions (if you’d like to make rolls) or 2 equal portions (if you’d like to make a loaf) (using a sharp knife or a dough scraper works well). Shape each into a ball or loaf and place on a parchment-lined baking sheet (try not to handle the dough too much at this point).
7. Cover with plastic wrap and let rise for 15 minutes while you prepare the topping.
8. Coat the top of each roll or loaf with the topping as described above. While the original recipe recommends letting them stand for 20 minutes after applying the topping, I got better results by putting them directly into the oven.
9. Once you’ve applied the topping, bake in a preheated moderately hot 375ºF for 25-30 minutes, until well browned. Let cool completely on a wire rack before eating.
Posted by Alessandra on Monday Mar 26, 2012
Filed under :Breads
I had a need to bake today. So I decided to bake some bread for dinner. This recipe is very easy and really good for burger buns, hot dog buns or hoagie rolls. Hope you enjoy it.

1 cup milk
1/2 cup water
4 T butter
4 1/2 cups all-purpose flour (plus a little more to dust the surface)
1 T instant dry yeast
2 T white sugar
1 1/2 t salt
1 egg
In a sauce pan, warm up the milk, water and butter. Don’t let it get too hot, just warm to the touch. Set aside
In a mixing bowl, add 2 1/2 c flour, yeast, sugar and salt. Add the milk mixture and the egg. Mix it adding in the rest of the flour little by little (I usually add 1/4 c at the time while mixing it). Turn this onto a floured surface and kneed it until it forms a ball. This dough will be a little wet, just keep kneading it but don’t add too much more flour to it.
Set it back in the bowl and let it rise for about 30-35 minutes (or until it doubles the size)
Punch it to let out the gas and divide into 12 balls. Roll the balls for hamburger buns. Pinch the back and flatten them just a little bit.

For hot dog shape each ball into a rectangle (6×4 inches or so). Roll them up tightly, and pinch edges and ends to seal.

Set them into a greased pan and let them rise for another 30-40 minutes. Bake at 400 for about 20 -25 minutes.

Yummy with brasilian sausage and tomato salad!
Posted by Alessandra on Saturday Jan 28, 2012
Filed under :Breads, The Dairing Kitchen
Audax Artifex was our January 2012 Daring Bakers’ host. Aud worked tirelessly to master light and fluffy scones (a.k.a. biscuits) to help us create delicious and perfect batches in our own kitchens!
Scones in North American are nearly always triangular in shape have a slightly crisp crust usually covered in sugar and have a soft interior crumb and sometimes are laced with dried fruit (these baked goods in Australia and England are called “rock cakes” since they are usually made to look like “rocky” cakes not wedges), meanwhile biscuits in North American are a round shaped buttery slightly flaky baked good usually eaten with meals (these items in Australia and England are called “scones” and are eaten with butter and jam usually with cups of tea or coffee as a sweet snack). So this challenge (using the North American name) is to make biscuits. Or using the Australian or English name this challenge is to make scones.

Basic Scones (a.k.a. Basic Biscuits)
Servings: about eight 2-inch scones or five 3-inch scones Recipe can be doubled
Ingredients:
1 cup plain (all-purpose) flour
2 teaspoons fresh baking powder
¼ teaspoon salt
2 tablespoons frozen grated butter (or a combination of lard and butter)
approximately ½ cup cold milk
optional 1 tablespoon milk, for glazing the tops of the scones
Directions:
1. Preheat oven to very hot 475°F
2. Triple sift the dry ingredients into a large bowl. (If your room temperature is very hot refrigerate the sifted ingredients until cold.)

3. Rub the frozen grated butter (or combination of fats) into the dry ingredients until it resembles very coarse bread crumbs with some pea-sized pieces if you want flaky scones or until it resembles coarse beach sand if you want tender scones.
4. Add nearly all of the liquid at once into the rubbed-in flour/fat mixture and mix until it just forms a sticky dough (add the remaining liquid if needed). The wetter the dough the lighter the scones (biscuits) will be!
5. Turn the dough out onto a lightly floured board, lightly flour the top of the dough. To achieve an even homogeneous crumb to your scones knead very gently about 4 or 5 times (do not press too firmly) the dough until it is smooth. To achieve a layered effect in your scones knead very gently once (do not press too firmly) then fold and turn the kneaded dough about 3 or 4 times until the dough has formed a smooth texture. (Use a floured plastic scraper to help you knead and/or fold and turn the dough if you wish.)
6. Pat or roll out the dough into a 6 inch by 4 inch rectangle by about ¾ inch thick (15¼ cm by 10 cm by 2 cm thick). Using a well-floured 2-inch (5 cm) scone cutter (biscuit cutter), stamp out without twisting six 2-inch (5 cm) rounds, gently reform the scraps into another ¾ inch (2 cm) layer and cut two more scones (these two scones will not raise as well as the others since the extra handling will slightly toughen the dough). Or use a well-floured sharp knife to form squares or wedges as you desire. Great for little hands to help out 😉

7. Place the rounds just touching on a baking dish if you wish to have soft-sided scones or place the rounds spaced widely apart on the baking dish if you wish to have crisp-sided scones. Glaze the tops with milk if you want a golden colour on your scones or lightly flour if you want a more traditional look to your scones.
8. Bake in the preheated very hot oven for about 10 minutes (check at 8 minutes since home ovens at these high temperatures are very unreliable) until the scones are well risen and are lightly coloured on the tops. The scones are ready when the sides are set.
9. Immediately place onto cooling rack to stop the cooking process, serve while still warm.
Variations on the Basic recipe
Buttermilk – follow the Basic recipe above but replace the milk with buttermilk, add ¼ teaspoon of baking soda, increase the fat to 4 tablespoons, in Step 3 aim of pea-sized pieces of fat coated in flour, in Step 5 fold and turn the dough, rounds are just touching in the baking dish, glaze with buttermilk.
Australian Scone Ring (Damper Ring) – follow the Basic recipe above but decrease the fat to 1 tablespoon, in Step 3 aim of fine beach sand sized pieces of fat coated in flour, in Step 5 knead the dough, in Step 7 form seven rounds into a ring shape with the eighth round as the centre, glaze with milk.
Cream – follow the Basic recipe above but replace the milk with cream, add ¼ teaspoon of baking soda, in Step 3 aim of beach sand sized pieces of fat coated in flour, in Step 5 knead the dough, rounds are just touching in the baking dish, glaze with cream.
Cheese and Chive – follow the Basic recipe above but add ¼ teaspoon of baking soda, after Step 2 add ½ teaspoon sifted mustard powder, ¼ teaspoon sifted cayenne pepper (optional), ½ cup (60 gm/2 oz) grated cheese and 2 tablespoons finely chopped chives into the sifted ingredients, in Step 3 aim of beach sand sized pieces of fat coated in flour, in Step 5 knead the dough, rounds are widely spaced in the baking dish, sprinkle the rounds with cracked pepper.
Fresh Herb – follow the Basic recipe above but after Step 3 add 3 tablespoons finely chopped herbs (such as parsley, dill, chives etc).
Sweet Fruit – follow the Basic recipe above but after Step 3 add ¼ cup (45 gm) dried fruit (e.g. sultanas, raisins, currents, cranberries, cherries etc) and 1 tablespoon (15 gm) sugar. Wholemeal – follow the Basic recipe above but replace half of the plain flour with wholemeal flour. Wholemeal and date – follow the Basic recipe above but replace half of the plain flour with wholemeal flour and after Step 3 add ¼ cup (45 gm) chopped dates and 1 tablespoon (15 gm) sugar.
Posted by Alessandra on Tuesday Dec 27, 2011
Filed under :Breads, The Dairing Kitchen
Our Daring Bakers Host for December 2011 was Jessica of My Recipe Project and she showed us how fun it is to create Sour Dough bread in our own kitchens! She provided us with Sour Dough recipes from Bread Matters by AndrewWhitley as well as delicious recipes to use our Sour Dough bread in from Tonia George’s Things on Toast and Canteen’s Great British Food!
I thought it was a fun project, however I did not enjoy the taste of this sour dough as much as I have with other recipes. Sourdough is always fun to make it. Sourdough starts with a ‘starter’ or ‘leaven’, basically a flour and water dough that is fermented over 4 or more days. The older your starter, the more flavourful your bread will be. This is because the lactobacilli in the dough help digest the flour, adding the strong, sour flavour and making it more digestible; kind of like yoghurt. I know of people that have their start for years and it is always delicious to taste what we can make with it. I have yet to keep my starter for that long, but who knows, someday…

French Country Bread Servings: 1 large loaf plus extra wheat starter for further baking
Wheat Starter – Day 1:
4 1/2 tablespoons stoneground breadmaking whole-wheat or graham flour
3 tablespoons water
Total scant ½ cup
Directions: 1. In a Tupperware or plastic container, mix the flour and water into a paste. 2. Set the lid on top gently, cover with a plastic bag, to prevent messes in case it grows more than expected! 3. Set somewhere warm (around 86 F if possible). I sometimes put mine on a windowsill near a radiator, but even if it’s not that warm, you’ll still get a starter going – it might just take longer.
Wheat Starter – Day 2:
4 1/2 tablespoons stoneground breadmaking whole-wheat or graham flour
3 tablespoons water
scant 1/2 cup starter from Day 1
Directions: 1. Stir the flour and water into the mixture from Day 1, cover, and return to its warm place.

Wheat Starter – Day 3:
4 1/2 tablespoons stoneground breadmaking whole-wheat or graham flour
4 teaspoons water
scant 1 cup starter from Day 2
Total 1⅓ cup
Directions: 1. Stir the flour and water into the mixture from Day 2, cover, and return to its warm place.
Wheat Starter – Day 4:
3/4 cup plus 1½ tablespoons unbleached all-purpose flour
1/2 cup less 4 teaspoons water
1⅓ cup starter from Day 3
Total scant 2⅔ cup (625 ml) (440 gm/15½ oz)
Directions: 1. Stir the flour and water into the mixture from Day 3, cover, and return to its warm place. At this point it should be bubbling and smell yeasty. If not, repeat this process for a further day or so until it is!
Stage 1: Refreshing the leaven
1 cup less 1 tablespoon wheat Leaven Starter
6 tablespoons less 1 teaspoon stoneground bread making whole-wheat or graham flour
1 cup plus 2 teaspoons unbleached all purpose flour
1/2 cup water
Production Leaven Total 2¾ cups plus 4 teaspoons
Directions: 1. Mix everything into a sloppy dough. It may be fairly stiff at this stage. Cover and set aside for 4 hours, until bubbling and expanded slightly.
Stage 2: Making the final dough
3/4 cup less 1 teaspoon stoneground breadmaking whole-wheat or graham flour, plus more for dustin0g
2 cups plus 2 tablespoons unbleached all-purpose flour
1¼ teaspoons sea salt or ⅔ teaspoon table salt
1 ¼ cups water 1
¾ cups production leaven – this should leave some (1 cup) for your next loaf.
Total 6 cups less 2 tablespoons
Directions: 1. Mix the dough with all the ingredients except the production leaven. It will be a soft dough. 2. Knead on an UNFLOURED surface for about 8-10 minutes, getting the tips of your fingers wet if you need to. You can use dough scrapers to stretch and fold the dough at this stage, or air knead if you prefer. Basically, you want to stretch the dough and fold it over itself repeatedly until you have a smoother, more elastic dough. Smooth your dough into a circle, then scoop your production leaven into the centre. You want to fold the edges of the dough up to incorporate the leaven, but this might be a messy process. Knead for a couple minutes until the leaven is fully incorporated in the dough. Spread some water on a clean bit of your work surface and lay the dough on top. Cover with an upturned bowl, lining the rim of the bowl with a bit of water. Leave for an hour, so that the gluten can develop and the yeasts can begin to aerate the dough. Once your dough has rested, you can begin to stretch and fold it. Using wet hands and a dough scraper, stretch the dough away from you as far as you can without breaking it and fold it back in on itself. Repeat this in each direction, to the right, towards you, and to the left. This will help create a more ‘vertical’ dough, ready for proofing. Heavily flour a banneton/proofing basket with whole wheat flour and rest your dough, seam side up, in the basket. Put the basket in a large plastic bag, inflate it, and seal it. Set aside somewhere warm for 3-5 hours, or until it has expanded a fair bit. It is ready to bake when the dough responds to a gently poke by slowly pressing back to shape.

Preheat the oven to hot 425°F. Line a baking sheet with parchment, then carefully invert the dough onto the sheet. I like to put the baking sheet on top of the basket, then gently flip it over so as to disturb the dough as little as possible. Make 2-3 cuts on top of the loaf and bake for 40-50 minutes, reducing the temperature to moderately hot 400°F 6 after 10 minutes. Cool on a cooling rack.

Posted by Alessandra on Tuesday Sep 27, 2011
Filed under :Breads, The Dairing Kitchen
The Daring Bakers go retro this month! Thanks to one of our very talented non-blogging members, Sarah, the Daring Bakers were challenged to make Croissants using a recipe from the Queen of French Cooking, none other than Julia Child!

Ingredients
1¼ teaspoon of dry-active yeast (about ½ sachet)
3 tablespoons warm water
1 teaspoon sugar
1 3/4 cups of flour
2 teaspoons sugar
1½ teaspoon salt
½ cup milk
2 tablespoons oil
½ cup chilled, unsalted butter
1 egg, for egg wash
Directions:
1. Mix the yeast, warm water, and first teaspoon of sugar in a small bowl. Leave aside for the yeast and sugar to dissolve and the yeast to foam up a little.
2. Measure out the other ingredients
3. Heat the milk until tepid (either in the microwave or a saucepan), and dissolve in the salt and remaining sugar
4. Place the flour in a large bowl.
5. Add the oil, yeast mixture, and milk mixture to the flour
6. Mix all the ingredients together using the rubber spatula, just until all the flour is incorporated
7. Turn the dough out onto a floured surface, and let it rest a minute while you wash out the bowl
8. Knead the dough eight to ten times only. The best way is as Julia Child does it in the video (see below). It’s a little difficult to explain, but essentially involves smacking the dough on the counter (lots of fun if you are mad at someone) and removing it from the counter using the pastry scraper.
9. Place the dough back in the bowl, and place the bowl in the plastic bag
10. Leave the bowl at approximately 75°F for three hours, or until the dough has tripled in size.
11. After the dough has tripled in size, remove it gently from the bowl, pulling it away from the sides of the bowl with your fingertips.
12. Place the dough on a lightly floured board or countertop, and use your hands to press it out into a rectangle about 8 by 12 inches
13. Fold the dough rectangle in three, like a letter (fold the top third down, and then the bottom third up)
14. Place the dough letter back in the bowl, and the bowl back in the plastic bag.
15. Leave the dough to rise for another 1.5 hours, or until it has doubled in size. This second rise can be done overnight in the fridge

16. Place the double-risen dough onto a plate and cover tightly with plastic wrap. Place the plate in the fridge while you prepare the butter.
17. Once the dough has doubled, it’s time to incorporate the butter
18. Place the block of chilled butter on a chopping board.
19. Using the rolling pin, beat the butter down a little, till it is quite flat.
20. Use the heel of your hand to continue to spread the butter until it is smooth. You want the butter to stay cool, but spread easily.
21. Remove the dough from the fridge and place it on a lightly floured board or counter. Let it rest for a minute or two.
22. Spread the dough using your hands into a rectangle about 14 by 8 inches
23. Remove the butter from the board, and place it on the top half of the dough rectangle
24. Spread the butter all across the top two-thirds of the dough rectangle, but keep it ¼ inch across from all the edges.

25. Fold the top third of the dough down, and the bottom third of the dough up.
26. Turn the dough package 90 degrees, so that the top flap is to your right (like a book).

27. Roll out the dough package (gently, so you don’t push the butter out of the dough) until it is again about 14 by 8 inches (35 cm by 20 cm).
28. Again, fold the top third down and the bottom third up.
29. Wrap the dough package in plastic wrap, and place it in the fridge for 2 hours.
30. After two hours have passed, take the dough out of the fridge and place it again on the lightly floured board or counter.
31. Tap the dough with the rolling pin, to deflate it a little
32. Let the dough rest for 8 to 10 minutes
33. Roll the dough package out till it is 14 by 8 inches (35 cm by 20 cm).

34. Fold in three, as before
35. Turn 90 degrees, and roll out again to 14 by 8 inches (35 cm by 20 cm).
36. Fold in three for the last time, wrap in plastic, and return the dough package to the fridge for two more hours (or overnight, with something heavy on top to stop it from rising)
37. It’s now time to cut the dough and shape the croissants
38. First, lightly butter your baking sheet so that it is ready
39. Take the dough out of the fridge and let it rest for ten minutes on the lightly floured board or counter
40. Roll the dough out into a 20 by 5 inch rectangle (51 cm by 12½ cm).
41. Cut the dough into two rectangles (each 10 by 5 inches)

42. Place one of the rectangles in the fridge, to keep the butter cold
43. Roll the second rectangle out until it is 15 by 5 inches
44. Cut the rectangle into three squares (each 5 by 5 inches
45. Place two of the squares in the fridge
46. The remaining square may have shrunk up a little bit in the meantime. Roll it out again till it is nearly square
47. Cut the square diagonally into two triangles.

48. Stretch the triangle out a little, so it is not a right-angle triangle, but more of an isosceles.
49. Starting at the wide end, roll the triangle up towards the point, and curve into a crescent shape.
50. Place the unbaked croissant on the baking sheet

51. Repeat the process with the remaining squares of dough, creating 12 croissants in total.
52. Leave the tray of croissants, covered lightly with plastic wrap, to rise for 1 hour
53. Preheat the oven to very hot 475°F.
54. Mix the egg with a teaspoon of water
55. Spread the egg wash across the tops of the croissants.
56. Put the croissants in the oven for 12 to 15 minutes, until the tops are browned nicely
57. Take the croissants out of the oven, and place them on a rack to cool for 10 minutes before serving.

This one I filled it with chocolate! YUM