Ridley’s in Orem is having a DOUBLE COUPON DAY : Tuesday 06/01/2010
They will double coupons up to $1.00
.25 off=.50 off
.35 off=.70 off
.50 off= $1 off
.75 off= $1 off!
FUN
Ridley’s in Orem is having a DOUBLE COUPON DAY : Tuesday 06/01/2010
They will double coupons up to $1.00
.25 off=.50 off
.35 off=.70 off
.50 off= $1 off
.75 off= $1 off!
FUN
The May 2010 Daring Bakers’ challenge was hosted by Cat of Little Miss Cupcake. Cat challenged everyone to make a Piece Montée, or croquembouche, based on recipes from Peter Kump’s Baking School in Manhattan and Nick Malgieri.
I joined the Daring Kitchen last month and have been anxiously waiting to hear what the challenge of April would be. I was so excited to see that a Piece Montée would be my first Daring Kitchen challenge. I have always wanted to make one of these.
A Piece Montée, also called Croquembouche is a French dessert. It is basically a montage of those delicious cream puffs. The cream puffs are made with Pate a Choux. (If you have never tried making Pate a Choux, try it. It is easy and delicious. You can make puffs, eclairs and let your imagination run with it.) Then you have the filling, usually a pastry cream. Then you have the glaze, usually sugar or chocolate.
I decided to fill my puffs with whipped cream and Dulce di Leche. Then I couldn’t decide on the glaze so I thought it would be fun to do both chocolate and spun sugar.
Pate a Choux (recipe from The Daring Kitchen Archives)
¾ cup water
6 Tbsp. unsalted butter
¼ Tsp. salt
1 Tbsp. sugar
1 cup all-purpose flour
4 large eggs
For Egg Wash: 1 egg and pinch of salt
Pre-heat oven to 425◦F degrees. Line two baking sheets with parchment paper.
Combine water, butter, salt and sugar in a saucepan over medium heat. Bring to a boil and stir occasionally. At boil, remove from heat and sift in the flour, stirring to combine completely.
Return to heat and cook, stirring constantly until the batter dries slightly and begins to pull away from the sides of the pan.
Transfer to a bowl and stir with a wooden spoon 1 minute to cool slightly.
Add 1 egg. The batter will appear loose and shiny. As you stir, the batter will become dry-looking like lightly buttered mashed potatoes.
It is at this point that you will add in the next egg. Repeat until you have incorporated all the eggs.
Transfer batter to a pastry bag fitted with a large open tip (I piped directly from the bag opening without a tip). Pipe choux about 1 inch-part in the baking sheets. Choux should be about 1 inch high about 1 inch wide. Using a clean finger dipped in hot water, gently press down on any tips that have formed on the top of choux when piping. You want them to retain their ball shape, but be smoothly curved on top. Brush tops with egg wash (1 egg lightly beaten with pinch of salt).
Bake the choux at 425◦F degrees until well-puffed and turning lightly golden in color, about 10 minutes.
Lower the temperature to 350F degrees and continue baking until well-colored and dry, about 20 minutes more. Remove to a rack and cool.
Can be stored in a airtight box overnight.
I used a pastry bag with a star tip and filled some of them with Dulce di Leche
some with whipped cream
Then I dipped them in chocolate (milk and white) and here is a picture of the tower 😀
I had never done spun sugar before and it was an interesting project. Fun though… I decided to decorate my piece with sugar art and some spun sugar.
1 lb Ground Beef
1 T Olive Oil
1/2 Onion diced
2 clothes Garlic (minced)
Salt and Pepper
1 cup cooked Rice (I used brown rice)
1/2 cup cooked Corn
1/4 c Shredded Parmesan Cheese (optional)
1 can diced Tomatoes
2 T Green Onions (cut)
Parmesan Cheese Shavings
4-6 Green Pepper (depends on the size)
Cut Peppers length wise, remove the seeds found on the inside. Wash it very well. Set them inside of a baking dish.
Season the peppers with a little salt and pepper. I like to open the tomato can and pour the juices on the bottom of the baking dish. Set aside.
Brown ground beef with onions, garlic and oil. Add salt and pepper to taste.
In a mixing bowl, rice, beef, corn, shredded Parmesan,tomatoes and green onions.
Fill each pepper with this mixture. Bake at 350 for about 30-40 minutes. Or until peppers looks cooked.
Top with Parmesan Shavings and enjoy!
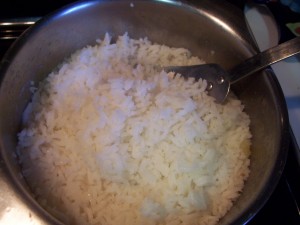
Brazilians eat rice pretty much every day. I can say that rice is the most staple food of Brazil. I also love it because a basic recipe like the one I will post here can be turned into so many dishes. I like products like that because you can let your imagination run wild! If you keep checking back you will see I will come back to this basic recipe many times during my blog adventure. If you want to read more about rice, check out Wikipedia. They have some great facts on rice!

1 c long grain white rice (you can substitute with other type of rice)
2 T minced onion
1 clove garlic, minced
2 T vegetable oil (I use olive oil)
1 1/2 t salt
4 cups water (about)
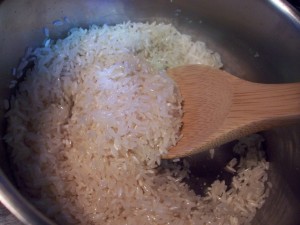
Place the rice in a colander and rinse thoroughly with cold water; set aside. Heat the oil in a saucepan over medium heat. Cook the onion in the oil for one minute. Stir in the garlic and cook until the garlic is golden brown. Add the rice and salt and stir until the rice begins to get translucent.

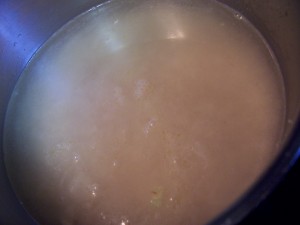
Pour water over rice mixture so the water level is 2 fingers higher than the rice (*do not stir the rice after adding the water)

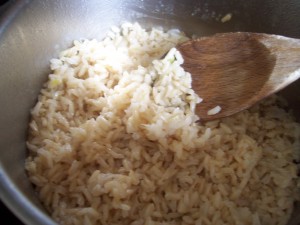
Reduce heat to medium-low, cover the saucepan, and allow to simmer until the water has been fully absorbed, 20 to 25 minutes.

Brown Rice
If you are going to make brown rice make sure you let it cook for at least 45 minutes. You might need to add a little bit more water when the water starts to evaporate, but do not stir the rice! Just add a little water if the rice still hard. When the rice is almost soft you can turn off the heat, cover and let it sit for a while.
I really like brown rice. It is healthy and I love the nutty taste. It does take a little while to cook, but if you plan ahead you can make your rice, cook for the 30-45 minutes required then cover it and forget about it. It is easy and worth the wait!
You can also freeze the cooked rice (individual portions, or big portions). Like I said before, I love brown rice, but my husband doesn’t as much of it. So when I make white rice or brown rice, I will make a big batch and freeze individual portions of it. That way if I am serving rice I have his white rice ready and just need to make my brown. Or vice versa.
*if you stir the rice too mush, it won’t be nice and loose. It will form clumps together, which we in Brasil refer to as “arroz unidos venceremos” = “together we win” 🙂 I only like this type of sticky rice when making Japanese food, otherwise I like my rice nice and fluffy.
I thought I should take a picture of a shopping trip for this week! I will try to remember to take more pictures of my shopping trips. I am so used to coming home and putting everything away and I only remember about pictures when I have the last item on my hand to be put away. But I remembered this time, so here it is:
This was at Smiths:
5 -pk (2) Dial Soap Bars
1 -French Mustard
2 -Cholula Hot Sauce
3 -Pkg American Cheese
1 -Double Pkg Always Pads
5- Pkg Flips Chocolate Pretzels
5- 3 Musketeers
14- Chewing Gum
1- Sandwich Thin Bread
1- Bottle of Capers
Total before my Smiths Card: $80.58. Total after Sales, Smiths Card and Coupons: $5.61 (it was supposed to be $4.61. I had a coupon for a free Always Pad and the cashier marked the price incorrect and I didn’t notice it until I got home…oh well)
That is a 93.04 % savings! WOW WOW WOW
Here is a picture:
Now, I am really trying to be good and not eat so much candy and etc… Here are some things I do with the chocolate, gum, and treats I get:
Hope this has sparked your interest and made you curious about coupons shopping! Remember I teach classes, just contact me for a free class. Also on the right hand side of this page there is a link which allows you to print coupons from your computer! You can start saving TODAY!
Enjoy
I have never tasted anything like this treat here in the US. It is like a cookie crust filled with this delicious coconut candy. It is very easy to make. You can make it using the small size muffin tins for finger food size or the big size for a full dessert size. Here is how:
For the dough/ cookie:
2 cups Flour
7 T. Butter (soften)
1 Egg
2 T. Sugar
Mix it all together, until it forms a smooth ball. Cover and set aside.
For the filling:
3 C. Shredded Sweetened Coconut
2 Egg Yolks
1 can Sweetened Condensed Milk
1 T. Sugar
1 T. Butter
In a big sauce pan, mix the coconut, yolks, sweetened condensed milk and sugar. In medium heat mix it until it all comes together and starts to separate from the sides and bottom of the pan. Take it off heat and mix in the butter.
Now, use the dough to cover the muffin tins. Make sure you spread it bottom and sides very well.
Fill each of them with the coconut mixture.
Bake it at 350 until golden brown. About 30 minutes.
YUM…Like I said it is not as creamy as a normal coconut pie, it is more of a candy like texture, but it is very good! Hope you like it 😀
This recipe is my weakness. I really have to watch myself when I make this one. It’s just that good! I still remember the first time I had this at my aunts house in Brasil. (yep it is one of those for me, so good you never forget it). I used to go eat lunch at my aunts house on Fridays. She lived close to my school and I only had time to go to her house before going back for school. The first time she served this I looked at it and thought “oh no eggplant! I will just eat one to be polite”. Yeah right! Needless to say she had to make those for me every week. To this day, every time we go back to visit Brasil she has a whole dish ready, waiting for me… yum!
Here it is. Enjoy!
Breaded Eggplant:
1/2 onion (shredded)
1 cup mayo
1 cup bread crumbs
1/2 cup parmesan cheese
1 eggplant
How to make it:
You are going to shred the onion, just like you shred cheese. There will be a lot of juice coming from the onion with the little pieces of onion, so make sure you do this on the plate you will use. Then, mix with the onion the 1 cup of mayo. This will be the wet mixture for the breading part.
In another plate mix the bread crumbs and the parmesan cheese.
Slice the eggplant, quite thin. I then soak them in water just a little bit. Then I pat it dry with a paper towel and start the breading process. First you dip it in the onion mix.
Then in the bread crumb mix…
Set them aside in a cookie sheet.
Bake them at 350 degrees for about 30-40 minutes. I will turn them half the way through so both sides get this golden brown color. Ohhh it is so good 😀
You can serve this as a side dish or here are some ideas that I like to do if there are leftovers:
Eggplant Lasagna: Make your favorite lasagna recipe but use the eggplant instead of noodles. Lasagna in Brasil is a bit different than the ones I have eaten in the US. The most traditional type of lasagna uses layers of lasagna noodles, sliced ham, sliced cheese, bolognese sauce, and alfredo sauce.
Eggplant Parmesan: Layer slices into a casserole dish, then top with a nice marinara sauce and shredded mozzarella. Keep layering until there is not more eggplant left.
1 (6 oz) log of President brie (click here for $3 off coupon)
1/2 c shredded cheese (cheddar, or parmesan)
1 t Italian Seasoning
8 thin slices of london broil (you can also use chicken)
4 slices of Prosciutto
Salt and Pepper
Oil to brown the beef
Microwave brie for about 1- 1 1/2 minutes. You just want to soften it a little bit. Add shredded cheese and Italian Seasoning. Set aside.
I like to put all the meat side by side, salt and pepper thin slices of beef. Then top with half slice of Prosciutto and about 1 Tablespoon of cheese mixture. Roll it tight and secure it with a tooth pick.
Fry the meat rolls in a frying pan with a little splash of oil Since the beef is so thin it won’t require much time. You just want to give a little color to the outside. I would say between 2 or 3 minutes per side. Put meat rolls into a oven safe dish and bake for about 20 minutes at 250 degrees.
Don’t forget to take tooth pick out before you eat it 😀 Enjoy!
I thought I would post my recipe for homemade tortillas in celebration of cinco de Mayo tomorrow! I really like these tortillas. It is a bit of work to roll them out, but they taste so good!!! Also as you’ll see in the pictures, we decided to make them square (easier to cut) and it was a fun little change!
Mix together:
1 tsp salt
3 c flour
1 1/2 tsp baking powder
Cut in 1/4 c margarine or butter with a pastry blender.
Add: 3/4 – 1 c warm water, stir until dough is formed.
Divide the dough into 8-10 equal size balls.
Roll them thin and round.
tip: If you want them nice and round, use a small plate and cut around it.
or you can have fun and make it in any shape you like!
Cook on a hot frying pan or gridle about 30 seconds each side.
Suggestions: Serve with taco meat and toppings, make deli rolls or serve with salad.
Depending on the weather they may harden after cooked. To soften the tortillas, just keep them warm. You can use the microwave for a couple of seconds to warm them up. Or you can gently wet a clean dish towel with hot water (damp, not soaked) and keep the cooked tortillas inside while you cook the rest. (It will be just like using one of the tortilla warmers) 😉