Posted by Alessandra on Monday Sep 27, 2010
Filed under :Desserts, The Dairing Kitchen
The September 2010 Daring Bakers’ challenge was hosted by Mandy of “What the Fruitcake?!” Mandy challenged everyone to make Decorated Sugar Cookies based on recipes from Peggy Porschen and The Joy of Baking.
She set the theme for the cookies as “September”. We were inspired to bake any shape, size or color that means “September” for us. Since I am from Brasil and September is Brasil’s independence month I thought of making something that had to do with Brasil!

Basic Sugar Cookies:
Makes Approximately 36x 10cm / 4″ Cookies
½ cup + 6 Tbsp Unsalted Butter, at room temperature
3 cups + 3 Tbsp All Purpose / Plain Flour
1 cup Caster Sugar / Superfine Sugar
1 Large Egg, lightly beaten
1 tsp Vanilla Extract / Or seeds from 1 vanilla bean
Directions
• Cream together the butter, sugar and any flavorings you’re using. Beat until just becoming
creamy in texture.
• Beat in the egg until well combined, make sure to scrape down the sides of the bowl. Add the sifted flour and mix on low until a non sticky dough forms.
• Knead into a ball and divide into 2 or 3 pieces.
• Roll out each portion between parchment paper to a thickness of about 0.2 inch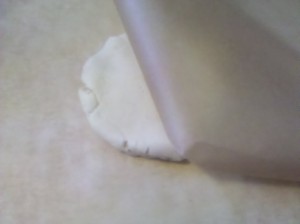
• Refrigerate for a minimum of 30mins.
• Tip: Recipes commonly just wrap the whole ball of dough in clingwrap and then refrigerate it for an hour or overnight, but by rolling the dough between parchment, this shortens the chilling time and then it’s also been rolled out while still soft making it easier and quicker.
• Once chilled, peel off parchment and place dough on a lightly floured surface.
• Cut out shapes with cookie cutters or a sharp knife.
• Arrange shapes on parchment lined baking sheets and refrigerate for another 30mins to an hour.
• Tip: It’s very important you chill them again otherwise they’ll spread while baking.

• Re-roll scraps and follow the above process until all scraps are used up.
• Preheat oven to 350°F
• Bake until golden around the edges, about 8-15mins depending on the size of the cookies.
• Leave to cool on cooling racks.
• Once completely cooled, decorate as desired.
• Tip: If wrapped in tinfoil/cling wrap or kept in airtight containers in a cool place, un-decorated
cookies can last up to a month.
I used half of the recipe to cut my shapes. The other half I wrapped it in plastic wrap and frooze it for later use. I also got a little bit of the dough and flavored with lemon, coconut and chocolate cherries to see how they turn out.
Royal Icing:
2½ – 3 cups Icing / Confectioner’s / Powdered Sugar, unsifted
2 Large Egg Whites
2 tsp Lemon Juice
1 tsp Almond Extract, optional
Directions:
• Beat egg whites with lemon juice until combined.
• Tip: It’s important that the bowls/spoons/spatulas and beaters you use are thoroughly cleaned and grease free.
• Sift the icing sugar to remove lumps and add it to the egg whites.
• Tip: I’ve listed 2 amounts of icing sugar, the lesser amount is good for a flooding consistency, and the larger amount is for outlining, but you can add even more for a much thicker consistency good for writing. If you add too much icing sugar or would like to make a thinner consistency, add very small amounts of water, a few drops at a time, until you reach the consistency you need.
• Beat on low until combined and smooth.
• Use immediately or keep in an airtight container.
• Tip: Royal Icing starts to harden as soon as it’s in contact with air so make sure to cover containers with plastic wrap while not in use.
Decorating Your Cookies:
I outlined the shape of the cookie with the royal icing. Then you are going to use a technique called flooding. All you need to do for this is to thin out the royal icing a little bit with water. (Drag a knife through the surface of the Royal Icing and count to 10. If the surface becomes smooth between 5 & 10 seconds, the icing is at the correct consistency.) After you get your desired consistency just fill in the outlined areas.

You can also use this a toothpick to make some fun designs 😀

Posted by Alessandra on Wednesday Sep 22, 2010
Filed under :Brazilian Recipes, Desserts
I always enjoyed it when my mom made this dessert. As a kid I loved the different colors and shapes that you can create with this recipe. I hope you enjoy it as well.
Pick 3 or 4 flavors of Jell-o (you can make any colorful flavors you like. The more colorful, the cooler it will be)
1 can sweetened condensed milk
1 can table cream (creme de leite-you can find this in the International isle)
1 pkg of unflavored gelatin
Water
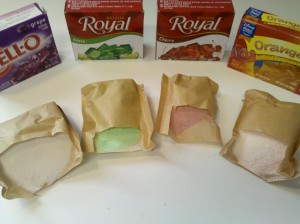
Prepare each jell-o according to package directions. Usually you use 1 cup of hot water, dissolve the jell-o then add 1 cup of cold water. Pour the liquid into a dish. I used a 9×13 pan. Refrigerate until it hardens.
Cut the jell-0 into squares. You can be creative here and cut them into different shapes if you like.
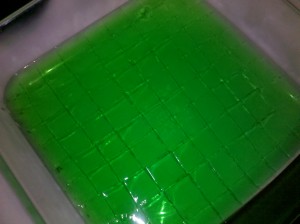
Put all the cut jell-o together into a serving dish and set aside. Once again any shape. I make one in a 9×13 pan and a small one in a cup.
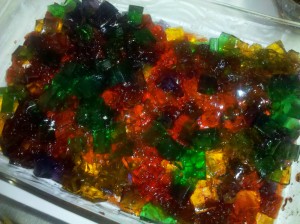
Prepare the white Jell-o:
Take 1/2 cup of hot water and dissolve the unflavored gelatin.
Add the sweetened condensed milk and table cream.
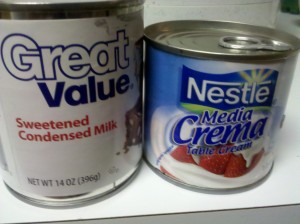
Mix well. Pour this mixture on top of the prepared dish of cut jell-o.
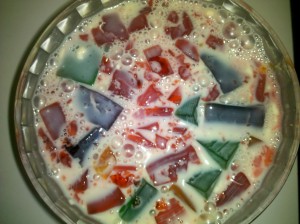
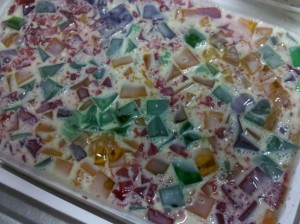
Refrigerate until it hardens.

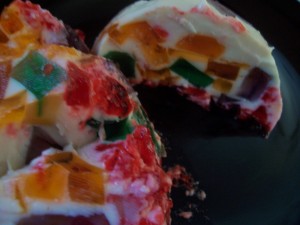
This is how it looks when it is cut! Fun huh?
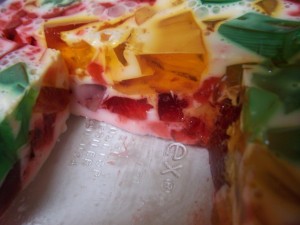
Enjoy!
Posted by Alessandra on Wednesday Sep 15, 2010
Filed under :Dinning Out
Recently, we went on a trip to Bear Lake in Garden City, Utah with some friends. What a fun, relaxing time. Isn’t it great to spend time with friends and family at a beautiful location. Bear Lake was just over the top great!
Amongst all the swimming, relaxing, site seeing, movie watching, playing games, cooking and eating… did I mention eating… all the tastey food!!!…., we did make a little trip to Logan to the Cache Valley Cheese and Aggie ice cream place for a tour.

Mr. Randall Bagley, Associate Director and Dairy Plant Manager, welcomed us and taught us about how they make their cheese. Did you know it takes an average of 1,500 gallons of milk to make 150 lb of cheese? Wow! That is a lot of milk! Their cows are milked twice, everyday.
We also were able to sample 3 of their cheeses. First up was a delicious smoky Swiss called Old Ephraim; very mild and just amazing. Next, a Jalapeno cheddar; very good. But, my favorite was their award winning cheddar! Old Juniper, an aged cheddar cheese that won first place on the Idaho Milk Produce Association. A very tasty cheddar cheese indeed!
After our cheese tour, we decided to try some of their ice cream. Yum! Every time we go to an ice cream store, my son asks for “blue ice cream”, not sure where he saw this… or why he asks for it, but he was lucky at the Aggie. They have a very milk blue mint ice cream. Needless to say my son was very happy.

If you are ever in Logan stop by and check them out. Enjoy!
Posted by Alessandra on Saturday Sep 11, 2010
Filed under :Dinning Out
This has been a busy festival weekend! We had an amazing time at the Greek Festival last night, which goes through Sunday! and YES I am going today again! This will make up for the time we missed it last year.
Today is also the Brazilian Festival at the Gateway Mall. You cannot miss it. I plan to spend the whole day jumping from festival to festival, enjoying company of friends, music and amazing food!
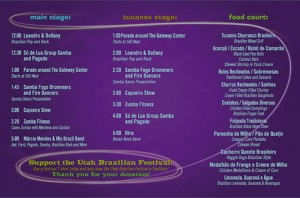
Here is a sample of what the Brazilian Festival has to offer this year! Hope to see you there!
Posted by Alessandra on Thursday Sep 9, 2010
Filed under :Uncategorized
Taste Of Home Cooking School is coming to Utah!
If you missed it last time, here is another chance. It is a fun event. Last time Taste of Home Cooking School was here, I was able to help out in the kitchen preparations and I had a lot of fun. I hope you get to join us this time around.
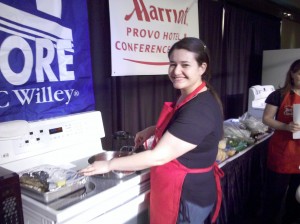
The Daily Herald and Thanksgiving Point ‘s Taste of Home Cooking School will be on Tuesday September 14th at the Show Barn, Thanksgiving Point. Here are the details for the show: Taste of Home Cooking School.
Also held over to savvyshopperdeals.com to enter to win free tickets to the event!!!! Thanks Amy 😀
Posted by Alessandra on Thursday Sep 9, 2010
Filed under :Dinning Out
The Greek Festival started today! I love this festival. We were introduced by friends of ours many years ago. Since then I’ve only missed it once because we were in Brasil at the time. That happened last year. So this year it is almost like I am twice as hungry for their delicious food.
I will post pictures for sure! But I wanted to give everyone a heads up on an online coupon for free admittance to the festival! Yes, more money to spend on food 😀
Thank you Zion’s Bank for the free admission! Now lets go get some FOOD 😀
Posted by Alessandra on Tuesday Sep 7, 2010
Filed under :Appetizers, Desserts
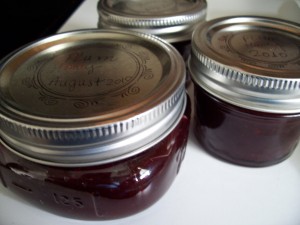
A couple weeks ago, a friend and I got together to bottle some peaches. We also made peach honey and we loved it. I had a variety of plums at my house and we just weren’t eating them. So, I figure I would try to make some plum honey and see if it worked out. I really enjoyed the taste and texture. It is a very good spread for breads. Also, if you thin it out, it makes a great glaze for cakes and such.
First you will need a bunch of the fruit; in this case plum. Wash and cut them. Boil with a little bit of water and about 1/2 cup sugar.
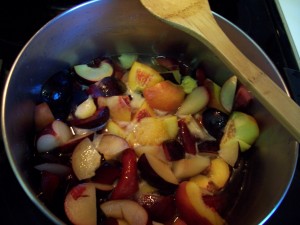
Let is boil until most of the fruit turns into a mush. Then strain it to obtain the juice.
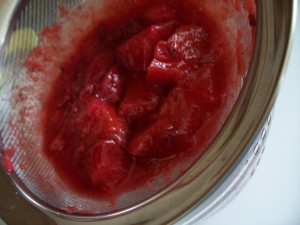
Make sure to scrape the bottom of your strainer.
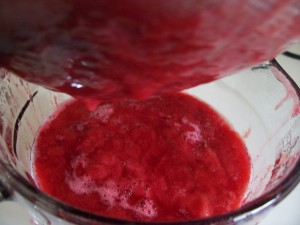
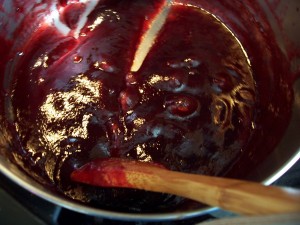
Measure the amount of juice you have and pour it into a sauce pan. Bring it to boil on medium heat and add 1/2 of the amount of juices of sugar (ex if you had 2 cups of juice, add 1 cup of sugar). Cook until it starts to thicken. Mix constantly.
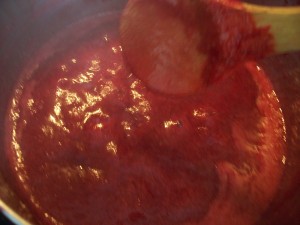
Keep mixing often until it gets very thick.
You can now pour into jars and process the jars, or just keep jars in the fridge.
YUM!


