Posted by Alessandra on Wednesday Apr 28, 2010
Filed under :Desserts
This is one of my favorite “easy-to-make-in-a-pinch” recipes. It tastes good fresh and even better the day after! It also freezes very well (up to a month) without the glaze. Enjoy!

Adapted from America’s Test Kitchen
2 sticks of unsalted butter
1 3/4 cups flour
1/2 teaspoon baking powder
1/2 teaspoon salt
1/4 cup sour cream
2 tablespoons lemon juice
1 cup granulated sugar plus 2 additional tablespoons
5 large eggs (room temperature)
Syrup
1/4 cup granulated sugar
1/4 cup lemon juice
Glaze
1/2 cup Confectioners’ sugar , sifted
1 tablespoon lemon juice
For the cake:
Grease and dust a bunt cake pan. Sift the flour, baking powder and salt. Set aside. Mix the sour cream and the lemon juice and set aside.
In a mixer, add butter and sugar. Mix it together until nice and fluffy. It will take about 3 minutes (it depends on the mixer). You may have to scrape down the sides of the bowl while it mixes. Slowly add the eggs, one at a time letting it mix very well. With the mixer on low, add 1/3 of the flour mixture, and 1/2 of the sour cream mixture. Repeat, ending with flour mixture.
Pour into prepared pan and bake at 325 for about 55 minutes. It might need some more time. To check, insert a tooth pick into the middle of the cake. If it comes out clean, it is done.
For the syrup:
Mix together the sugar and lemon juice in a sauce pan. Let it simmer until all the sugar dissolves and liquid is a little thick. It will be a thin syrup. When cake is done, let cake cool in the pan for about 10 minutes. Then poke small holes on the cake (with a fork or toothpick) and drizzle about half of the the syrup, turn the cake into a platter and do the same to the top of the cake.
For the glaze:
Whisk powder sugar and lemon juice until it is a thick (but runny) glaze. Sometimes I add just a little bit of water until it comes to the right consistency.
After the cake is nice and cooled to room temperature, drizzle the glaze on top and side of the cake.
This cake is even better the day after it is baked. It is a nice dessert to make ahead of time. I like to decorate it with some raspberries on top. It is a good combination!
Posted by Alessandra on Friday Apr 2, 2010
Filed under :Brazilian Recipes, Desserts
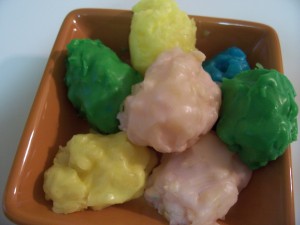
I thought this would be a fun treat for Easter. Just in case there are some of you that don’t eat chocolate… This is what you will need:
1 can of Pineapple (you can use it fresh, however if you use coupons like me you should have a storage of canned pineapple that you got for very cheap and/or FREE with coupons!)
1/2 C Sugar
1 1/2 C shredded Coconut
Poured Fondant Frosting (recipe to follow)
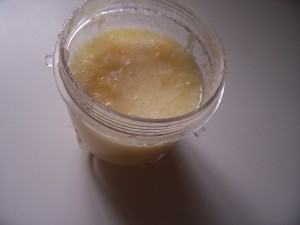
Open pineapple can and drain at least half of the liquid. Quickly blend the pineapple. I used my magic bullet ! A very quick pulse, you still want to have a little bit of pineapple chunks.
In a sauce pan, add pineapple and sugar. Bring it to a boil, stir consistently and let it cook until most of the water has evaporated. (About 5-7 minutes)
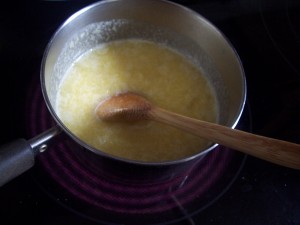
Then add the coconut.
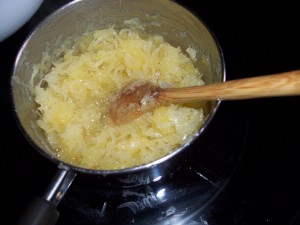
Cook, stirring well for about 8-10 minutes or until the mixture starts to come together.
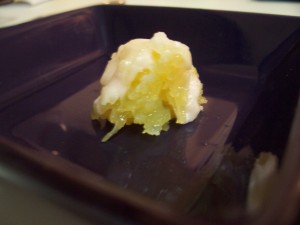
Transfer it to a plate and make your shapes (I usually make little balls, but since it is Easter I made more of an egg looking shape)
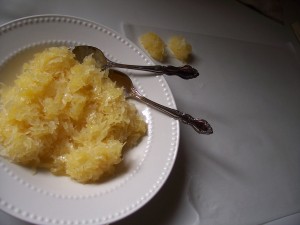
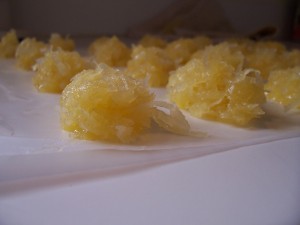
Now let them stay there for a while until they cool and hold their shape. You can freeze them if you would like.
Transfer them to a non stick cooling rack. Make sure to use wax paper or some other type of paper under the rack to catch all the frosting. Cover the candies with the following mixture:
Poured Fondant Frosting: (make one recipe for each color you want to use)
1/2 c Powder Sugar
1T water
Food coloring
Mix well. It will be runny. You can add more sugar or more water to come to your desired consistency.
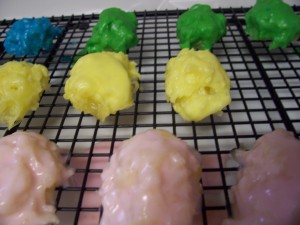
Let them sit and dry! Enjoy 😀
Posted by Alessandra on Thursday Mar 18, 2010
Filed under :Brazilian Recipes, Desserts
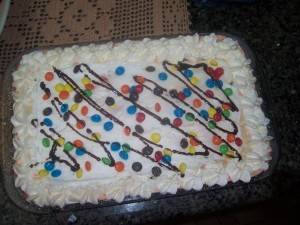
I grew up inside of an ice cream factory… and by that I mean our family business was making ice cream! My parents have been making ice cream in Brazil for about 30 years now. We had this “pie” that we used to make called “Torta de Sorvete” this one is similar to that, but I added a slice of pound cake hence the name Ice Cream Cake 😀 I hope you love it as much as I do!
Ingredients:
2 to 4 flavors of your favorite Ice Cream and/or Sherbet. (I like using at least one flavor that is not as sweet, like pineapple or lime)
1 small Pound Cake (sliced thin)
1 cup Heavy Whipping Cream
2 T. Powder Sugar
Nuts (as you like it)
Candies (as you like it)
Ice cream Syrup
Fudge
The way you make is very open to changes and to your imagination. You do want to follow these basic steps:
First you layer one of the ice cream flavors on your dish. If you let your ice creams melt a little it will be a lot easier to spread it on your pan.
Next Layer it will be your syrup (any flavor) and/or fudge
Next you sprinkle some candies or nuts: I like to use MMs, chopped pecans, marshmallows, oreo cookies, pretty much anything you like
Then you have a choice you can either repeat this one more time, ice cream, syrup, candy or you can skip and add your thin sliced cake. I will see how tall my pan is and see if it will be tall enough to hold more layers or not. You want the cake to be on the middle of your layers. So it will end up being 2 ice cream layers, cake, 2 ice cream layers OR 1 ice cream layer, cake, 1 ice cream layer. Keep doing your layers until you get to the top of your dish.
Decorate with whipped cream. (in your mixer, mix 1 cup of heavy whipped cream and 2 T powder sugar until nice and fluffy) Put the pie/cake in the freezer.
Before serving you might want to take it out of the freezer for about 10 minutes to it is easier to slice. Enjoy 😀
Make sure to go here: Blue Bunny Coupon to get $1 off blue bunny ice cream 😀
Posted by Alessandra on Tuesday Mar 16, 2010
Filed under :Desserts
3/4 cup melted butter
1 1/4 cups sugar
2 eggs
1 1/2 teaspoons pure vanilla extract
1 T whipping cream
1 cup Flour
1/3 cup Cocoa Powder
1/4 teaspoon salt
8 chocolate Truffles (cut into pieces) I used 8 milk chocolate lindt truffles and 2 white chocolate on top of the brownies.
Spray a 9 inch square pan with oil and set aside. Preheat oven to 350.
In the mixer, cream together the butter and sugar until smooth. Add the eggs one at a time, beating for well after each egg. Add the vanilla and cream.
Add flour, cocoa, and salt Mix it well. Stir in the cut truffles.
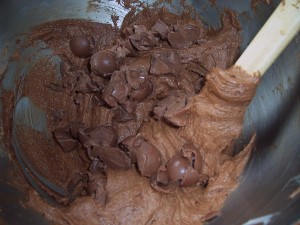
Put batter into the pan and spread. Top with chocolate if you want. I make half with more truffle on top and the other half without.
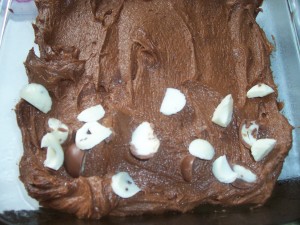
Bake 30-35 minutes.
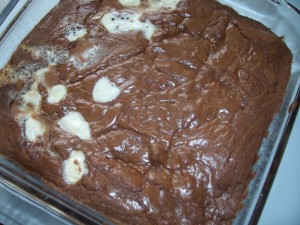
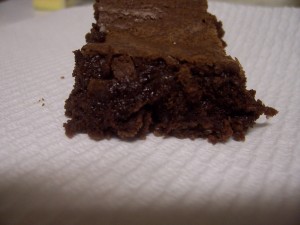
It will be gooey and delicious! VERY good with ice cream!!!
Posted by Alessandra on Friday Feb 12, 2010
Filed under :Desserts
Happy Valentine’s Day! This is a great recipe for Valentine’s Breakfast. It is simple to make and very delicious!
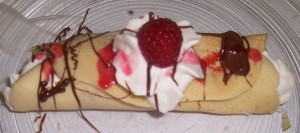
Sweet Crepes:
2 Eggs
2 C Flour
1 C Sugar
Pinch Salt
1 t Vanilla
1/3 C Milk
1/3 C Water
Mix it all together, but add the milk and water slowly. You can use a blender, but I find that by hand works just as well. You are looking for a thin, smooth batter. The reason why you hold on the liquids is so that you can make it to the right consistency. Sometimes it takes both 1/3 cups, sometimes a little more or less. I usually add in all the milk so it is easier to mix, then I will add the water slowly until it gets to the right consistency.
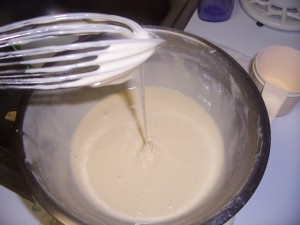
Using a frying pan you want to add a little bit of butter, or spray some oil. Just a little. Pour some batter and spread it thin with the back of a spoon.
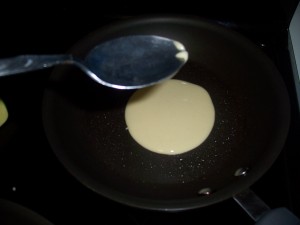
TIP: The first or second usually don’t work as well. That is ok! You will get the hang of it. Just don’t give up. 😉 I also found that the oil is only added on the first one. You do not need to keep adding butter or oil to the pan. (it is a lot easier to spread without any oil)
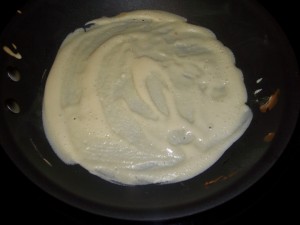
You want to cook it about 20-30 seconds each side.
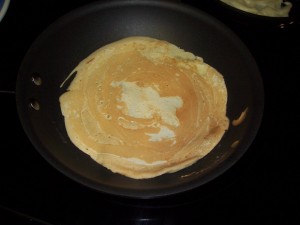
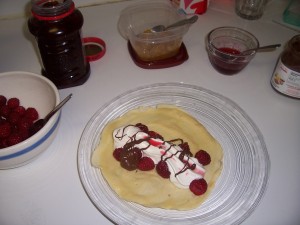
That is it!!! It is so sweet and delicious . Now just use your creativity for the filling. We like to have raspberries, strawberries, bananas, pineapple, nutella, different jams and whipped cream of course!
It is something that the whole family can enjoy because they can fill with whatever they may like.
TIP: Use it as it comes out of the pan, or keep it warm. They tend to harden a little after cold, making it hard to fold. Enjoy!

Posted by Alessandra on Saturday Feb 6, 2010
Filed under :Desserts
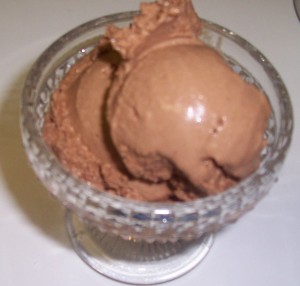
What a great tradition! Even though I was raised in an ice cream store in Brasil (that is my parents business). I was not introduced to this amazing day until I came to the US. I combined the decilious Nutella day (yesterday) and made some ice cream for today. I searched for recipes online and came across this one:
Easy Nutella Ice Cream
I did it a bit differently, so here is what I did:
1 1/2 cans of evapotated milk (just because I had 1/2 can open and didn’t want to waste)
3/4 of a 13 oz Jar of Nutella (also by eye, I got about 4 super full spons and I have about 1/4 of the jar left)
I put both into a sauce pan and warmed it until the nutella melted away. Then I turned the heat off and let it cool down. I didn’t put it in the fridge, just cool to room temp.
Then I put it into my ice cream maker. I have one that does not require the drum to be frozen before. It makes ice cream on command, no ice, no mess! It took about 40 minutes. It is creamy and delicious!!! Enjoy
Posted by Alessandra on Friday Feb 5, 2010
Filed under :Desserts

Thought I would post this in celebration of Nutella’s Day … I love Nutella. There is so much you can do with this amazing spread.
Here is one of my favorite cake frosting:
Nutella Buttercream
3 large egg whites
1 cup sugar
3/4 cup unsalted butter, softened, cut into tablespoons
1/2 jar of Nutella (about 1/2 – 2/3 cup)
Put egg whites and sugar into the top of a double boiler over a pan of simmering water. Whisking constantly, cook until sugar has dissolved and mixture is warm (about 160 degrees). Pour heated egg whites into the bowl of an electric mixer fitted with the whisk attachment. Beat egg white mixture on high speed until it forms stiff (but not dry) peaks. Continue beating until fluffy and cooled, about 7 minutes total. Switch to the paddle attachment. With mixer on medium-low, add butter one tablespoon at a time, beating well after each addition. Increase speed to medium-high; continue beating until frosting appears thick, about 4 minutes. Reduce speed to low; add Nutella a few tablespoons at a time and continue beating until incorporated.
This is delicious to frost and fill cakes or cupcakes!
For more ideas check out this website http://www.nutelladay.com/
Posted by Alessandra on Thursday Feb 4, 2010
Filed under :Desserts
Ingredients:
1 box yellow Cake mix
1 t Cinnamon mix (I used the pampered chef or you can use just normal cinnamon)
½ c Sour Cream
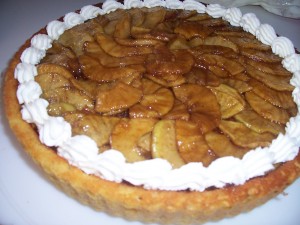
Mix the cake mix according to directions on the package. Then, add the cinnamon and the sour cream. Divide batter into Pampered Chef’s torte pan set.(you can use any cake pan). Bake your cake. Let the cake rest in the pan for about 10 minutes after you remove it from the oven. Invert it to a platter. (NOTE: Most cake mixes will make two cakes. One cake is required for this recipe. You can do something different with the second cake or freeze it for a rainy day.)
Filling/top
Ingredients:
4 Apples (cored, peeled and sliced)- I use the apple peeler/corer/slicer machine from Pampered Chef
3 T Butter
2/3 c Brown Sugar (might need a little more depending on how tart the apples are)
1 t Cinnamon
Pinch Salt
Pinch Nutmeg
Squeeze of Lemon juice
Add butter and sugar into a skillet and cook until sugar is melted and mixture is hot. You may need to add a little splash of water to soften the sauce.
Add to the mixture in the skillet the apples, cinnamon, salt, nutmeg. Squeeze the lemon (just a little) so juice drips on top of the apples. Let it cook until apples are soft but still holding their shape. (About 10+ minutes). Let it cool a bit. (there will be a lot of sauce)
Poke little holes on the cake (with a fork). Drizzle about 4 Tablespoons of the sauce on the cake. Then start layering the apples side by side, until all the cake is covered with the apples.
Drizzle a little more of the sauce on top (not too much or it will be too sweet). You can always serve the sauce on the side.
Decorate the sides with whipped cream (1 c heavy Cream, 2T Powdered Sugar, ½ T Vanilla).
Options: Try with chocolate cake, pears instead of apples, add a vanilla pudding on the cake before putting the layer of apples (you can even use the other ½ of the cake and make the pudding, apple filling, then decorate the top of the 2nd cake- so it will be cake, pudding, apples, cake)


