Posted by Alessandra on Tuesday Oct 12, 2010
Filed under :Brazilian Recipes, Sauces and Dips
When I was young, my family had a tradition of making pasta for Sunday lunches. We would get home from church and my mom would start her delicious sauces while my sisters would start cooking the pasta and setting the table. Kids would play around while waiting for lunch. The smells in the kitchen were just amazing!
Here is one of the sauce recipes I really enjoy making it. I like it because it tastes fresh and light. It is also very versatile. You can use on top of spaghetti, as a sauce for a meat roast, top chicken cutlets or even to make risotto.
You will need:
2 T Oil
1/4 c diced Onion
3 clothes Garlic
2-3 cups Chopped Tomatoes (if you have the time, remove the skins and seeds)
3 cups Tomatoes blended (sauce)
2 t Salt
1 t Pepper
Pinch Sugar
1 t Chicken bouillon
Dash Red Pepper Flakes
1/4 cup Carbenet Sauvignon (optional)
Oregano (to taste)
Fresh Basil (if you don’t have fresh you can use dried basil as well)
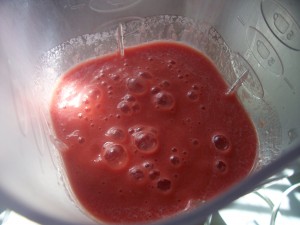
First blend about 5 or 6 medium size tomatoes to create the 3 cups of blended tomato sauce. Set aside.
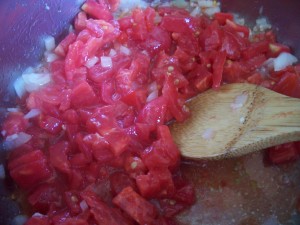
In a large sauce pan, heat the oil and cook the onions until translucent. Add chopped garlic. Sautee for a couple minutes. Add the chopped tomatoes. (it might take 3-5 tomatoes to make 2-3 cups of chopped tomatoes). Let it cook for a couple of minutes.
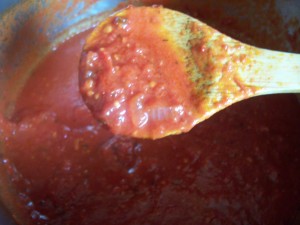
Slowly add about 1/4 cup of the tomato sauce you set aside. Let it cook, when you see the liquid is evaporating, start adding more of the tomato sauce. Add the salt, pepper, sugar, bouillon, red pepper flakes. Let it simmer for another 15 minutes or so. Then come back and add a little more of the tomato sauce. You will want to keep adding the sauce until it is all gone. Add it slowly. Taste it for seasoning. Adjust salt as needed. Add the oregano and basil. (Only add it here if you’re using dried basil and oregano. If you use fresh oregano and basil, add it to the sauce pan at the end of the cooking time.) If you choose to use red wine, add it now and then cover the sauce. Turn the heat to medium low. Let it cook for about 1 hour. You want the consistency to be thick. The more you cook it, the thicker it will start to get. For my preferred consistency, I let it cook for about 1 hour and 20 minutes.
This will make about 2 cups of tomato sauce. I love to top this sauce with fresh basil chiffonade. YUM
Posted by Alessandra on Thursday Oct 7, 2010
Filed under :Brazilian Recipes, Desserts
1 c rice
2 c water
4 c milk
1 1/2 – 2 c sugar
Cinnamon to taste
2-3 T sweetened condensed milk
In a sauce pan, add milk and sugar. (Add the 1 and ½ c sugar to the milk and taste the milk. If it is not sweet add more sugar.) Bring it to boil, turn heat to medium low and let it cook, stirring it occasionally. This will thicken over time. (I do this then I start cooking the rice, this way this mixture will have been cooking for about 30 minutes or so before you start adding it to the rice.)
In another sauce pan, add rice and water. Let it boil until rice is almost soft. It will take about 20 minutes. Then start adding the milk mixture, little by little. The milk mixture will keep cooking in the first sauce pan, making it thicker. As you add each ladle of the milk mixture to the rice, it will sweeten the rice and it also will become thicker.
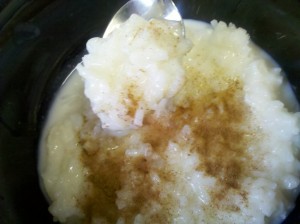
Add some sweetened condensed milk to taste. I also like to add cinnamon. Sometimes I will add a stick of cinnamon to the milk while it is cooking. This will flavor the milk and add a gentle cinnamon taste to the pudding.
Posted by Alessandra on Monday Oct 4, 2010
Filed under :Brazilian Recipes, Fish

1 lb red snapper
Marinade:
1/ 4 cup lime juice
1 t salt
1 t pepper
1 T chopped cilantro
Marinade the fish for about 1 hour
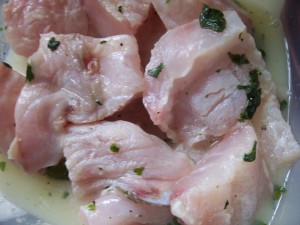
In a Sauce pan, sauté:
½ onion diced
3 garlic minced
1 T olive oil and ½ T oleo de dende
When onions are translucent add 1 can diced tomatoes
½ t cayenne pepper
Add in the marinated fish
Cover in medium low and cook for about 20 minutes

Add 2/3 c coconut milk
Cook for about 10-15 minutes

Serve with rice
Posted by Alessandra on Wednesday Sep 22, 2010
Filed under :Brazilian Recipes, Desserts
I always enjoyed it when my mom made this dessert. As a kid I loved the different colors and shapes that you can create with this recipe. I hope you enjoy it as well.
Pick 3 or 4 flavors of Jell-o (you can make any colorful flavors you like. The more colorful, the cooler it will be)
1 can sweetened condensed milk
1 can table cream (creme de leite-you can find this in the International isle)
1 pkg of unflavored gelatin
Water
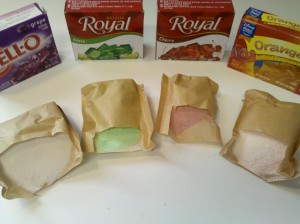
Prepare each jell-o according to package directions. Usually you use 1 cup of hot water, dissolve the jell-o then add 1 cup of cold water. Pour the liquid into a dish. I used a 9×13 pan. Refrigerate until it hardens.
Cut the jell-0 into squares. You can be creative here and cut them into different shapes if you like.
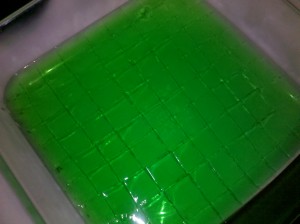
Put all the cut jell-o together into a serving dish and set aside. Once again any shape. I make one in a 9×13 pan and a small one in a cup.

Prepare the white Jell-o:
Take 1/2 cup of hot water and dissolve the unflavored gelatin.
Add the sweetened condensed milk and table cream.
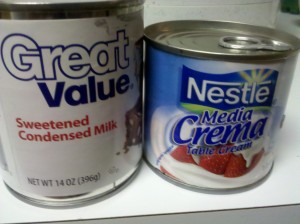
Mix well. Pour this mixture on top of the prepared dish of cut jell-o.

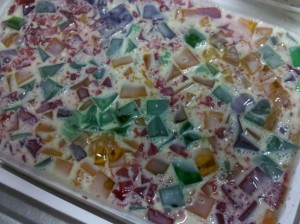
Refrigerate until it hardens.


This is how it looks when it is cut! Fun huh?
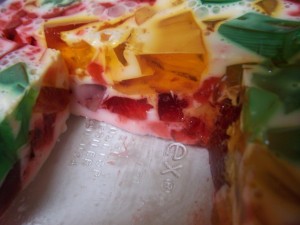
Enjoy!
Posted by Alessandra on Friday Aug 27, 2010
Filed under :Brazilian Recipes, Side Dish
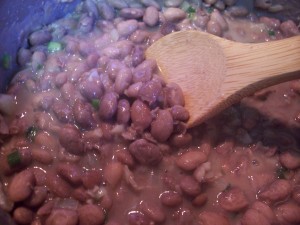
Brazilian Beans
2 cups beans (black, red or pinto beans)
4 cups water (or more)
1 medium size chopped onion
4-5 cloves of garlic
3 tablespoon olive oil
Salt and pepper
Green onions (optional)
Optional: cut bacon (or Canadian bacon) or 1 sliced Portuguese sausage
How to make it:
Cover beans with water in a pressure cooker, (water level should be about 2-3 inches above the beans). Close the pressure cooker and place at medium heat. It will take about 30-40 minutes to cook the beans after the pan is pressurized (steam starts blowing out). After the beans have cooked, let the pressure cooker cool completely before opening it to check if beans are soft enough. If they aren’t cook for longer. The whole process takes about 1 hour.
Note: ALWAYS wait for your pressure cooker to cool down before you open it!
If you don’t have a pressure cook, let the beans soak overnight and use a sauce pan to cook the beans. Same process, just cover them with water (about 2-3 inches above the beans). Cook until beans are soft.
Here is where the Brazilian part comes from….
In a sauce pan saute the garlic and onions with the oil. Add the boiled beans, salt, pepper and green onions. Let the beans cook until liquid gets thicker. It will take about 20-30 minutes. Taste for seasoning; if needed add more salt.
You could also add the bacon/sausage during this time.
If your sauce is not getting thicker, smash about 1/4 cup of the beans with a fork and mix it with the rest.
Posted by Alessandra on Friday Jul 9, 2010
Filed under :Beef, Brazilian Recipes
I had a lot of fun at the Studio 4, Good Things Utah show today. They are so nice and they make you feel right at home.

We made the Brazilian style meat loaf on the show. It is one of the dishes I love because it is so easy to make and you can use your creativity. You can change the ingredients to your liking. Here is the recipe:
- 2 lb ground beef
- 1 pkg Lipton onion soup mix
- 1 large carrot
- 2 boiled eggs
- 6-8 slices of ham
- 4 ounces shredded cheese (mozzarella or cheddar)
- 1 T mayo
- 3- 4 strips of bacon
- Oil (just enough to spread on your hands)
Mix onion soup mix and ground beef together, set aside.
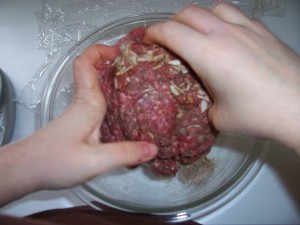
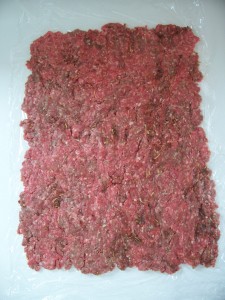
Put a large sheet of plastic wrap on the counter, and lightly coat it with oil. Then, use your hands to gently open the meat mixture. (Just like you would for thin hamburgers.) It should be shaped into a 13×18 rectangle. You may need to rub a little oil on your hands to make it easier to spread the meat. You want a nice thin layer.

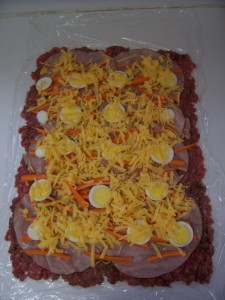
Then top it with the ham slices, carrots, sliced eggs and cheese. Starting with the side closest to you, roll the meat. Use the plastic to help you form the loaf.
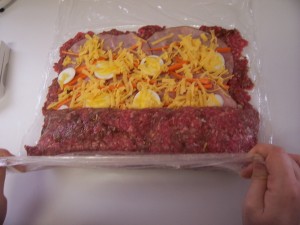
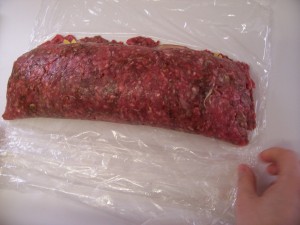
Transfer it to a cookie sheet (lined with foil). Spread the mayo on top. Add strips of bacon over the top, wrapping around the sides of the loaf. Bake at 350 for 40-50 minutes (or until fully cooked).
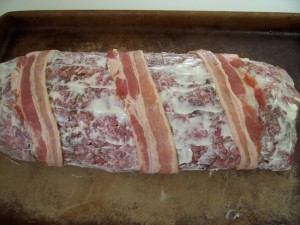
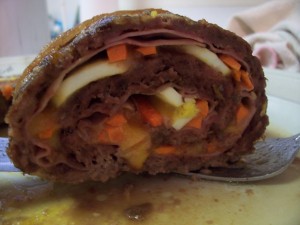
Options: You can fill the loaf with any type of fillings. Here are some ideas: Spinach and cream cheese; 3 cheeses; prosciutto artichoke hearts and brie; vegetables (green peppers, red peppers, carrots, spinach, olives); all meat (ham, pepperoni and sausage).
Another option is to use ground chicken, sausage or turkey instead of beef.
Serve options:Brazilian Rice, green salad, and/or vegetables
Posted by Alessandra on Tuesday Jun 15, 2010
Filed under :Brazilian Recipes, Chicken
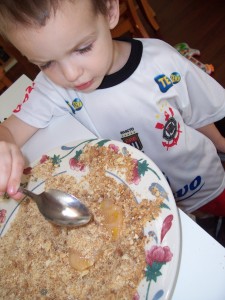
I love this dish. It is a nice meal in which the kids help out in the kitchen (…if you are brave. Just kidding). I think allowing kids to help out in the kitchen lets them feel like they are part of decisions and it also helps them to not be afraid to experiment with food later on. My son is two and he has been cooking with me since he was able to hold his head up. 😀 I would hold him in one arm and cook with the other hand and tell him all about what I was doing. Needless to say he loves to be in the kitchen with me. This is the first time we made cutlets together and he was so proud after it was done. It was adorable.
For the Chicken Cutlets:
1 large chicken breast
1 egg
1 1/2 c of bread crumbs
salt and pepper
Cut the chicken breast in little pieces. Line them in a cutting board. Cover them with plastic wrap and pound them thin. Salt and Pepper each little cutlet.
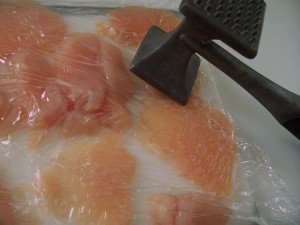
Beat the egg with a little splash of water. Put it into a plate or bowl that is large enough to dip the chicken in. In another bowl or plate add the bread crumbs.
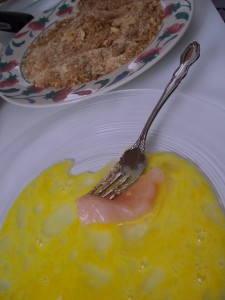
Traditionally you want to first dip the chicken into some flour, then egg then bread crumbs. This technique makes the breading nice and crusty. For today I skipped the flour and just dipped the chicken cutlets into the egg wash, then the bread crumbs. Here is where your child can help out. Give them a spoon and let them cover the chicken with the bread crumbs. My son just loved it. Yes, it is messy, but well worth it. Nothing that a rag won’t clean, right?
In a frying pan, add about 1 T of oil, then fry the chicken cutlets. They are very thin so they fry quickly.
Tip: After each batch of chicken you will see some black crumbs. What I like to do it clean the pan with a paper towel (be careful since the pan it HOT). Then add new oil. It will make your next batch just as nice as the first. Otherwise you might get some burn marks on the second batch.
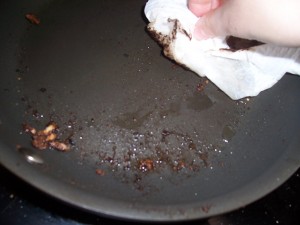
I like to keep my oven at a low temperature. Mine has a setting for keeping food warm. After I removed the cooked cutlet from the stove, I put it in the oven until everything is done. 😉
These are great. There is so much you can do with chicken cutlets. Here are some ideas:
Cut them to top a salad (see Quinoa Salad idea)
Line them in a baking dish top with your favorite spaghetti sauce and cheese. Bake until cheese is melted. Also good with Alfredo sauce.
Good to serve as finger food. Make dips and enjoy. (I love a BBQ, honey mustard or ranch dip)
Top your favorite pasta dish with the chicken cutlets (they go very well with Alfredo)
Use it for sandwiches

Posted by Alessandra on Wednesday May 26, 2010
Filed under :Beef, Brazilian Recipes, Main Dish, Vegetables
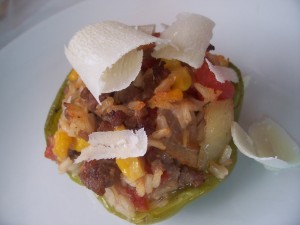
1 lb Ground Beef
1 T Olive Oil
1/2 Onion diced
2 clothes Garlic (minced)
Salt and Pepper
1 cup cooked Rice (I used brown rice)
1/2 cup cooked Corn
1/4 c Shredded Parmesan Cheese (optional)
1 can diced Tomatoes
2 T Green Onions (cut)
Parmesan Cheese Shavings
4-6 Green Pepper (depends on the size)
Cut Peppers length wise, remove the seeds found on the inside. Wash it very well. Set them inside of a baking dish.
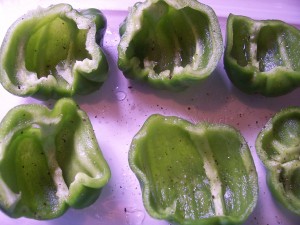
Season the peppers with a little salt and pepper. I like to open the tomato can and pour the juices on the bottom of the baking dish. Set aside.
Brown ground beef with onions, garlic and oil. Add salt and pepper to taste.
In a mixing bowl, rice, beef, corn, shredded Parmesan,tomatoes and green onions.

Fill each pepper with this mixture. Bake at 350 for about 30-40 minutes. Or until peppers looks cooked.

Top with Parmesan Shavings and enjoy!
Posted by Alessandra on Monday May 24, 2010
Filed under :Brazilian Recipes, Rice, Side Dish
Brazilians eat rice pretty much every day. I can say that rice is the most staple food of Brazil. I also love it because a basic recipe like the one I will post here can be turned into so many dishes. I like products like that because you can let your imagination run wild! If you keep checking back you will see I will come back to this basic recipe many times during my blog adventure. If you want to read more about rice, check out Wikipedia. They have some great facts on rice!
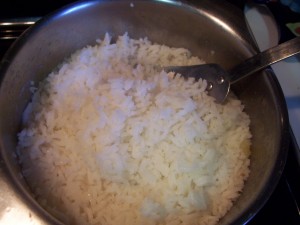
1 c long grain white rice (you can substitute with other type of rice)
2 T minced onion
1 clove garlic, minced
2 T vegetable oil (I use olive oil)
1 1/2 t salt
4 cups water (about)
Place the rice in a colander and rinse thoroughly with cold water; set aside. Heat the oil in a saucepan over medium heat. Cook the onion in the oil for one minute. Stir in the garlic and cook until the garlic is golden brown. Add the rice and salt and stir until the rice begins to get translucent.
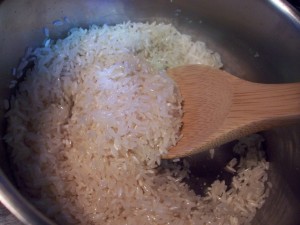
Pour water over rice mixture so the water level is 2 fingers higher than the rice (*do not stir the rice after adding the water)
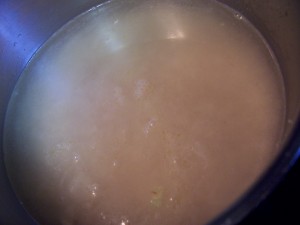
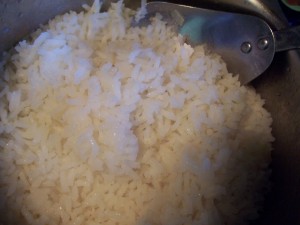
White Rice
Reduce heat to medium-low, cover the saucepan, and allow to simmer until the water has been fully absorbed, 20 to 25 minutes.
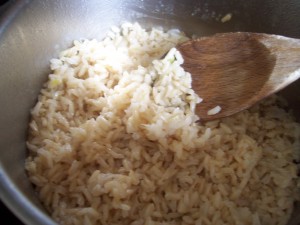
Brown Rice
If you are going to make brown rice make sure you let it cook for at least 45 minutes. You might need to add a little bit more water when the water starts to evaporate, but do not stir the rice! Just add a little water if the rice still hard. When the rice is almost soft you can turn off the heat, cover and let it sit for a while.
I really like brown rice. It is healthy and I love the nutty taste. It does take a little while to cook, but if you plan ahead you can make your rice, cook for the 30-45 minutes required then cover it and forget about it. It is easy and worth the wait!
You can also freeze the cooked rice (individual portions, or big portions). Like I said before, I love brown rice, but my husband doesn’t as much of it. So when I make white rice or brown rice, I will make a big batch and freeze individual portions of it. That way if I am serving rice I have his white rice ready and just need to make my brown. Or vice versa.
*if you stir the rice too mush, it won’t be nice and loose. It will form clumps together, which we in Brasil refer to as “arroz unidos venceremos” = “together we win” 🙂 I only like this type of sticky rice when making Japanese food, otherwise I like my rice nice and fluffy.
Posted by Alessandra on Tuesday May 18, 2010
Filed under :Brazilian Recipes, Desserts
I have never tasted anything like this treat here in the US. It is like a cookie crust filled with this delicious coconut candy. It is very easy to make. You can make it using the small size muffin tins for finger food size or the big size for a full dessert size. Here is how:
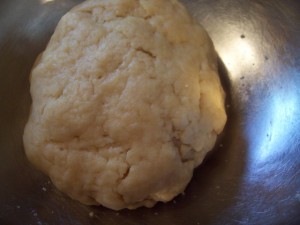
For the dough/ cookie:
2 cups Flour
7 T. Butter (soften)
1 Egg
2 T. Sugar
Mix it all together, until it forms a smooth ball. Cover and set aside.
For the filling:
3 C. Shredded Sweetened Coconut
2 Egg Yolks
1 can Sweetened Condensed Milk
1 T. Sugar
1 T. Butter
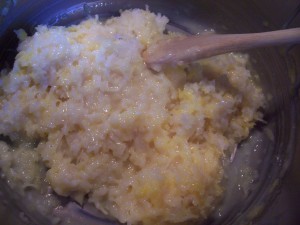
In a big sauce pan, mix the coconut, yolks, sweetened condensed milk and sugar. In medium heat mix it until it all comes together and starts to separate from the sides and bottom of the pan. Take it off heat and mix in the butter.
Now, use the dough to cover the muffin tins. Make sure you spread it bottom and sides very well.
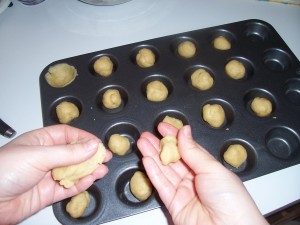
Fill each of them with the coconut mixture.
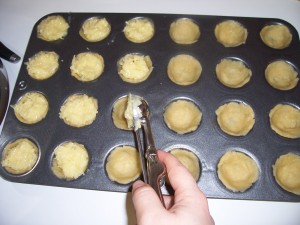
Bake it at 350 until golden brown. About 30 minutes.

YUM…Like I said it is not as creamy as a normal coconut pie, it is more of a candy like texture, but it is very good! Hope you like it 😀


