Posted by Alessandra on Tuesday Jun 22, 2010
Filed under :Giveaway
Hi everyone, what a fun giveaway! Thanks for sharing your ideas and participating on this giveaway. I hope you enjoy your heart healthy hotcakes! Here are the winners:
Marie G3
Karen
Erin
Marilyn
Pearce
Amy
To claim your prize,please send me an e-mail with your mailing address. I can’t wait to hear what you think about the hotcakes! Thanks again.
Ale
Posted by Alessandra on Tuesday Jun 15, 2010
Filed under :Giveaway, Main Dish
My son loves pancakes for breakfast! I try to make it once a week deal, but he likes it so much that sometimes it is the only thing he asks for and he is very persistent. I was very excited when I was contacted by Lehi Roller Mills to try their hotcakes. When I read the ingredients on the package and the instructions it blew me away. I love when I read the product label and I can recognize what is on there, like 100 % whole wheat flour, milled flaxseed, non fat dry milk, brown sugar and dry egg whites. Heart Healthy Hotcakes features zero grams of trans fats, are low in total fat, have no preservatives and are a good source of fiber. They are made with organic wheat and Omega 3 and the instructions are easy to follow, just add water.
I was concerned with how it would taste and if it would pass my son’s taste buds…
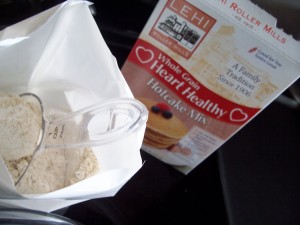
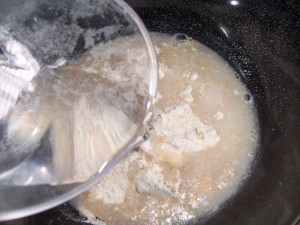
I love that all you do it add same amount of mix to water. That way I can make only the amount of hotcake we will eat in the morning.
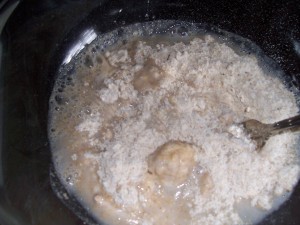
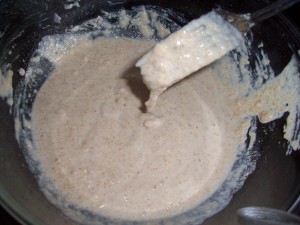
Then all you need to do is cook them. I only made 1 cup of the batter. 1 cup of the mix yielded 6 hotcakes. Which is exactly the amount of pancakes on the directions. (Directions say “for 2 cups of mix you will get 12 pancakes), since I made 1 cup I got 6 pancakes!)
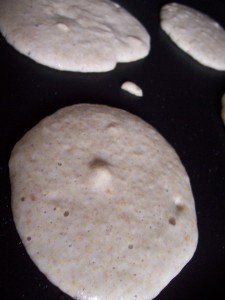
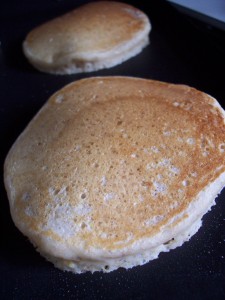
I thought it was nice and fluffy. For a whole wheat product, it was not heavy and the calories were not bad at all. (170 for two 4″ hotcakes.) I couldn’t believe it. I had mine with a little drizzle of Xagave and some strawberries. It passed my taste buds test! 😉
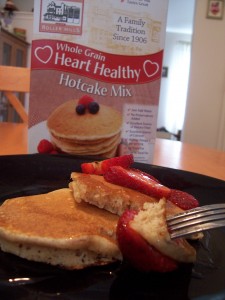
My son had his usual dollop of doce de leite and strawberries. He ate the whole thing. It past his taste buds test too. 🙂

I feel much better serving him Lehi Mill’s Heart Healthy Hotcakes over the other mixes out there.

The only thing I wish is that they would develop are other flavors of the hotcakes, like blueberry, or buttermilk. I also notice that the colder it gets, the chewier the hotcakes get. So eat it while it is warm, which is true for any type of pancake! But overall I really like this product. It is healthy and it tastes good.
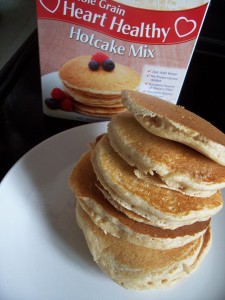
Now for the better part, Lehi Mill offered to give away some boxes of Heart Healthy Hotcakes for howicook.com readers! I know, exciting right. This way you get to try it too. There will be 6 boxes given away to 6 lucky readers! The giveaway contest will end on Monday, June 21st, 2010 at 8 pm MST. Winners will be announced here on Tuesday, June 22nd, 2010. US Residents only please. The winner will be chosen using Random.org. You do not want to miss this one. It is just that good!!!!
Here is how you can enter: (one entry per person, just need to do one of the options bellow)
1. Leave a comment on this post.
2. Leave me a comment on the howicook.com Facebook fan page. for the “Heart Healthy Hotcakes Giveaway” post.
3. Tweet about this post. (make sure to include #howicookgiveway http://bit.ly/a8thGm)
Good luck everyone. I am excited for you!
As part of Lehi Roller Mills 104th Anniversary, the company will be offering a Buy One Get One Free promotion at all Smith’s Food & Drug Stores in Utah during June 6th through July 3rd, 2010.
There is also a $1/2 coupon for Harmons. Good until 06/28/2010. I got this coupon because I signed up with Harmons Local. They will send you local coupons right to your e-mail!
Posted by Alessandra on Tuesday Jun 15, 2010
Filed under :Brazilian Recipes, Chicken
I love this dish. It is a nice meal in which the kids help out in the kitchen (…if you are brave. Just kidding). I think allowing kids to help out in the kitchen lets them feel like they are part of decisions and it also helps them to not be afraid to experiment with food later on. My son is two and he has been cooking with me since he was able to hold his head up. 😀 I would hold him in one arm and cook with the other hand and tell him all about what I was doing. Needless to say he loves to be in the kitchen with me. This is the first time we made cutlets together and he was so proud after it was done. It was adorable.
For the Chicken Cutlets:
1 large chicken breast
1 egg
1 1/2 c of bread crumbs
salt and pepper
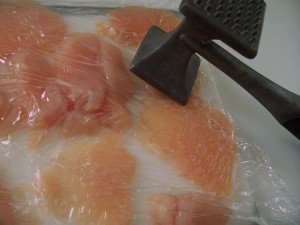
Cut the chicken breast in little pieces. Line them in a cutting board. Cover them with plastic wrap and pound them thin. Salt and Pepper each little cutlet.
Beat the egg with a little splash of water. Put it into a plate or bowl that is large enough to dip the chicken in. In another bowl or plate add the bread crumbs.
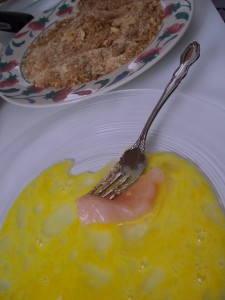
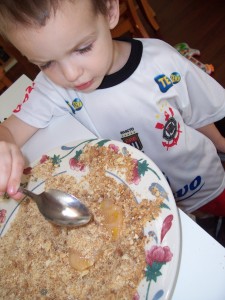
Traditionally you want to first dip the chicken into some flour, then egg then bread crumbs. This technique makes the breading nice and crusty. For today I skipped the flour and just dipped the chicken cutlets into the egg wash, then the bread crumbs. Here is where your child can help out. Give them a spoon and let them cover the chicken with the bread crumbs. My son just loved it. Yes, it is messy, but well worth it. Nothing that a rag won’t clean, right?
In a frying pan, add about 1 T of oil, then fry the chicken cutlets. They are very thin so they fry quickly.
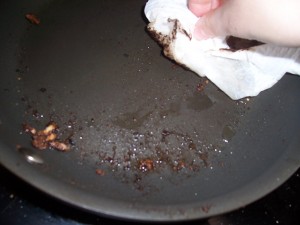
Tip: After each batch of chicken you will see some black crumbs. What I like to do it clean the pan with a paper towel (be careful since the pan it HOT). Then add new oil. It will make your next batch just as nice as the first. Otherwise you might get some burn marks on the second batch.
I like to keep my oven at a low temperature. Mine has a setting for keeping food warm. After I removed the cooked cutlet from the stove, I put it in the oven until everything is done. 😉
These are great. There is so much you can do with chicken cutlets. Here are some ideas:
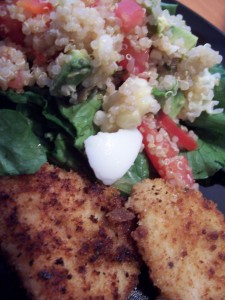
Cut them to top a salad (see Quinoa Salad idea)
Line them in a baking dish top with your favorite spaghetti sauce and cheese. Bake until cheese is melted. Also good with Alfredo sauce.
Good to serve as finger food. Make dips and enjoy. (I love a BBQ, honey mustard or ranch dip)
Top your favorite pasta dish with the chicken cutlets (they go very well with Alfredo)
Use it for sandwiches
Posted by Alessandra on Monday Jun 14, 2010
Filed under :Salads, Side Dish
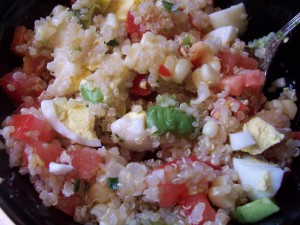
Quinoa is very healthy and I love the nutty like taste. It is nice to have Quinoa as a salad because you can use your imagination. This makes it easy to reuse leftovers or wherever is in the fridge to make it taste good For this particular one I had some tomatoes, red pepper and a boiled egg (left over from another meal), so I started to put those items together until it was beautiful and colorful.
For the Quinoa:
3/4 c of Quinoa
1 t Salt
1 t olive oil
In a small sauce pan heat the oil slightly, add the quinoa and salt. Then add about 2 cups of water. Let the quinoa cook (medium heat) for about 20 minutes, covered.
You can make this ahead of time and keep it in the fridge.
For the salad:
Cooked quinoa
2 ears of corn (just the kernels)- you can use canned corn
1 avocado (sliced)
1 boiled egg (diced)
1/4 red pepper (diced)
2 tomatoes (diced)
2 T green onions (cut)
Mix it all together. Then season it with Salt and Pepper to taste. You can also add a little bit of lime juice and olive oil for a different taste. My husband likes to eat this with a little bit of Italian dressing drizzled on top. I prefer without dressing and just a little squeeze of lime. I also like to serve it on top of a nice green lettuce.
It is refreshing and it tastes very good!

Pair this recipe with the Chicken Cutlets and you have a complete meal!
Posted by Alessandra on Wednesday Jun 9, 2010
Filed under :Uncategorized
Here is a great online FREE download. It is a free eCookbook for Healthy Muffins!
There are 25 amazing Healthy Muffins Recipes. Hope you like it 😉

Posted by Alessandra on Monday Jun 7, 2010
Filed under :Appetizers, Vegetables
I love Artichoke and I wanted to experiment with different ways of cooking artichoke. I tried 5 ways. I liked them all, but I have to say my favorite was baking the artichoke. Here is a summery of my adventures with artichoke:
Basics: Before you start, make sure you trim the artichoke. Cut just a little bit of the top and trim the leaves a bit. Then wash it well under cold water. If you are going to use the artichoke as a serving dish you may also want to trim the bottom so it stands well. If you don’t need it to sit then go ahead and peel the outer side of the stem. The stem is a continuation of the artichoke heart so cook it and enjoy it.
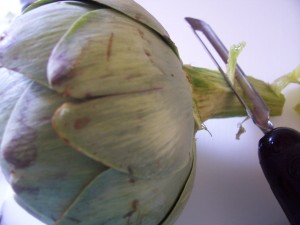
Boil: In a large sauce pan, bring water to boil. Add a little salt and add artichoke. Cover and boil it for about 45-50 minutes. It will be done when you can insert a knife in the bottom of the artichoke easily. If your artichoke is small, keep an eye on it. You don’t want to over cook it.
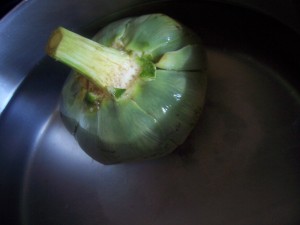
Steamed: Just like any other vegetable. Add a little bit of water to your pan, using a steamer, steam your artichoke until a knife can easily be inserted in the bottom of the artichoke.
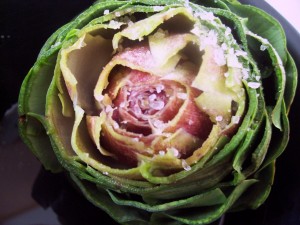
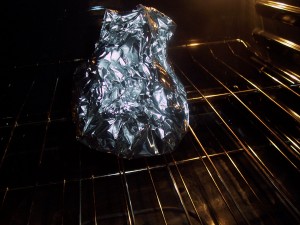
Baked: I separated the leaves a little bit and seasoned the artichoke with 1 t rock salt, 2 t garlic powder and a little drizzle of olive oil. Then I wrapped it in foil. I used 2 sheets of foil to make sure it was nice and closed. Bake in a 350 oven for about 1 hour. It is just like baking a potato. It will be done when a knife can go on the bottom of the artichoke with ease.
Microwaved : Using a microwave safe dish, microwave your artichoke for about 10 minutes on high.
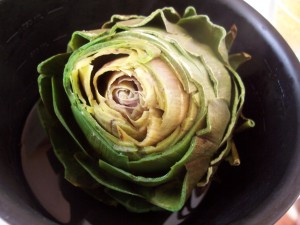
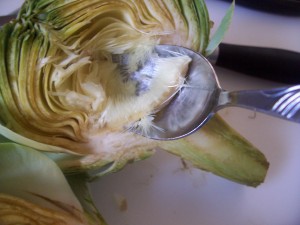
Grilled: Cut the artichoke length wise. Either steam or microwave it for a couple of minutes just to soften it a bit. Take out the choke (as you can see on the picture). The choke is the fuzzy part. Then season it (olive oil, salt and lemon juice) take it to your grill. Grill the artichoke (cut side down) until they get a good color and are nice and tender.
How to eat it: Now the best part right??? Serving an artichoke for company is very nice. It is healthy and it looks very fancy! To eat it, just pull the leaves out and scrape the bottom with your teeth.
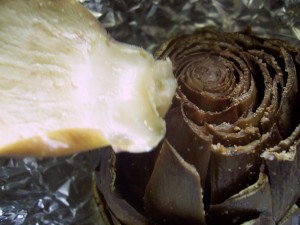
You can serve it in place of tortillas with your favorite dips, or you can serve it with melted butter. YUM!!! It is also delicious by itself. After you are done with the leaves, you will get to the artichoke heart. This is the middle of the artichoke. It is nice and soft. You usually see this part used in cooking. Just take the heart out and cut it into fourths. Then scrape the fussy part of the artichoke (called choke) and discard it. Now you can chop the rest and use in your favorite dish. I love to add it to pasta sauces, make a hot artichoke dip or just eat it by itself. It is so good!!!
Posted by Alessandra on Tuesday Jun 1, 2010
Filed under :Uncategorized

If you go on the right side of this page you will see a place where you can print coupons (FREE). They have a great coupon for Muir Glen right now. $1.00 of any product.
I hear some Walmart have the tomato paste for $1.00, with the coupon it would be free!!! There is much you can do with tomato paste, or even just diced tomatoes! Here are some ideas:
Stuffed Peppers
Pan Simmered Cod with Tomatoes
Stuffed Cabbage Rolls
Brazilian Beef Stroganoff
Posted by Alessandra on Friday May 28, 2010
Filed under :Uncategorized

Ridley’s in Orem is having a DOUBLE COUPON DAY : Tuesday 06/01/2010
They will double coupons up to $1.00
.25 off=.50 off
.35 off=.70 off
.50 off= $1 off
.75 off= $1 off!
FUN
Posted by Alessandra on Thursday May 27, 2010
Filed under :Desserts, The Dairing Kitchen
The May 2010 Daring Bakers’ challenge was hosted by Cat of Little Miss Cupcake. Cat challenged everyone to make a Piece Montée, or croquembouche, based on recipes from Peter Kump’s Baking School in Manhattan and Nick Malgieri.

I joined the Daring Kitchen last month and have been anxiously waiting to hear what the challenge of April would be. I was so excited to see that a Piece Montée would be my first Daring Kitchen challenge. I have always wanted to make one of these.
A Piece Montée, also called Croquembouche is a French dessert. It is basically a montage of those delicious cream puffs. The cream puffs are made with Pate a Choux. (If you have never tried making Pate a Choux, try it. It is easy and delicious. You can make puffs, eclairs and let your imagination run with it.) Then you have the filling, usually a pastry cream. Then you have the glaze, usually sugar or chocolate.
I decided to fill my puffs with whipped cream and Dulce di Leche. Then I couldn’t decide on the glaze so I thought it would be fun to do both chocolate and spun sugar.
Pate a Choux (recipe from The Daring Kitchen Archives)
¾ cup water
6 Tbsp. unsalted butter
¼ Tsp. salt
1 Tbsp. sugar
1 cup all-purpose flour
4 large eggs
For Egg Wash: 1 egg and pinch of salt
Pre-heat oven to 425◦F degrees. Line two baking sheets with parchment paper.
Combine water, butter, salt and sugar in a saucepan over medium heat. Bring to a boil and stir occasionally. At boil, remove from heat and sift in the flour, stirring to combine completely.
Return to heat and cook, stirring constantly until the batter dries slightly and begins to pull away from the sides of the pan.
Transfer to a bowl and stir with a wooden spoon 1 minute to cool slightly.
Add 1 egg. The batter will appear loose and shiny. As you stir, the batter will become dry-looking like lightly buttered mashed potatoes.
It is at this point that you will add in the next egg. Repeat until you have incorporated all the eggs.
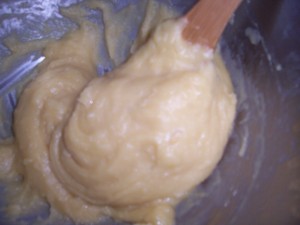
Transfer batter to a pastry bag fitted with a large open tip (I piped directly from the bag opening without a tip). Pipe choux about 1 inch-part in the baking sheets. Choux should be about 1 inch high about 1 inch wide. Using a clean finger dipped in hot water, gently press down on any tips that have formed on the top of choux when piping. You want them to retain their ball shape, but be smoothly curved on top. Brush tops with egg wash (1 egg lightly beaten with pinch of salt).
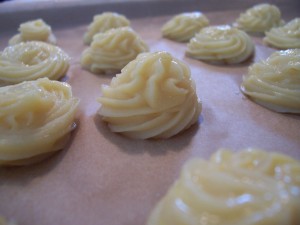
Bake the choux at 425◦F degrees until well-puffed and turning lightly golden in color, about 10 minutes.
Lower the temperature to 350F degrees and continue baking until well-colored and dry, about 20 minutes more. Remove to a rack and cool.
Can be stored in a airtight box overnight.

I used a pastry bag with a star tip and filled some of them with Dulce di Leche

some with whipped cream

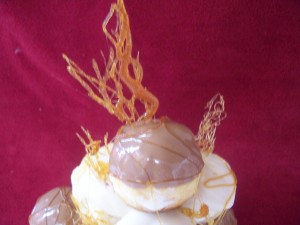
Then I dipped them in chocolate (milk and white) and here is a picture of the tower 😀

I had never done spun sugar before and it was an interesting project. Fun though… I decided to decorate my piece with sugar art and some spun sugar.


Posted by Alessandra on Wednesday May 26, 2010
Filed under :Beef, Brazilian Recipes, Main Dish, Vegetables
1 lb Ground Beef
1 T Olive Oil
1/2 Onion diced
2 clothes Garlic (minced)
Salt and Pepper
1 cup cooked Rice (I used brown rice)
1/2 cup cooked Corn
1/4 c Shredded Parmesan Cheese (optional)
1 can diced Tomatoes
2 T Green Onions (cut)
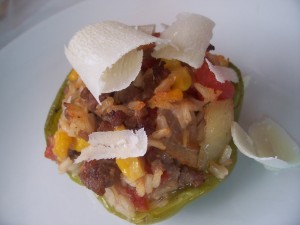
Parmesan Cheese Shavings
4-6 Green Pepper (depends on the size)
Cut Peppers length wise, remove the seeds found on the inside. Wash it very well. Set them inside of a baking dish.
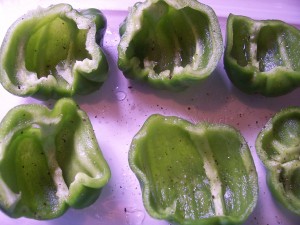
Season the peppers with a little salt and pepper. I like to open the tomato can and pour the juices on the bottom of the baking dish. Set aside.
Brown ground beef with onions, garlic and oil. Add salt and pepper to taste.
In a mixing bowl, rice, beef, corn, shredded Parmesan,tomatoes and green onions.
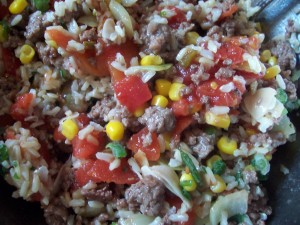
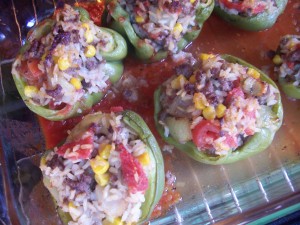
Fill each pepper with this mixture. Bake at 350 for about 30-40 minutes. Or until peppers looks cooked.
Top with Parmesan Shavings and enjoy!


