Posted by Alessandra on Sunday Nov 2, 2014
Filed under :Beef, Brazilian Recipes
We came across this cut of meat and I had to come up with a recipe. It is super easy and fast to make. You can serve it as a main dish or cut in small portions for appetizers. Just ask your butcher to cut the short ribs in a long but thin strips (almost as thin as thick bacon)

Make the marinade:
1/4 cup brown sugar
1/3 c olive oil
3 T soy sauce
A good chunk of fresh Ginger (finely shredded)
Mix inside of a zip lock bag and add the slices of meat (about 12 slices or as much as the bag can hold)
Marinate about 1 hr
Put on top of wired sheet at 500 F (or on broil) for 5 minutes each side. Watch it closely, since the meat is so thin and the oven is super hot it cooks fast. It may also make a little bit of smoke because of the sugar in the marinade.
Sprinkle parsley on top (optional)
Posted by Alessandra on Monday Mar 17, 2014
Filed under :Brazilian Recipes, Desserts
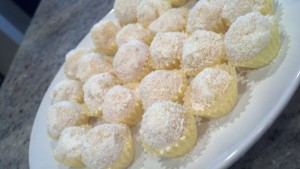
Brigadeiro is a basic yet very popular Brasilian candy. It is comparable to chocolate truffles. It was created in the 1940s and still popular today. This recipe is a twist on the original Brigadeiro. Instead of chocolate flavor it is made with lemon. The citrus contrasts the sweetness of this candy in a very delicious way. Hope you try it out!
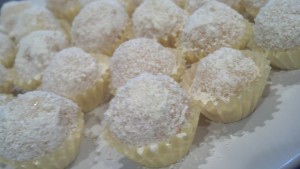
Lemon Truffles
1 can sweetened condensed milk
1 T butter
100 grams white chocolate (cut)
1 egg yolk
1 T powder milk
2 T lemon zest
10 ml lemon juice (fresh and strained)
In a sauce pan mix all ingredients and cook it, mixing the entire time, on medium heat until it thickens and starts to bubble in the bottom of the pan. Take it off the heat and put into a plate. Let it cool, wrap it and refrigerate for 24 hrs.
Next day you can roll it any size you would like. It makes about 50-60 small brigadeiro balls (about 1 teaspoon size). A trick I have been using is to use a little bit of cold water to wet my hands prior to rolling the candy. It is quite sticky and if you don’t use some thing like butter or water, you are not going to be able to roll them properly. I prefer the water method to the butter because the water doesn’t add any more flavor to the candy where the butter may add a little bit. You don’t want you hands totally wet, just a little. You will see what I mean once you start rolling it and you will find what works best for you.
Here is a picture of my set up. My candy plate, my bowl of cold water, my crust (chocolate shavings) and the final plate.
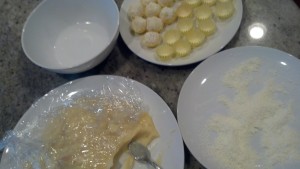
I like to rolls these lemon truffles into white chocolate shavings. I use a microplane and shave the chocolate very fine, almost like a powder.
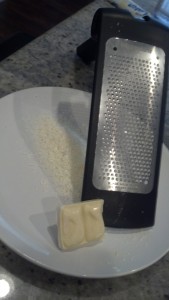
This gives a delicate crust to the candy. You could also use milk chocolate, or crush some lemon drops (hard candy) to put on the outside.
Enjoy!
Posted by Alessandra on Sunday Dec 22, 2013
Filed under :Desserts, Other
It has been a while but I wanted to come here and wish everyone a Merry Christmas and share this fun idea.

I bought this cake mold, you all know how I love cakes… It is silicone and super easy to use. You can also use it for Jell-O, chocolates, or molding other types of food besides making cakes. I recommend if you want an easy, quick, cute and festive dessert for Christmas. Thanks everyone for this year and hope 2014 is a better one 😉 Love
Ale
Comments Off on Merry Christmas
Posted by Alessandra on Sunday Sep 29, 2013
Filed under :Uncategorized
Inma of la Galletika was our Sept. 2013 Daring Bakers’ hostess and WOW did she bring us something decadent and delicious! Pastel de Tres Leches or Three Milk Cake, creamy yet airy, super moist but not soggy… just plain delish!
This month’s daring bakers challenge was the tres leches cake recipe. I have been making tres leches for quite some time now, and every time I make I think: ” I really want to try a chocolate version” so when I saw this challenge that is exactly what I did. I used their recipe for the chocolate tres leches and it was really good. I thought the cake was a little dense than what I am used to, but the milk mixture was delicious. Cooking it made it a bit thicker and it was really good. Thanks Inma for the challenge.
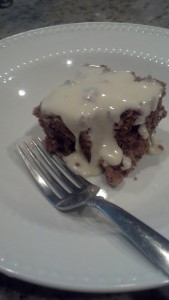
Coconut Three Milks Cake (recipe from daring baker’s challenge)
Ingredients for sponge cake
5 large eggs (separated)
½ cup sugar
2 teaspoons vanilla extract
1 cup all-purpose (plain) flour (sifted)
¼ cup water
3 tablespoons unsweetened cocoa powder
For the coconut syrup
1 can (14 oz) sweetened condensed milk
1 can coconut milk
1 cup heavy cream (about 35% fat)
Topping and filling
2 cups of whipping cream (about 30% fat)
½ cup sugar
1 cup shredded coconut
Directions for the sponge cake:
Preheat oven to moderate 350°F. Prepare a square 9”x9” pan or 9” round cake pan
Separate the egg whites from the yolks. Beat the egg whites on medium speed, 3 – 5 minutes. When soft peaks form slowly add the sugar in small batches. Whip until stiff peaks form about 5 minutes. Set aside.
In a medium bowl beat egg yolks at medium-high speed for about 5 to 6 minutes, or until the egg yolks become pale colored, creamy and puffy. Stir in vanilla. Pour the egg yolks over the egg whites, gently fold until just combined trying not to lose any volume from the mixture. Fold in the flour little by little in the form of rain. Mix until just combined (over-beating will result in a denser, flatter cake). After folding in the flour you have to fold in the cocoa powder dissolved in the ¼ cup of water (it should be a thick paste) and then bake in the preheated moderate oven for 25 minutes or until the toothpick comes out clean
Let it cool. Once cool, split the cake in half, flip the top of the cake and place it on a base. Poke using a fork holes all over the cake to better absorb the three milk soaking liquid.
Directions for the coconut syrup
- In a saucepan add the sweetened condensed milk, coconut milk and heavy cream, bring to a boil, reduce the heat and continue boiling for 5 minutes. Remove it and let it cool.
- Cut the cake in half and brush the syrup on both sides until totally absorbed.
Directions for the decoration
1. In a skillet, over medium heat, toast the coconut 2. Cover the cake with whipping cream and spread the coconut on the top. Enjoy!
Posted by Alessandra on Monday Sep 16, 2013
Filed under :Brazilian Recipes, Desserts
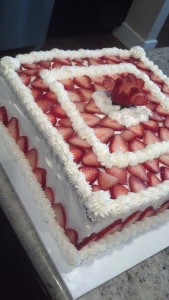
Pavê is a classic Brasilian dessert. It differs in flavors just like a trifle would. It is made with a combination of layers of cookies, cakes, fruits, creams. What I like most about them is the possibility of creativity.
We had a Brasilian party a couple months ago in my neighborhood and I made these 4 different types of paves by simply changing the cookies and fruits that go inside. I will post all of them here. Hope you enjoy it.
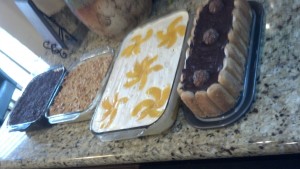
PAVE DE AMENDOIN (peanut pavê)
This is a little less creamy as the usual pavês, however it is one of the favorites in our family.
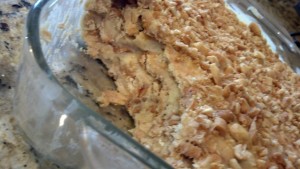
3 c sugar
2 egg yolk
300 grms butter
2 can media cream (crème de leite/table cream)
2- 3 T sweetened condensed milk
bolacha maisena
milk
500 grms toasted peanuts (grind)
Beat together the sugar, yolks and butter, until it becomes light and fluffy. Fold the table cream and sweetened condensed milk. (set aside)
Assemble:
Dip the cookies into the milk and layer with the separated cream and nuts. One layer of the cookies (bolacha maisena), thin layer of the cream, sprinkle toasted grinded nuts on top. Keep doing this until you use all the cream. End with the nuts.
Refrigerate overnight.
PAVE DE CHOCOLATE
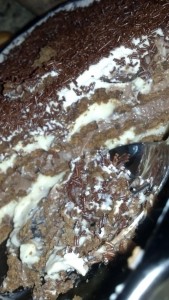
1 pkg bolacha maisena de chocolate
milk (just to wet the cookies a little bit)
2 sweetened condensed milk
2 c milk
2 T corn starch
4 eggs
4 T cocoa powder
4 T sugar
1 can table cream (crème de leite)
Cream 1:
in a sauce pan at medium heat, mix 1 sweetened condensed milk can, 1 c milk, 1 T corn starch, 2 egg yolks. cook until it thickens. set aside
Cream 2:
in a sauce pan at medium heat, mix 1 sweetened condensed milk can, 1 c milk, 1 T corn starch, 2 egg yolks and 4 T cocoa powder. cook until it thickens. set aside
Cream 3/top:
beat the egg whites with sugar until hard peaks. Fold in the table cream
Assemble:
Layer cookies (dip them in the milk first), cream 1, cookies, cream 2, cookies, cream 1, cookies, cream 2, cookies cream 3 . Top with chocolate shavings or sprinkles
PAVE ROCHER
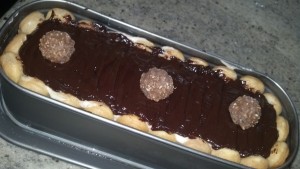
1 box lady finger cookies
2 1/2 c milk
4 T cocoa powder
2 eggs
1 T corn starch
1 can sweetened condensed milk
15-20 Ferrero rocher
3 T sugar
1 can table cream (crème de leite)
12 oz chocolate (milk or dark)
1 c cream
Cut the Ferrero rocher and set aside.
Mix 1 c milk and cocoa and dip the lady finger cookies. Layer the booton of your serving dish. I also did the sides.
In a sauce pan at medium heat mix the remaining 1 1/2 c milk, sweetened condensed milk, egg yolk, corn starch. Cook until it thickens, about 10 minutes. Set aside
In the mixer beat the egg whites with sugar until hard peaks. Fold in the can of table cream.
Melt the chocolate add cream to make a ganache
Assemble:
Lady fingers, cream, cut Ferrero rocher.
Top with the egg white mixture. After it is cold top with ganache and decorate with Ferrero rocher.
PAVE DE PESSEGO
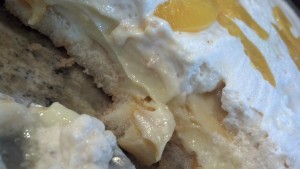
2 sweetened condensed milk
2 c milk
3 egg yolks
3 T corn starch
Mix it all together in a sauce pan at medium heat. cook until it thickens (about 10 minutes)-set aside
Cookies (I used lady fingers)
1 can 29 oz peach with syrup
3 egg whites
2 T sugar
1 crème de leite (table cream)
Dip the cookies in the peach juice. layer them with the cream and peaches. (cookies, cream, peaches, cookies, cream peaches -until it is all used)
When done top with the following mixture : beat the egg whites with sugar until hard peaks, then fold in the crème de leite.
Spread this cream on top of the last layer and decorate it with leftover peaches.
Posted by Alessandra on Saturday Jul 27, 2013
Filed under :Uncategorized
We love to make this brazilian limeade, also known in Brasil as swiss limeade (limonada suíça). It is refreshing and perfect for summer days! Enjoy
for each liter of water you will need:
2 large limes (you can use 3 medium size or 3 large is you like it really strong)
1 heaping tablespoon of sweetened condensed milk
1/2 c sugar
First you want to cut the limes into 4 pieces. You will use the entire lime. Just make sure to take that middle (white part) and the seeds out. (just like the picture)
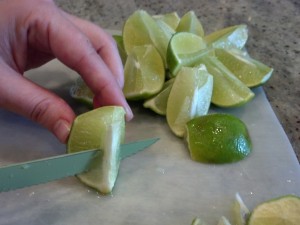
In a blender add 1 liter of water, sugar and sweetened condensed milk. Blend until all the sugar is dissolved.
Then add the cut limes and pulse 3-4 times. The limes will be chopped into smaller pieces.
Strain it and serve with ice.

Options:
You can change the flavor a little by adding other fruits into the mixture. Here are some ideas: raspberry, pineapple, oranges, blueberry and strawberry. Make it a little more interesting with some splashed of coconut cream. It is also refreshing with a bit of mint, or even some leaves of sweet basil. 😉
YUM
Posted by Alessandra on Friday Jul 19, 2013
Filed under :Uncategorized
Craftsy Sale
As you all know I love craftsy. Here is a link for a sale they are having until 07/21/2013. I usually buy my classes during sale times and then take them at my leisure later on. Enjoy!

Posted by Alessandra on Tuesday Jun 11, 2013
Filed under :Uncategorized
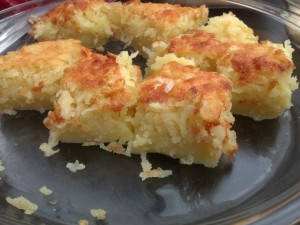
COCADA DE FORNO (BAKED COCONUT)
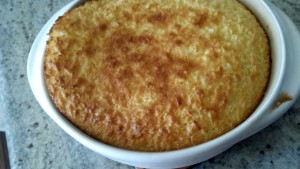
I found this recipe while looking through some old cookbooks I have. It was delicious. Once baked the botton layer will be almost like a thick custard topped with the sweet coconut flakes. YUM
8 Tbs butter (1/2 cup), at room temperature
1/2 cup granulated sugar
3 eggs
1/3 cup coconut milk
1/3 cup sweetened, condensed milk
1 + 1/2 cups grated coconut
2 Tbs all-purpose flour, sifted
Heat the oven to 350F. Lightly grease baking dish with butter or cooking spray.
Place the butter and the sugar in the bowl of an electric mixer fitted with the paddle attachment, and beat them together at medium speed until creamy, about 5 minutes. Add the eggs, one at a time, and continue to mix. Scrape the sides of the bowl after each addition.
Add the coconut milk, the condensed milk, continue to mix until well blended (about one more minute). Add the coconut and mix until incorporated. Fold the flour with a rubber spatula, and spread the batter into the prepared baking dish.
Bake in the 350 F oven until the top looks golden brown, the edges are set, but the center is slightly jiggly, about 20 minutes (or if you prefer a firmer consistency, bake until set, 30 to 35 minutes). Remove it from the oven and let it rest for 10 minutes.
We served with a side of passion fruit mousse. Delicious!
Posted by Alessandra on Thursday Apr 4, 2013
Filed under :Uncategorized
Craftsy spring sale! Starting April 5th through April 8th, a different set of Craftsy classes will be on sale each day, up to 75% off their normal price.
There are a lot of classes to choose from. It begins tomorrow! Enjoy 😀
If you want to see some of my craftsy projects, check out this post: Craftsy Classes

Posted by Alessandra on Monday Feb 11, 2013
Filed under :Appetizers, Brazilian Recipes
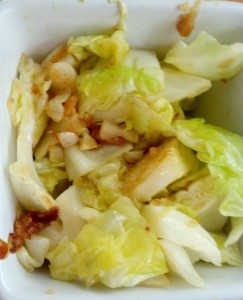
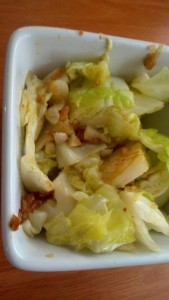
This is really good as an appetizer, or side dish. It is simple and it taste delicious.
2-3 T oil
1 T minced garlic
1 T ginger (fresh)- either cut very fine or use a grinder
1/2 cabbage (diced)
1 T sugar
salt and pepper to taste
I like to also add a little bit red pepper flakes
Sautee the garlic and ginger in the oil. Add the cabbage and quickly stir fry it. You want the cabbage to still have a little crunch. Don’t over cook it. 😉 Add sugar, salt and pepper to taste. Serve as an appetizer or side dish. I like to add a little sprinkle of red pepper flakes. YUM
