Posted by Alessandra on Monday Jan 7, 2013
Filed under :Uncategorized
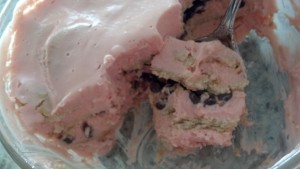
You may have noticed that I started a little business bringing Brazilian items to Utah. We are still in the baby steps of starting it, but I thought I would share some of the items we have available. I made this dessert for a dinner party we had and everyone enjoyed it. I love having some of the Brazilian ingredients available and now you can have it as well. Enjoy!
Pave Sensação:
1 pkg of biscoito maisena (can be substituted for graham crackers or animal crackers)

1 can leite condensado cremoso (creamed sweetened condensed milk- not found in the stores yet, but Brazilian Pantry sells it 😉 and it is delicious. It is not the normal sweetened condensed milk. It is much thicker and creamier) Worth to try it!

1 can table cream (also called creme de leite -found at the grocery stores)
1/8 c milk
2 t strawberry flavor (ice cream flavoring)
chocolate chips (I used mini dark chocolate chips, but a milk chocolate chip would also be good)
In a blender, mix milk, creamed sweetened condensed milk, table cream and flavoring for about 5 minutes.
In a trifle dish layer the crackers, then the strawberry mousse, crackers, mousse, chocolate chips, crackers, mousse, crackers and last layer mousse.
Refrigerate for about 4 hours 😉
Posted by Alessandra on Sunday Dec 23, 2012
Filed under :Uncategorized
Craftsy is having an AMAZING sale. Check it out!
Craftsy is a community of crafters from around the world. They offer online classes on everything from quilting & knitting to gardening & cake decorating.
I have taken many classes from them and I always learn something new. I also enjoy the networking. I can ask questions to the teacher, post pictures of my finished projects and connect with other crafters.
Here is a picture of the last class I took with them. It was on making classic croissants at home from Colette Christian.

If you would like to see other pictures from my previous classes, check out this post. Thanks
Posted by Alessandra on Friday Dec 14, 2012
Filed under :Brazilian Recipes
Salpicão, the brasilian “chicken salad”. This is another recipe where you will find many variations. Basically you can substitute or add ingredients accordingly to your family’s taste. Here is the basic recipe:

2 chicken breasts (boil and shredded) I usually boil them in water with a generous amount of chicken boilon (you can use this water latter to make risotto, or coxinhas)
1 medium carrot (shredded)
1 small onion (diced)
Hearts of palm (to taste- also diced or sliced)
2 small tomatoes (diced)
Green onions (to taste)
Parsley (to taste)
Salt and Pepper
1 cup of requeijao
1 or 2 T of mayo
Salt and Pepper
(this is a picture of a requeijão package, for those who don’t know it.)

Boil chicken (water with boilon) or chicken broth. Shred it really fine and adjust seasonings.

Add all the other ingredients. Taste for seasoning. Mix well.

You may need to add more mayo. It will depend on the wetness of the ingredients. Add a little at a time, that way you will know if it needs more.
Serve with crackers, chips or also good in sandwiches.

(this one was made with 1 slice of whole wheat bread,cut into 4, then you layer bread, salpicao, bread, lettuce, bread, salpicão and bread)
Another thing I like to do is to bake some wonton wrappers into a small cupcake pan. It will create little wonton cups. Then fill them with this mixture and serve at parties. It is delicious.
Other ingredients you may add to your salpicão:
can of corn
olives
diced apples
raisins
diced ham
diced cheese
Posted by Alessandra on Wednesday Nov 21, 2012
Filed under :Other
Craftsy is a community of crafters from around the world. They offer online classes on everything from quilting & knitting to gardening & cake decorating.
I have taken many classes from them and I always learn something new. I also enjoy the networking. I can ask questions to the teacher, post pictures of my finished projects and connect with other crafters.
The last class I took was on making classic croissants at home from Colette Christian.
(classic croissants and ham and cheese croissants)

(Pain au Chocolat)

I thought the class was very informative. Colette explains all the little details to making croissants. Even the basic details, so it is great for people who may be afraid to try or have never baked before. You can be sure that you will be taken care of in this class and will be able to make these delicious croissants from home.
If you are an expert baker, you may find the class to be a little basic (a little slow) at times, however even then I believe Colette shows some interesting techniques, good reminders and a fail proof recipe. I highly recommend it for everyone at any level.
Craftsy classes are great because you can take notes, the videos are in HD, it is interactive and really fun. I enjoy that I can stop and come back to it later in the day when the kids are naping or I have a quick minute to myself. The classes you purchase are yours to watch whenever you like, as many times as you like. If for any reason you aren’t completely satisfied, Craftsy will refund 100% of the cost of your class, no questions asked.
Now for a little DEAL :
From 11/23-11/26, Craftsy is running its Black Friday/Cyber Monday Sale and all classes are being offered at $19.99 or less. Sweet huh! I usually purchase my classes at this price and keep them in my account for when I can watch them. Hope you enjoy it.
Here are some pictures of my projects from classes I have taken:
Classic Croissants
(Croissants,Pain au chocolat, andHam and Cheese)
Decadent Chocolate Cakes

Dipped, Dusted & Rolled: Handmade Chocolates

Advanced Fondant Techniques

Handcrafted Sugar Flowers

Topsy-Turvy Cake Construction
Classes I have purchase are are waiting for me:
Artisian Bread Making
Artisian Cheese Making
Fashion-Inspired Fondant
Modern Buttercream
Vintage Cakes, Modern Methods
Posted by Alessandra on Friday Nov 16, 2012
Filed under :Desserts

This is a must at our house during Thanksgiving Dinner. Hope you like it as well!
Recipe addapted from America’s Test Kitchen: Pumpkin-Bourbon Cheesecake with Graham Pecan Crust. I really enjoy this recipe. I don’t use bourbon as the original recipe asks. I do add a little more vanilla and sometimes mapple syrup instead of the bourbon. It turns out delicious!!!
Crust:
3 ounces graham crackers
3 T sugar
2 ouces pecans
1/2 t ground ginger
1/2 t cinnamon
1/4 t ground cloves
4 T butter, melted
Pre heat oven to 325 degrees. Spray bottom and sides of 9-inch springform pan evenly with nonstick cooking spray. Pulse crackers, nuts, sugar, and spices in food processor until evenly and finely ground, about fifteen 2-second pulses. Transfer crumbs to medium bowl, drizzle melted butter over, and mix with rubber spatula until evenly moistened. Turn crumbs into prepared springform pan and, using hand, spread crumbs into even layer. Using flat-bottomed ramekin or drinking glass, press crumbs evenly into pan bottom, then use a soup spoon to press and smooth crumbs into edges of pan. Bake until fragrant and browned about the edges, about 15 minutes. Cool on wire rack while making filling.
Filling:
1 1/3 c sugar
1 t cinnamon
1/2 t ground ginger
1/4 t ground cloves
1/4 t ground nutmeg
1/4 t all spice
1/2 t salt
15 ouces can pumpkin
1 1/2 lb cream cheese (room temperature)
1 t vanilla
5 eggs
1 cup cream
1/4 c bourbon (optional)
Bring about 4 quarts water to simmer in stockpot. Whisk sugar, spices, and salt in small bowl; set aside. To dry
pumpkin: Line baking sheet with triple layer of paper towels. Spread pumpkin on paper towels in roughly even layer. Cover pumpkin with second triple layer of paper towels and press firmly until paper towels are saturated. Peel back top layer of towels and discard. Grasp bottom towels and fold pumpkin in half; peel back towels. Repeat and flip pumpkin onto baking sheet; discard towel.
In standing mixer fitted with flat beater, beat cream cheese at medium speed to break up and soften slightly, about 1 minute. Scrape beater and bottom and sides of bowl well with rubber spatula. Add about one third of
sugar mixture and beat at medium-low speed until combined, about 1 minute; scrape bowl and add remaining sugar in two additions, scraping bowl after each addition. Add pumpkin and vanilla and beat at medium speed until combined, about 45 seconds; scrape bowl. Add 3 eggs and beat at medium-low until incorporated, about 1 minute; scrape bowl. Add remaining 2 eggs and beat at medium-low until incorporated, about 45 seconds; scrape bowl. Add heavy cream and bourbon and beat at low speed until combined, about 45 seconds. Using rubber spatula, scrape bottom and sides of bowl and give final stir by hand.
Set springform pan with cooled crust on 18-inch-square doubled layer heavy-duty foil and wrap bottom and sides with foil; set wrapped springform pan in roasting pan. Pour filling into springform pan and smooth
surface; set roasting pan in oven and pour enough boiling water to come about halfway up side of springform pan. Bake until center of cake is slightly wobbly when pan is shaken, and center of cake registers 145 to 150 degrees on instant-read thermometer, about 1 1/2 hours. Set roasting pan on wire rack and use paring knife to loosen cake from sides of pan. Cool until water is just warm, about 45 minutes. Remove springform pan from water bath, discard foil, and set on wire rack; continue to cool until barely warm, about 3 hours. Wrap with plastic wrap and refrigerate until chilled, at least 4 hours or up to 3 days.
TO SERVE: Slide thin metal spatula between crust and pan bottom to loosen, then slide cake onto serving platter. Let cheesecake stand at room temperature about 30 minutes, then cut into wedges and serve.
Brown Sugar Cream (delicious)
1 cup cream
1/2 c sour cream
1/2 c brown sugar
1/8 t salt
2 t vanilla
In bowl of standing mixer, whisk heavy cream, sour cream, brown sugar, and salt until combined. Cover with plastic wrap and refrigerate until ready to serve cheesecake, at least 4 hours or up to 24, stirring once or
twice during chilling to ensure that sugar dissolves.
When ready to serve cheesecake, add vanilla and beat mixture with whisk attachment at medium speed until small bubbles form around edges, about 40 seconds; increase speed to high and continue to beat until fluffy and
doubled in volume, about 1 minute longer. Spoon cream on individual slices of cheesecake

Posted by Alessandra on Tuesday Nov 6, 2012
Filed under :Other

These past couple of days have been way fun for me. My dear husband gave me the gift of taking a couple of cake classes from Carrie’s Cakes. It was a great time away and an amazing experience. Carrie is an amazing instructor. Willing to share her knowledge, experience and expertise. The classes were fun and full of learning experiences for the beginner as well as the more advanced students.
Here are some of my projects. I tried to make each side of my cake different so I could learn as much possible.

I highly recommend her fondant class.

These next pictures are using the Cricuit machine. I am not quite “friendly” with that machine yet, but I am working on it.
Front:

Back:

Check out Carrie’s website http://www.carriescakes.com/. Her cakes are a work of art: inspiring and amazing….
Topsy Turvy Class

Posted by Alessandra on Tuesday Nov 6, 2012
Filed under :Brazilian Recipes, Desserts
I love to spend time with the kids in the kitchen. It is fascinating to see their faces light up when they make a dish or help cook. This recipe was Andrew’s first cake. (made by himself). It is a basic chocolate cake very common in Brazil. I remember making this cake with my mom…
Nega Maluca (Chocolate Cake)

For the Cake:
3 c flour
2 c sugar
4 eggs
1 c oil
1 c chocolate nesquick
1 c warm water
1 T baking powder
For the Syrup:
1 c chocolate nesquick
1 c sugar
2 T butter
1 c milk
Instructions:
For the cake:
Mix all of the cake ingredients but the baking powder together in a large bowl. Mix very well. Then add baking powder to mix.

After it comes together, transfer to a prepared cake pan. (great video with baking tips and such) Bake at 350 until done. To test I usually insert a toothpick in the middle of the cake. It will be done when tooth pick comes out clean.
For the Syrup:
In a sauce pan add nesquick, sugar, butter and milk. Let it come to a boil. Set aside.
Pour the syrup while cake still warm. I usually poke the cake all over, then pour the syrup until it looks nice and moist. I also like to sprinkle chocolate jimmies on top. YUM

Posted by Alessandra on Wednesday Oct 31, 2012
Filed under :Uncategorized
Happy Halloween everyone… Saw this picture and had to share, what a cute idea!

Posted by Alessandra on Thursday Oct 18, 2012
Filed under :Brazilian Recipes, Fish

It is getting cold…. I love to see the pumpkin and all sorts of winter vegetables out. I usually make this recipe a couple of times, and it is a fun one to make for Halloween, because it cooks inside the pumpkin . If you can, go to a pumpkin patch and try to find the Cinderella Pumpkin . It is orange and kind of flat. This type is the one that is most comparable to the one we use in Brasil. If you are not able to find it, any other pie pumpkin would work. Or as you can see in the picture I used a Kabocha Pumpkin. It has a stronger taste, but still delicious.
For this recipe you will want to “clean” your pumpkin first. So grab a sharp knife and get to work. Open a hole on top and of the pumpkin, clean out the seeds and goop. Then wrap it in foil and bake inside a baking dish with a little bit of water until the inside of the pumpkin is soft. It will take about 45 minutes, depending on the size of your pumpkin
Take it out of oven and scoop some of the pumpkin meat out. Reserve.
Now you want to cover the sides of the pumpkin with cheese. I have used a mixture of catupiry and mozzarella cheeses. After the entire sides and bottom has a nice layer of cheese, then fill with the mixture (recipe bellow). Then add a little cheese on top (for taste, haha) and bake it again until bubbly.

Here is a picture of it done.

For the inside mixture:
2 lbs of shrimp (it may take more depending on the size of your pumpkin). I usually go more than less, since we like shrimp here! (this can also be done with chicken or meat)
1-2 T olive oil
2 t garlic (crushed)
1/2 medium onion (diced)
3-4 large tomatoes (diced, no seeds or skin)
1 (8oz) can tomato sauce
2 T butter
Salt and Pepper to taste
About 1 cup or more of the baked pumpkin meat (reserved from preparing the pumpkin)
1 can of creme de leite (table cream)
In a large sauce pan, sautee the garlic and onions in the olive oil. Add shrimp, cook a little bit, then add tomatoes, tomato sauce, butter and seasonings. Let it cook. It will make a sauce. If necessary add a little water. After sauce is done, add the pureed pumpkin meat and the table cream. Pour this mixture into your pumpkin.
ps: if you prefer, you can make the sauce first and then add the shrimp last. This will prevent overcooking the shrimp. Still sautee them and season to taste. Then add to the creamy tomato sauce 😉
Posted by Alessandra on Thursday Sep 27, 2012
Filed under :Appetizers, Brazilian Recipes, Breads, Catupiry, Chicken, The Dairing Kitchen
Patri of the blog, Asi Son Los Cosas, was our September 2012 Daring Bakers’ hostess and she decided to tempt us with one of her family’s favorite recipes for Empanadas! We were given two dough recipes to choose from and encouraged to fill our Empanadas as creatively as we wished!

5-1/3 cups bread flour
2 cups of lukewarm water
1 tablespoon dry yeast or (1 oz) fresh yeast
2 teaspoons salt
4 tablespoons oil (you can use oil from the pan where you have cooked the filling)
1 large egg, for egg wash
Directions:
Shift the flour into a big bowl and make a well in the middle. Rub the yeast in with your fingers. In a small bowl, mix the water and the salt.
Now, using your fingers or a wooden spoon, start adding the water and mixing it with the flour-yeast mixture. Keep on working with your fingers or spoon until you have added enough water and all the flour has been incorporated and you have a messy ball of dough.
On a clean counter top, knead the dough for approximately 10 minutes
You could do all the above using a stand mixer, in that case mix the ingredients with the paddle attachment until mixed and then switch to a dough hook and knead on low for about 6 minutes.
Clean and oil the big bowl you used for mixing and place the kneaded dough in it. Cover it with a napkin or piece of linen and keep it in a warm, draught-free place for approximately 40 to 50 minutes.

Once risen, turn the dough back into a floured counter and cut it in half. Cover one half with the napkin to prevent drying.
Spread the other half of the dough using a rolling pin. You can use a piece of wax paper over the counter, it will make it easier to move the dough around. Depending on the shape of your oven pan or cookie sheet, you will make a rectangle or a round.
Now, the thinness of the dough will depend on your choice of filling and how much bread you like in every bite. For your first time, make it about 3mm thin (about 1/10th of an inch) and then adjust from that in the next ones you make.
Assembling the empanada:
If you haven’t used wax paper, either lightly flour or line with wax paper your pan or tray.
Cover the base and sides with the dough. Using the rolling pin or a knife, cut the extra dough.

Place the filling, making sure it is cold and that all the base is covered. Using a hot filling will make the bottom layer of the empanada become soggy. Be careful to avoid adding too much oil from the filling, try to make it as “dry” as possible.

Start preheating your oven to moderate 350°F.
Take the other half of the dough and spread it out to the same or less thinness of the base. You can use a piece of wax paper for this too. Take into account that this “top” dough needs to be smaller around than the bottom, as it only needs to cover the filling.
If not using wax paper, move carefully the top to cover the filling. If using wax paper, transfer the dough, turn upside down, cover the filling and gently peel off the wax paper.
Using your fingers, join bottom and top dough, when you have gone all the way around, start pinching top and bottom together with your thumb and index finger and turning them half way in, that way you end up with a rope-like border. As a picture is worth a thousand words, please watch this video to see how it is done.
When you are finished, make a 1 inch hole in the middle of the top layer. This will help hot air exit the empanada while it’s baking without breaking the cover.
You can use left-over dough to decorate the empanada, using rounds, bows, lines… let your imagination flow and make it pretty!

Using a fork, prick the top layer or, using scissors, make snips that go all the way through the top layer
In a small bowl, beat an egg and add a tbsp of cold water. With the pastry brush, paint the top of the empanada with the egg wash.
Place the empanada in the oven and bake for about 45 minutes. Check that the bottom part is done.

I used a chicken and catupiry filling. Recipe here: Creamy Chicken
Other possible fillings:
Cod
400 gm (14 oz) chopped onion (approximately 1 big onion or 2 medium-sized ones) 2 garlic cloves ¾ cup (180 ml) Olive oil 300 gm (10½ oz) salted cod, washed and cleaned (you put it in fresh water 24 hours before, change the water four times) 100 gm (3½ oz) raisins 100 gm (3½ oz) cured ham or bacon (not smoked) A few strands of saffron
- When vegetables are cooked, turn off the heat. Add the saffron and the raisins. Cut cod and ham (or bacon) in less than bite sized pieces, and add. Stir everything together.
- Add salt as needed (we do this at the end because the amount of salt will depend on how salty your fish remains after the unsalting and how salty your cured ham or bacon is).
- Allow to cool for at least half an hour before filling the empanada.
Filling Directions:
- Finely chop the onion and garlic.
- Heat the oil in a skillet and add the onion and garlic, fry over medium heat until the onion is transparent (you do not want the onion to brown at all).
Tuna fish filling:
Ingredients
400 gm (14 oz) chopped onion (approximately 1 big onion or 2 medium-sized ones) 200 gm (7 oz) tomatoes (peeled and seeded) 1 small red pepper 2 garlic cloves ¾ cup (180 ml) olive oil 1 can (6.5 – 7 oz / 180 gm – 200 gm) of tuna fish in oil, drained 1 hard-boiled egg 1 teaspoon sweet paprika (optional)
Directions:
- Heat the oil in a skillet
- Fry the finely chopped onions, pepper and garlic until the vegetables are soft. Add then the tomatoes, chopped small, and cook until done.
- Turn off heat and add the tuna fish and hard boiled egg, cut into less than bite sized pieces.
- If adding the paprika, do so now and stir into the frittata.
- Allow to cool for at least 30 minutes.
Ground meat filling:
Ingredients
400 gm (14 oz) chopped onion (approximately 1 big onion or 2 medium-sized ones) 200 gm (7 oz) tomatoes (peeled and seeded) 1 small green pepper 2 garlic cloves ¾ cup (180 ml) olive oil 300 grams (2/3 pound or 10.5 ounces) minced (ground) meat 1 teaspoon sweet paprika
Directions:
- Heat the oil in a skillet
- Fry the finely chopped onions, pepper and garlic until the vegetables are soft. Add then the tomatoes, chopped small, and cook until done.
- Add the meat and cook for about 5 minutes.
- Add the paprika, and stir into the frittata.
- Allow to cool for at least 30 minutes.
- Fill the empanada en bake as indicated.
Ham and cheese filling:
Ingredients
10½ oz (300 gm) ham 10½ oz (300 gm) cheddar type cheese (any sandwich cheese will do)
Directions:
- This is the simplest of fillings. You only need to layer prettily the ingredients, starting and ending with ham, to keep the melted cheese inside.
Pork loin and red pepper filling:
Ingredients
10½ oz (300 gm) pork loin (one piece) 1 big red pepper (capsicum) , cut into thin slices 1 small onion, cut into thin slices 2 garlic cloves 1 tablespoon (15 ml) (6 gm) paprika ½ tablespoon (3 ml) dried oregano salt
Directions:
- 24 hours in advance, marinate the pork loin: for this, mix the oregano, paprika and the garlic cloves (very finely chopped) with salt to taste. Rub this marinade all around the meat, put into a sealable plastic bag and keep in the fridge for 24 hours.
- Take the meat out of the bag and cut into thin fillets (about 0,5mm)
- Cover the bottom part of the empanada with the fillets
- Cover the fillets with the slices of onion and pepper. Sprinkle salt on top.
- Cover the empanada and bake in a preheated oven to moderate 350°F/180ºC/gas mark 4. As this empanada starts with all raw ingredients, it will take about 15 minutes longer to bake. Just check that the underside of the empanada is golden. If it is, it’s cooked. If it isn’t, put it in the oven again and check after 10 minutes.
Get creative!!