Posted by Alessandra on Sunday Jul 3, 2011
Filed under :Brazilian Recipes, Desserts
Erica of Erica’s Edibles was our host for the Daring Baker’s June challenge. Erica challenged us to be truly DARING by making homemade phyllo dough and then to use that homemade dough to make Baklava
I decided to make phyllo dough and use it to make a Brasilian treat (canudinhos) filled with doce de leite. It turned out amazing! I was a bit skeptical with this recipe to use for Baklava, but I think this dough will be perfect. It rolls out so thin and it is super easy to make it. Thanks Erica for sharing it with us!
Ingredients:
1 1/3 cups unbleached all purpose (plain) flour
1/8 teaspoon salt
1/2 cup less 1 tablespoon water, plus more if needed
2 tablespoons vegetable oil, plus additional for coating the dough
1/2 teaspoon cider vinegar, (could substitute white wine vinegar or red wine vinegar, but could affect the taste)
Directions:
1. In the bowl of your stand mixer combine flour and salt
2. Mix with paddle attachment
3. Combine water, oil and vinegar in a small bowl.
4. Add water & oil mixture with mixer on low speed, mix until you get a soft dough, if it appears dry add a little more water (I had to add a tablespoon more)
5. Change to the dough hook and let knead approximately 10 minutes. You will end up with beautiful smooth dough. If you are kneading by hand, knead approx. 20 minutes.
6. Remove the dough from mixer and continue to knead for 2 more minutes. Pick up the dough and through it down hard on the counter a few times during the kneading process.
7. Shape the dough into a ball and lightly cover with oil
8. Wrap tightly in plastic wrap and let rest 30-90 minutes, longer is best ( I let mine rest 2 hours and it was perfect)
Rolling your Phyllo
* Remove all rings and jewelry so it does not snag the dough*
Use whatever means you have to get the dough as thin as you can. I have included a fantastic video at the end of the post on how to roll out your phyllo dough, using a wooden dowel, which worked perfectly for me. You may also use a pasta machine if you have one, or a normal rolling pin whatever works for you.
1. Unwrap your dough and cut off a chunk slightly larger then a golf ball. While you are rolling be sure to keep the other dough covered so it doesn’t dry out.
2. Be sure to flour your hands, rolling pin and counter. As you roll you will need to keep adding, don’t worry, you can’t over-flour.
3. Roll out the dough a bit to flatten it out.
4. Wrap the dough around your rolling pin/dowel
5. Roll back and forth quickly with the dough remaining on the dowel (see attached video for a visual, its much easier then it sounds)
6. Remove; notice how much bigger it is!
7. Rotate and repeat until it is as thin as you can it. Don’t worry if you get rips in the dough, as long as you have one perfect one for the top you will never notice.
8. When you get it as thin as you can with the rolling pin, carefully pick it up with well floured hands and stretch it on the backs of your hands as you would a pizza dough, just helps make it that much thinner. Roll out your dough until it is transparent. NOTE: you will not get it as thin as the frozen phyllo dough you purchase at the store, it is made by machine
9. Set aside on a well-floured surface. Repeat the process until your dough is used up. Between each sheet again flower well. You will not need to cover your dough with a wet cloth, as you do with boxed dough, it is moist enough that it will not try out.
To make the canudinhos, cut the dough into one inch strips, roll them in the cone shaped canudo makers. Fry in medium hot oil. Fill them with your favorite filling. I used doce de leite and nutella. YUM
Posted by Alessandra on Thursday May 12, 2011
Filed under :Brazilian Recipes, Desserts
I remember this candy from my childhood. My mom used to love them. They have a texture of a caramel, but taste like sugar and bananas. I decided to try to make it from home and see how they turned out. I have to say I like the homemade a bit more than the ones we can buy packaged in Brasil. Hope you enjoy them as well:
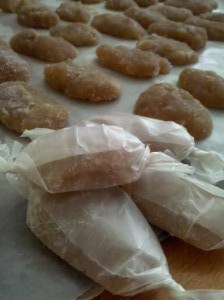
4 ripened bananas about 400 grms
1 3/4 c sugar
1 T butter
1 T lemon juice
1 T Nesquik chocolate
In a sauce pan, mix all together (slice the bananas). You want to cook it on medium high heat for about about 8-10 minutes.
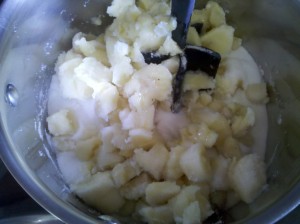
It will start to turn into a caramel color and the bananas will melt. Then lower the heat to about medium to medium-low. Cook for another 10-15 or until the mixture is thicken and comes loose from pan.
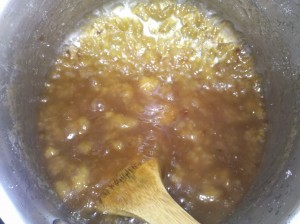
Spread mixture into a buttered pan ( I used a square cake pan)
Refrigerate it over night. Cut into rectangular slices or any shape you may like.
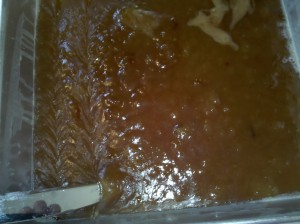
Roll each individual shape into some sugar and set them aside in a cookie sheet lined with wax paper.

Leave it out (room temp) for at least 1 day until it hardens a bit.
I then rolled each candy into a piece of wax paper. You can use any type of candy wrapper to make it more fun! Enjoy

Posted by Alessandra on Sunday Mar 27, 2011
Filed under :Desserts, The Dairing Kitchen
The March 2011 Daring Baker’s Challenge was hosted by Ria of Ria’s Collection and Jamie of Life’s a Feast. Ria and Jamie challenged The Daring Bakers to bake a yeasted Meringue Coffee Cake.
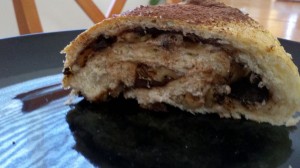
This was a delicious, amazing coffee cake recipe. This recipe will make 2 cakes. I made one with dark dove chocolate and one with mixed berries. The dough is fabulous.
FILLED MERINGUE COFFEE CAKE (From the Daring Kitchen Archives)
Makes 2 round coffee cakes, each approximately 10 inches in diameter
The recipe can easily be halved to make one round coffee cake.
Ingredients:
4 cups flour
¼ cup sugar
¾ teaspoon salt
1 package active dried yeast
¾ cup whole milk
¼ cup water)
½ cup unsalted butter at room temperature
2 large eggs at room temperature
For the meringue:
3 large egg whites at room temperature
¼ teaspoon salt
½ teaspoon vanilla
½ cup sugar
For the Chocolate filling:
1 cup chopped pecans or walnuts
2 Tablespoons granulated sugar
¼ teaspoon ground cinnamon
1 cup semisweet chocolate chips or coarsely chopped chocolate
For the Mixed Berry filling:
1 1/2 cups mixed berries
2 Tablespoons granulated sugar
¼ teaspoon ground cinnamon
Egg wash: 1 beaten egg
Cocoa powder (optional) and confectioner’s sugar (powdered/icing sugar) for dusting cakes
Directions:
Prepare the dough:
In a large mixing bowl, combine 1 ½ cups of the flour, the sugar, salt and yeast.
In a saucepan, combine the milk, water and butter and heat over medium heat until warm and the butter is just melted.
With an electric mixer on low speed, gradually add the warm liquid to the flour/yeast mixture, beating until well blended. Increase mixer speed to medium and beat 2 minutes. Add the eggs and 1 cup (150 g) flour and beat for 2 more minutes.
Using a wooden spoon, stir in enough of the remaining flour to make a dough that holds together. Turn out onto a floured surface (use any of the 1 ½ cups of flour remaining) and knead the dough for 8 to 10 minutes until the dough is soft, smooth and elastic, keeping the work surface floured and adding extra flour as needed.
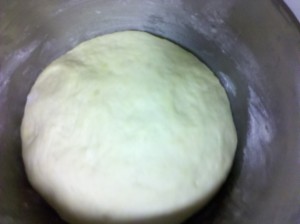
Place the dough in a lightly greased (I use vegetable oil) bowl, turning to coat all sides. Cover the bowl with plastic wrap and a kitchen towel and let rise until double in bulk, 45 – 60 minutes. The rising time will depend on the type of yeast you use.
Prepare your filling:In a small bowl, combine the cinnamon and sugar for the filling if using. You can add the chopped nuts to this if you like, but I find it easier to sprinkle on both the nuts and the chocolate separately.
Once the dough has doubled, make the meringue:
In a clean mixing bowl – ideally a plastic or metal bowl so the egg whites adhere to the side (they slip on glass) and you don’t end up with liquid remaining in the bottom – beat the egg whites with the salt, first on low speed for 30 seconds, then increase to high and continue beating until foamy and opaque. Add the vanilla then start adding the ½ cup sugar, a tablespoon at a time as you beat, until very stiff, glossy peaks form.
Assemble the Coffee Cakes:
Line 2 baking/cookie sheets with parchment paper.
Punch down the dough and divide in half. On a lightly floured surface, working one piece of the dough at a time (keep the other half of the dough wrapped in plastic), roll out the dough into a 20 x 10-inch rectangle. Spread half of the meringue evenly over the rectangle up to about 1/2-inch from the edges. Sprinkle filling of choice evenly over the meringue
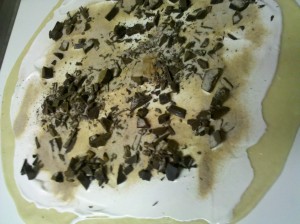
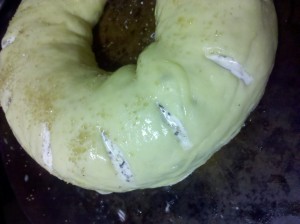
Now, roll up the dough jellyroll style, from the long side. Pinch the seam closed to seal. Very carefully transfer the filled log to one of the lined cookie sheets, seam side down. Bring the ends of the log around and seal the ends together, forming a ring, tucking one end into the other and pinching to seal.
Using kitchen scissors or a sharp knife (although scissors are easier), make cuts along the outside edge at 1-inch intervals. Make them as shallow or as deep as desired but don’t be afraid to cut deep into the ring.
Repeat with the remaining dough, meringue and fillings.
Cover the 2 coffee cakes with plastic wrap and allow them to rise again for 45 to 60 minutes.
Preheat the oven to 350°F (180°C).
Brush the tops of the coffee cakes with the egg wash. Bake in the preheated oven for 25 to 30 minutes until risen and golden brown. The dough should sound hollow when tapped.
Remove from the oven and slide the parchment paper off the cookie sheets onto the table. Very gently loosen the coffee cakes from the paper with a large spatula and carefully slide the cakes off onto cooling racks. Allow to cool.
Here is the chocolate one:

Here is the berry one:

Just before serving, dust the tops of the coffee cakes with confectioner’s sugar as well as cocoa powder if using chocolate in the filling. These are best eaten fresh, the same day or the next day.
Posted by Alessandra on Thursday Feb 3, 2011
Filed under :Desserts
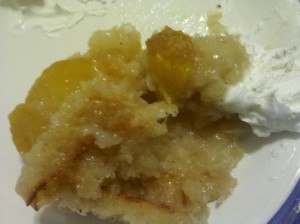
1 cube butter
1 c sugar
1 c flour
1/2 t baking powder
3/4 c milk
1 1/2 – 2 cups fruit (I used a quart jar of home canned peaches)
1 t cinnamon
Dash nutmeg
Melt butter in a 9×13 baking pan. Mix the sugar, flour, baking powder, cinnamon, nutmeg and milk in a bowl. Pour it on top of the butter. Add fruit on top (don’t mix it).
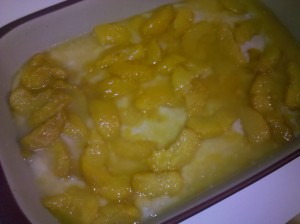
Bake at 350 for 30-40 minutes. The fruit will end up going to the bottom, and the cake like mix will go to the top (there is the magic!). Serve with ice cream, or whipped cream.
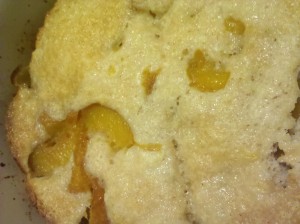
PS: You could use fresh or canned fruit. You can also use other fruits like pineapple, apples or berries. YUM
Posted by Alessandra on Friday Jan 7, 2011
Filed under :Brazilian Recipes, Desserts
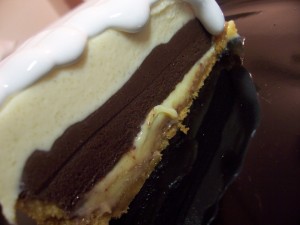
As some of you may know, I found out that I am pregnant. With this pregnancy came a delightful craving for lime pie. I used to go to the bakeries in Brasil and have this delicious pie. I figured I would make some. But instead of a simple lime pie, it ended up as lime, chocolate truffle and mousse pie. Even better, right?
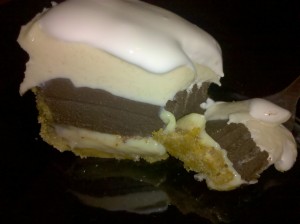
For the crust:
1 1/2 c graham cracker
1/3 c butter (melted)
Using a blender or food processor, break the crackers until fine dust. Mix with the butter. Press into a 8 inch springform pan. Cook at 350 for about 8-10 minutes.
Layer 1- Lime Custard:
1 can sweetened condensed milk
3 egg yolks
1/3-1/2 c lime juice (depending how tart you may like it)
Mix it together, put on top of prepared crust and bake at 350 for about 8 minutes. Refrigerate until firm.
Layer 2: Chocolate Truffle
300 grms dark chocolate (or milk chocolate)
1 can table cream (creme de leite)
1 T butter
2 T nutella
1/2 pkg of unflavored gelatin (dissolved in 1/4 c water)
Melt the chocolate, mix table cream, butter nutella, and gelatin. Pour on top of first layer. Refrigerate until firm.
Layer 3- Lime Mousse:
1 can sweetened condensed milk
1 can table cream (creme de leite)
1/2 c lime juice
1/2 pkg unflavored gelatin (dissolved in 1/4 cup water)
Mix it all together. Pour on top of second layer. Refrigerate for at least 4 hours.
You can decorate this pie with chocolate shavings, lime zest or meringue frosting. YUM
Posted by Alessandra on Thursday Dec 23, 2010
Filed under :Brazilian Recipes, Desserts
In Brazil, we celebrate Christmas late at night on Christmas Eve. I remember trying to stay awake for dinner and being so excited that as soon as midnight hit, I could open my presents. Christmas dinner is a serious meal 😀 We call it “ceia de Natal”. Usually, you will find different types of rice, farofas, turkey, ham, pernil (pork shoulder), salads, fruits and a lot of friends and family around (so you can eat all this food).
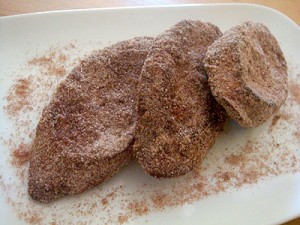
Going back to the Rabanada, this traditional Brazilian treat is very well known in the US as French Toast. My mom would sometimes “spoil” our dinner with Rabanada, as we kids just couldn’t wait for the late night eating. Rabanada is usually served as a Christmas dessert amongst many other delicious treats, flans, cakes, etc. The word Rabanada literally means “blown tail”. (Such a weird name.) We make this using day old French bread, which is soaked in a egg and milk mixture, then fried and lastly sprinkled with cinnamon and sugar. Different from the United States, Brasilians don’t use maple syrup. Some people will make a Port wine syrup to drizzle on top of the Rabanada. I have never done this. The sweet bread is fine by itself!
Hope you like it:
French Bread (sliced)
1 can sweetened condensed milk
1 1/2 c milk
3 eggs
oil or butter to fry
1/2 c sugar
1/4 c cinnamon
Mix the sweetened condensed milk, milk and eggs. Soak the slices of bread in this mixture. You may just want to get the bread wet instead of soaking it. It just depends how soggy you like your bread. Fry the bread either in oil or butter. I much prefer butter (yeah not a healthy meal)! You want the bread to get some color, it will take 2-3 minutes on each side. Mix the sugar and the cinnamon and sprinkle both sides of the bread with it. Generously! Enjoy. I like to eat it warm.
Final Note: I have also seen some people bake the Rabanada instead of frying it. For baking, you would use a baking dish, pour the milk mixture on top of the bread and bake until the liquid thickens. It makes the bread a lot softer, but it will still taste good!
Posted by Alessandra on Wednesday Oct 27, 2010
Filed under :Desserts, The Dairing Kitchen
The October 2010 Daring Bakers challenge was hosted by Lori of Butter Me Up. Lori chose to challenge DBers to make doughnuts. She used several sources for her recipes including Alton Brown, Nancy Silverton, Kate Neumann and Epicurious.
One of the recipes we could choose from was a recipe called Bomboloni, which is a doughnut like dough but the shape is a circle. This reminded me of sonhos. A delicious Brasilian dessert. I remember coming out of classes and smelling sonhos being made at the school cafeteria. This is exactly how my house smelled like when I make this recipe. It made me home sick.
Ingredients
1/3 cup + 1 Tablespoon Lukewarm water
3 ¼ teaspoon Active Dry Yeast
1.5 Tablespoon Honey
3 cup All Purpose Flour
3 Tablespoon Milk
6 Egg Yolk
1/3 cup White Granulated Sugar + more for rolling
2 teaspoon Salt
Tablespoon Butter, Unsalted
3 cup Canola Oil (for frying)
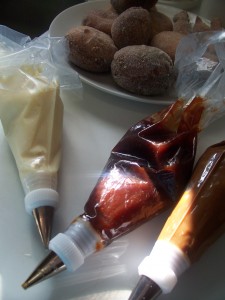
Jam, preserves, or jelly (I used doce de leite, goiabada and cream)
In the bowl of a standing electric mixer, mix the water, yeast, honey and 1 cup plus 2 tablespoons (160 gm) of the flour. (Alternatively, whisk the ingredients by hand.) Cover with plastic wrap and let stand at room temperature until foamy, about 1 hour.
Return the bowl to the mixer, fitted with a dough hook. Add the remaining 1 ¾ cups plus 2 tablespoons (260 gm) of flour, along with the milk, egg yolks, 1/3 cup of granulated sugar and the salt. Mix at low speed until blended, then add the butter and knead at medium speed until silky but sticky, about 5 minutes; the dough will not pull away from the side of the bowl.
Using an oiled spatula, scrape the dough into an oiled bowl and cover with plastic wrap. Refrigerate overnight.
In a large saucepan, heat the canola oil to 360°F/180°C. Line a rack with paper towels. Fill a shallow bowl with 1/2 inch of granulated sugar. On a lightly floured surface, roll out the dough a scant 1/2 inch (12 mm) thick. Using a 2-inch (50 mm) round biscuit cutter, stamp out rounds. The original recipe said to not re-roll the dough, but I did and found it to be fine.
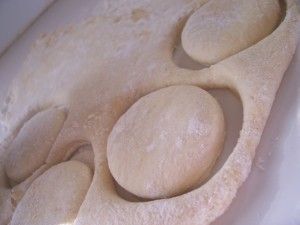
Fry the rounds, 4 to 5 at a time, until they are browned, about 4 minutes (mine only took about a minute each – try to go more by sight). Be sure to keep the oil between 360°F and 375°F (180°C and 190°C). Drain the bomboloni on paper towels.
Roll them in the granulated sugar.
Fit a pastry bag with a plain donut tip (or a 1/4-inch (6 mm) tip) and fill with the preserves (you can also use a squeeze bottle). Poke the tip three-fourths of the way into the bomboloni and squeeze in the preserves, pulling the tip out slightly as you squeeze to fill them as much as possible.
Serve warm.

Posted by Alessandra on Thursday Oct 14, 2010
Filed under :Brazilian Recipes, Desserts
According to holiday insights calendar today is National Dessert Day. When I think of dessert from Brasil, I always think sweetened condensed milk, which then brings memories of Brigadeiro. This dessert was created in the 1940s and is still popular today. This truffle like goodness is served at pretty much every type of party in Brasil: weddings, birthdays, get togethers or just a sweet tooth desire. They are easy to make and delicious!
1 can sweetened condensed milk
1 T butter
3-4 T Nestlé Nesquik (you could use cocoa powder for a stronger taste, or melted chocolate)
Mix all ingredients in a sauce pan. Choose one that has a thick bottom, this way you will be less likely to burn your candy.
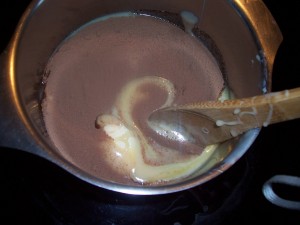
Mix it constantly. Don’t stop mixing it. It will take about 10 minutes on medium high heat. It will start to thicken, lower the heat to medium low and continue mixing it (in a figure 8 pattern). Do this until the mixture is thick and comes out of the bottom of the pan, like the picture bellow. I usually twist the pan to one side a little bit and if it looks like the picture it is ready!
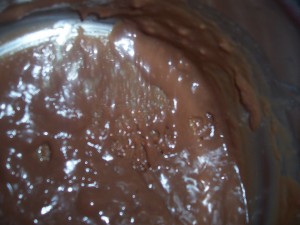
Pour the mixture on a plate and let it cool. When cooled, roll it into little ball shapes and dip them into chocolate sprinkles.
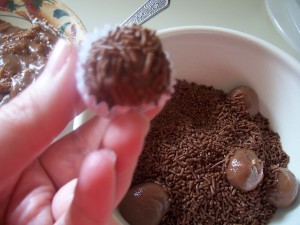
You can also use this to fill or top cakes. Just make sure to take the brigadeiro off of the heat just before it thickens too much. Pour this heavenly chocolate gooey deliciousness on top of your cake and voila!
Posted by Alessandra on Thursday Oct 7, 2010
Filed under :Brazilian Recipes, Desserts
1 c rice
2 c water
4 c milk
1 1/2 – 2 c sugar
Cinnamon to taste
2-3 T sweetened condensed milk
In a sauce pan, add milk and sugar. (Add the 1 and ½ c sugar to the milk and taste the milk. If it is not sweet add more sugar.) Bring it to boil, turn heat to medium low and let it cook, stirring it occasionally. This will thicken over time. (I do this then I start cooking the rice, this way this mixture will have been cooking for about 30 minutes or so before you start adding it to the rice.)
In another sauce pan, add rice and water. Let it boil until rice is almost soft. It will take about 20 minutes. Then start adding the milk mixture, little by little. The milk mixture will keep cooking in the first sauce pan, making it thicker. As you add each ladle of the milk mixture to the rice, it will sweeten the rice and it also will become thicker.
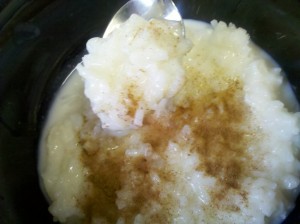
Add some sweetened condensed milk to taste. I also like to add cinnamon. Sometimes I will add a stick of cinnamon to the milk while it is cooking. This will flavor the milk and add a gentle cinnamon taste to the pudding.
Posted by Alessandra on Monday Sep 27, 2010
Filed under :Desserts, The Dairing Kitchen
The September 2010 Daring Bakers’ challenge was hosted by Mandy of “What the Fruitcake?!” Mandy challenged everyone to make Decorated Sugar Cookies based on recipes from Peggy Porschen and The Joy of Baking.
She set the theme for the cookies as “September”. We were inspired to bake any shape, size or color that means “September” for us. Since I am from Brasil and September is Brasil’s independence month I thought of making something that had to do with Brasil!

Basic Sugar Cookies:
Makes Approximately 36x 10cm / 4″ Cookies
½ cup + 6 Tbsp Unsalted Butter, at room temperature
3 cups + 3 Tbsp All Purpose / Plain Flour
1 cup Caster Sugar / Superfine Sugar
1 Large Egg, lightly beaten
1 tsp Vanilla Extract / Or seeds from 1 vanilla bean
Directions
• Cream together the butter, sugar and any flavorings you’re using. Beat until just becoming
creamy in texture.
• Beat in the egg until well combined, make sure to scrape down the sides of the bowl. Add the sifted flour and mix on low until a non sticky dough forms.
• Knead into a ball and divide into 2 or 3 pieces.
• Roll out each portion between parchment paper to a thickness of about 0.2 inch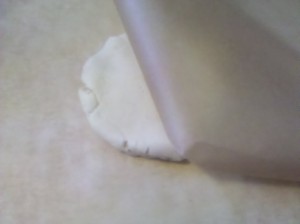
• Refrigerate for a minimum of 30mins.
• Tip: Recipes commonly just wrap the whole ball of dough in clingwrap and then refrigerate it for an hour or overnight, but by rolling the dough between parchment, this shortens the chilling time and then it’s also been rolled out while still soft making it easier and quicker.
• Once chilled, peel off parchment and place dough on a lightly floured surface.
• Cut out shapes with cookie cutters or a sharp knife.
• Arrange shapes on parchment lined baking sheets and refrigerate for another 30mins to an hour.
• Tip: It’s very important you chill them again otherwise they’ll spread while baking.

• Re-roll scraps and follow the above process until all scraps are used up.
• Preheat oven to 350°F
• Bake until golden around the edges, about 8-15mins depending on the size of the cookies.
• Leave to cool on cooling racks.
• Once completely cooled, decorate as desired.
• Tip: If wrapped in tinfoil/cling wrap or kept in airtight containers in a cool place, un-decorated
cookies can last up to a month.
I used half of the recipe to cut my shapes. The other half I wrapped it in plastic wrap and frooze it for later use. I also got a little bit of the dough and flavored with lemon, coconut and chocolate cherries to see how they turn out.
Royal Icing:
2½ – 3 cups Icing / Confectioner’s / Powdered Sugar, unsifted
2 Large Egg Whites
2 tsp Lemon Juice
1 tsp Almond Extract, optional
Directions:
• Beat egg whites with lemon juice until combined.
• Tip: It’s important that the bowls/spoons/spatulas and beaters you use are thoroughly cleaned and grease free.
• Sift the icing sugar to remove lumps and add it to the egg whites.
• Tip: I’ve listed 2 amounts of icing sugar, the lesser amount is good for a flooding consistency, and the larger amount is for outlining, but you can add even more for a much thicker consistency good for writing. If you add too much icing sugar or would like to make a thinner consistency, add very small amounts of water, a few drops at a time, until you reach the consistency you need.
• Beat on low until combined and smooth.
• Use immediately or keep in an airtight container.
• Tip: Royal Icing starts to harden as soon as it’s in contact with air so make sure to cover containers with plastic wrap while not in use.
Decorating Your Cookies:
I outlined the shape of the cookie with the royal icing. Then you are going to use a technique called flooding. All you need to do for this is to thin out the royal icing a little bit with water. (Drag a knife through the surface of the Royal Icing and count to 10. If the surface becomes smooth between 5 & 10 seconds, the icing is at the correct consistency.) After you get your desired consistency just fill in the outlined areas.

You can also use this a toothpick to make some fun designs 😀


