Posted by Alessandra on Monday Aug 30, 2010
Filed under :Uncategorized
If you receive the Sunday paper, yesterday you most likely got a $1/3 coupon for Libby’s vegetables . This means that you can get 3 cans of vegetables for FREE at Maceys!!! Since I signed up for 5 copies of the Sunday paper, that means I get 15 cans of vegetables for FREE! Isn’t that sweet?

Thanks Savvyshopperdeals.com! Check them out, they also have a link for a printable coupon $1/3 cans of Libby’s from redplum!
Love Freebies!
If you have questions about signing for the Daily Herald, Salt Lake Tribune or Deserets News, contact me. I can get you an exclusive discount!
Posted by Alessandra on Friday Aug 27, 2010
Filed under :Brazilian Recipes, Side Dish
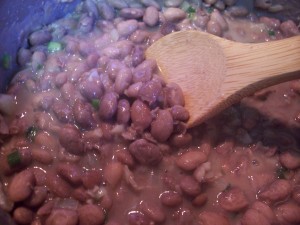
Brazilian Beans
2 cups beans (black, red or pinto beans)
4 cups water (or more)
1 medium size chopped onion
4-5 cloves of garlic
3 tablespoon olive oil
Salt and pepper
Green onions (optional)
Optional: cut bacon (or Canadian bacon) or 1 sliced Portuguese sausage
How to make it:
Cover beans with water in a pressure cooker, (water level should be about 2-3 inches above the beans). Close the pressure cooker and place at medium heat. It will take about 30-40 minutes to cook the beans after the pan is pressurized (steam starts blowing out). After the beans have cooked, let the pressure cooker cool completely before opening it to check if beans are soft enough. If they aren’t cook for longer. The whole process takes about 1 hour.
Note: ALWAYS wait for your pressure cooker to cool down before you open it!
If you don’t have a pressure cook, let the beans soak overnight and use a sauce pan to cook the beans. Same process, just cover them with water (about 2-3 inches above the beans). Cook until beans are soft.
Here is where the Brazilian part comes from….
In a sauce pan saute the garlic and onions with the oil. Add the boiled beans, salt, pepper and green onions. Let the beans cook until liquid gets thicker. It will take about 20-30 minutes. Taste for seasoning; if needed add more salt.
You could also add the bacon/sausage during this time.
If your sauce is not getting thicker, smash about 1/4 cup of the beans with a fork and mix it with the rest.
Posted by Alessandra on Monday Aug 23, 2010
Filed under :Desserts
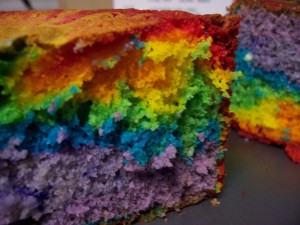
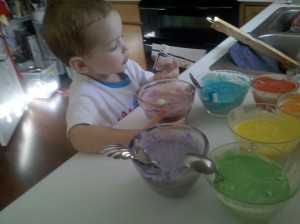
I have been talking about rainbows with my son, telling him stories, etc. I thought it would be fun to make a rainbow cake with him. He is always cooking with me in the kitchen. This was a fun, messy project. Just as any project with a 2 year old would be. I saw this idea online in many other blogs and decided to try it.
Rainbow Cake:
For the cake: (you may use a box of yellow or white cake mix)
6 eggs
2 1/2 c sugar
3 c flour
1 T baking powder
1 1/4 c milk or water
1 t vanilla
8 T butter (melted)
Mix the milk (or water) with the butter and vanilla. Set aside. Using an eletric mixer, beat the egg whites until soft peaks. Add the yolks, one at a time. Mix in the sugar until fluffy. Add 1 cup of flour and 1/2 of the liquid mixture. Keep doing this until all the flour is used. Stir in the baking powder.
For the Colors:
I used gel colors from Wilton. They give a nice vibrant color. You may also use liquid if you want.
You will need the colors of the raibowl: red, orange, yellow, green, blue, indigo and violet (I used the same for the last 2 colors)
Divide the cake batter until 7 containers and color each one with its color.

Spray a cake pan with oil and dust it with flour. Then add the colors one by one on top of each other.
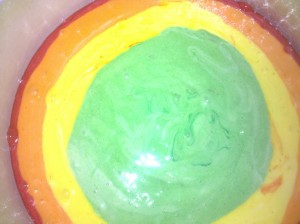
Bake for about 35- 40 minutes or until cake is done.
You may decorate as much as you want. I decided to leave my without a frosting. I used a little bit of orange juice and sugar to make a syrup and drizzled that on top of the cake.
My son had a lot of fun making this with me. He is still asking for the rainbow cake every day!!!
Posted by Alessandra on Monday Aug 16, 2010
Filed under :Sauces and Dips
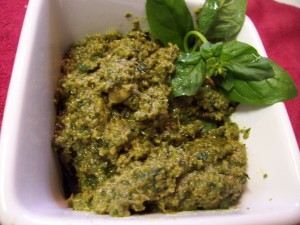
I love pesto sauce. I usually plant Basil, however this year I was not very lucky. I planted my beautiful basil and they were going great, until a little dog of mine decided to eat it all! And I never got to go plant more… busy summer! However a dear friend of mine gave me some of her delicious fresh sweet basil and this is what happened to it:
Pesto Sauce:
2 cups basil leaves (you may also use the flowers)
2/3 c toasted pine nuts
5 clothes of garlic
Salt and Pepper to taste
1/4 c shredded Parmesan cheese
1/3 c olive oil (may need a little more)
Wash and dry your basil leaves.

In a sautee pan, toast the pine nuts slightly. Keep an eye on it!

This time I used my Magic Bullet, but usually I make this on a food processor. Add the basil, pine nuts, garlic, Parmesan, salt and pepper.
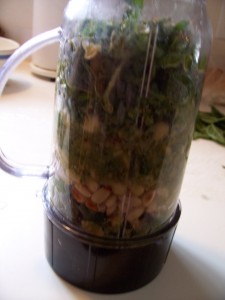
If you are using the magic bullet add the olive oil with all the other ingredients. You may need to add a little bit of water just to get things going, pulse until it is all mixed.
If using a food processor, mix the ingredients and slowly add the olive oil until it all blends in nicely.

I love to use pesto sauce for sauces (if you want creamy add a little bit of cream or Alfredo sauce to it), pizzas, shrimp. It is also a delicious spread for toast. Enjoy it!
PS: This is a very strong pesto. That is the way we like it in our house 😉
Posted by Alessandra on Monday Aug 9, 2010
Filed under :Desserts
I will always remember my first bite of cheesecake. I was having a difficult day and my American Mom/friend (what a wonderful woman) told me that it was time she introduced me to cheesecake. I translated the word in my head, cheese= queijo, cake= bolo, “bolo de queijo”. Huh?!? No thanks! But she insisted and I tried it. Yes it was a love at first bite! So good…
Cheesecake is also a lot of fun to make. It can be a little tricky to keep the top from cracking, but even if the top cracks it is still cheesecake and it is still delicious! I will also share some tricks about keeping your top nice and smooth at the end of this post!
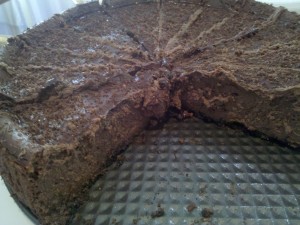
Bunches of Chocolate Cheesecake:
Preheat oven to 350 degrees F if using a silver spring form pan, or 325 degrees F if using a dark nonstick spring form pan.
For the crust:
1 cup crushed oreo cookies
1/2 c crushed grahm crackers
1 T sugar
2 T melted butter
Lightly grease the bottom and sides of a spring form pan (9 inch). Mix the oreos, graham crackers and sugar together. Add butter and mix with your fingers. Press into the bottom of the pan and set it aside. You could use any type of crackers to make this crust. I like using oreos and graham crackers together. It feels like the graham crackers make the crust a little lighter then just using oreos alone.
For the Chocolate Cheesecake:
16 ounces of cream cheese (softened at room temperature)
1 cup sugar
1 teaspoon vanilla extract
1 teaspoon chocolate essence (extract)
2 tablespoons flour
1 tablespoon cocoa
3 eggs
1 1/2 cup sour cream
8 ounces melted dove dark chocolate, cooled slightly
Using an electric mixer, combine cream cheese, sugar, vanilla and chocolate extracts and beat until creamy. Add the flour, cocoa and mix until smooth.
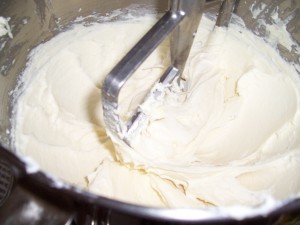
Add the melted chocolate and sour cream, mix well.
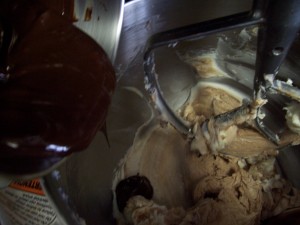
Then add the eggs, 1 at a time, mixing on low speed after each addition until just blended. Pour the batter into prepared pan and bake for about 1 hour. Or until the center is almost set. It will be a little wobbly when you touch.
Cool the cake on a wire rack. Top it with Chocolate Ganache:
4 ounces of melted chocolate (dove dark chocolate)
1/2 cup of heavy cream
Mix it well and spread it over the cheesecake.
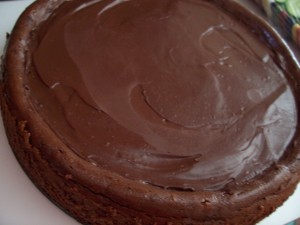
Refrigerate. Top with chocolate shavings and fresh raspberry. Enjoy!
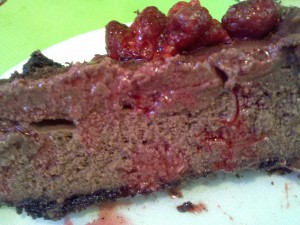
To prevent crack tops:
The top of the cheesecake can crack because of the temperature is too hot. You could cook your cheesecake in a water bath and bring it to cool very slowly to prevent the top to crack. Also running a knife around the rim of the pan when the cake is cooked and cooling will allow cake to pull it from the sides and prevents cracking. You could also use a thermometer and make sure your cheesecake does not go over 150 degrees F.


