Posted by Alessandra on Friday Feb 26, 2010
Filed under :Vegetables
I love broccoli, it is full in vitamins C, K and A. It is also a great source of dietary fiber and it is believed to be anti-cancer!!!
I also love it because it is easy to cook, you can boil, steam it or even eat it raw.
I like to buy it fresh (not frozen). That way I can use the flowers as well as the stalk. This is what I like to do:
First rinse it well, and then hold the broccoli by the flowers and using a julienne peeler, peel the stalk. This will make broccoli juliennes.
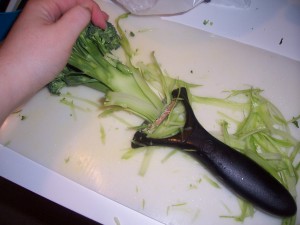
Usually this would be the part you throw away, but why not use it right? It is great for stir fry, salads or even just add to sauces or pasta.
Posted by Alessandra on Wednesday Feb 17, 2010
Filed under :Beef
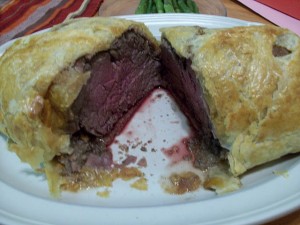
2-3 Lb Beef tenderloin
16 ounces of mushrooms
4 slices Prosciutto
Mustard for brushing meat
1 puff pastry sheet
1 egg
2 Clove garlic, crushed
1 Onion, diced
Salt and pepper
Olive oil
Parsley
Sear beef- seasoned with salt and pepper and slightly fry it on top, bottom and sides. (not to cook, only to give color)
Set beef aside to cool for about 10 minutes
Make the mushroom paste:
- Heat some olive oil in a sauce pan, add onions, garlic and cook for a bit. Then add mushroom. Let it cook until all the mushroom water evaporates. Add parsley and seasonings (salt/pepper)
- Take mushroom to the food processor, process just a bit.
Assemble:
- For individual Wellingtons: Open the puff pastry, spread a little bit of mustard on beef fillet, place it on the middle of pastry. Top fillet with the mushroom stuffing. Wrap fillet with the Prosciutto (side and top). Season with a little salt and pepper. Then wrap the pastry tucking in the sides – cut extra dough. (can brush with egg wash to help dough stick). Glaze with egg wash.
- For big Wellington: Use a film paper, line the Prosciutto on it, then top Prosciutto with mushroom mixture, then put the beef (spread a little mustard on the meat) on the center and roll with help of the film paper. Very tight. Chill for 20 minutes. Then open pasty put the rolled beef (without the plastic) in the middle. Make sure to egg wash the pastry so sides stick together. Chill for 5 minutes. Glaze with egg wash and bake.
Baking:
- Put Wellington in a baking dish (spread olive oil in the bottom of dish). Bake it at 350 for about 30-40 minutes for medium rare. (145 °F in the center of meat) Rest for about 10 minutes before cutting it.
Posted by Alessandra on Friday Feb 12, 2010
Filed under :Desserts
Happy Valentine’s Day! This is a great recipe for Valentine’s Breakfast. It is simple to make and very delicious!
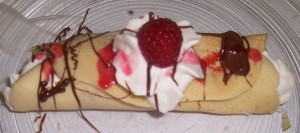
Sweet Crepes:
2 Eggs
2 C Flour
1 C Sugar
Pinch Salt
1 t Vanilla
1 C Milk
1/3 C Water
Mix it all together, but add the milk and water slowly. You can use a blender, but I find that by hand works just as well. You are looking for a thin, smooth batter. The reason why you hold on the liquids is so that you can make it to the right consistency. Sometimes it takes both 1/3 cups, sometimes a little more or less. I usually add in all the milk so it is easier to mix, then I will add the water slowly until it gets to the right consistency.
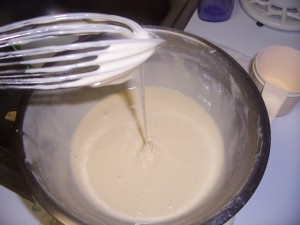
Using a frying pan you want to add a little bit of butter, or spray some oil. Just a little. Pour some batter and spread it thin with the back of a spoon.
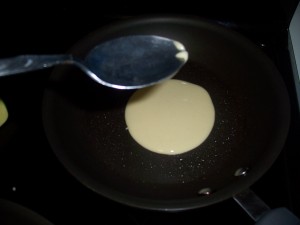
TIP: The first or second usually don’t work as well. That is ok! You will get the hang of it. Just don’t give up. 😉 I also found that the oil is only added on the first one. You do not need to keep adding butter or oil to the pan. (it is a lot easier to spread without any oil)
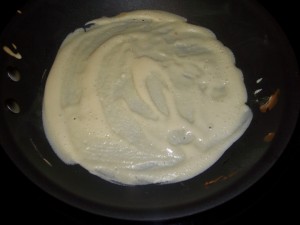
You want to cook it about 20-30 seconds each side.
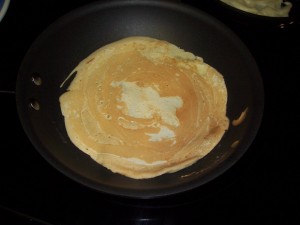
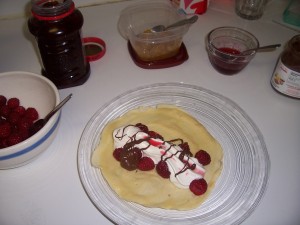
That is it!!! It is so sweet and delicious . Now just use your creativity for the filling. We like to have raspberries, strawberries, bananas, pineapple, nutella, different jams and whipped cream of course!
It is something that the whole family can enjoy because they can fill with whatever they may like.
TIP: Use it as it comes out of the pan, or keep it warm. They tend to harden a little after cold, making it hard to fold. Enjoy!

Posted by Alessandra on Saturday Feb 6, 2010
Filed under :Desserts
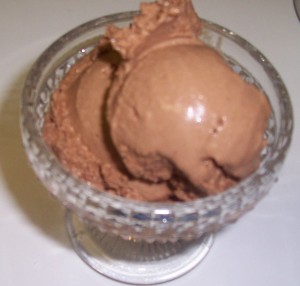
What a great tradition! Even though I was raised in an ice cream store in Brasil (that is my parents business). I was not introduced to this amazing day until I came to the US. I combined the decilious Nutella day (yesterday) and made some ice cream for today. I searched for recipes online and came across this one:
Easy Nutella Ice Cream
I did it a bit differently, so here is what I did:
1 1/2 cans of evapotated milk (just because I had 1/2 can open and didn’t want to waste)
3/4 of a 13 oz Jar of Nutella (also by eye, I got about 4 super full spons and I have about 1/4 of the jar left)
I put both into a sauce pan and warmed it until the nutella melted away. Then I turned the heat off and let it cool down. I didn’t put it in the fridge, just cool to room temp.
Then I put it into my ice cream maker. I have one that does not require the drum to be frozen before. It makes ice cream on command, no ice, no mess! It took about 40 minutes. It is creamy and delicious!!! Enjoy
Posted by Alessandra on Friday Feb 5, 2010
Filed under :Desserts

Thought I would post this in celebration of Nutella’s Day … I love Nutella. There is so much you can do with this amazing spread.
Here is one of my favorite cake frosting:
Nutella Buttercream
3 large egg whites
1 cup sugar
3/4 cup unsalted butter, softened, cut into tablespoons
1/2 jar of Nutella (about 1/2 – 2/3 cup)
Put egg whites and sugar into the top of a double boiler over a pan of simmering water. Whisking constantly, cook until sugar has dissolved and mixture is warm (about 160 degrees). Pour heated egg whites into the bowl of an electric mixer fitted with the whisk attachment. Beat egg white mixture on high speed until it forms stiff (but not dry) peaks. Continue beating until fluffy and cooled, about 7 minutes total. Switch to the paddle attachment. With mixer on medium-low, add butter one tablespoon at a time, beating well after each addition. Increase speed to medium-high; continue beating until frosting appears thick, about 4 minutes. Reduce speed to low; add Nutella a few tablespoons at a time and continue beating until incorporated.
This is delicious to frost and fill cakes or cupcakes!
For more ideas check out this website http://www.nutelladay.com/
Posted by Alessandra on Friday Feb 5, 2010
Filed under :Appetizers
1 can of whole water chestnut
Sliced bacon
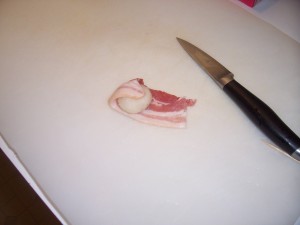
Wrap each water chestnut with a piece of bacon. (if the water chestnut is not too big, you might be able to cut the slice in half or even thirds) Secure it with a tooth pick.
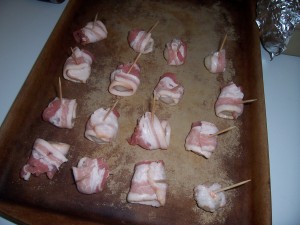
Bake at 350 until bacon is done (about 20-25 minutes, just until crispy).
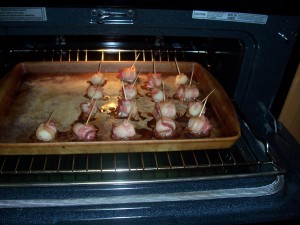
Sauce is ketchup and brown sugar (equal parts) pour on top and bake for another 10 minutes. Some times I only add sauce on half of the pieces and then warm up the rest of the sauce and serve on the side. Here is the final plate:
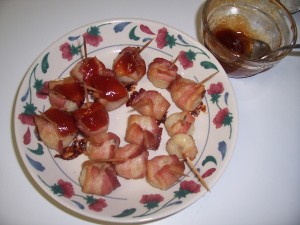
These are so good!
Posted by Alessandra on Thursday Feb 4, 2010
Filed under :Desserts
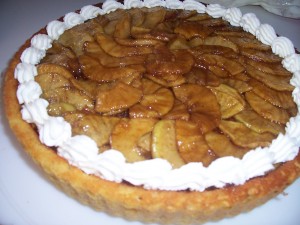
Ingredients:
1 box yellow Cake mix
1 t Cinnamon mix (I used the pampered chef or you can use just normal cinnamon)
½ c Sour Cream
Mix the cake mix according to directions on the package. Then, add the cinnamon and the sour cream. Divide batter into Pampered Chef’s torte pan set.(you can use any cake pan). Bake your cake. Let the cake rest in the pan for about 10 minutes after you remove it from the oven. Invert it to a platter. (NOTE: Most cake mixes will make two cakes. One cake is required for this recipe. You can do something different with the second cake or freeze it for a rainy day.)
Filling/top
Ingredients:
4 Apples (cored, peeled and sliced)- I use the apple peeler/corer/slicer machine from Pampered Chef
3 T Butter
2/3 c Brown Sugar (might need a little more depending on how tart the apples are)
1 t Cinnamon
Pinch Salt
Pinch Nutmeg
Squeeze of Lemon juice
Add butter and sugar into a skillet and cook until sugar is melted and mixture is hot. You may need to add a little splash of water to soften the sauce.
Add to the mixture in the skillet the apples, cinnamon, salt, nutmeg. Squeeze the lemon (just a little) so juice drips on top of the apples. Let it cook until apples are soft but still holding their shape. (About 10+ minutes). Let it cool a bit. (there will be a lot of sauce)
Poke little holes on the cake (with a fork). Drizzle about 4 Tablespoons of the sauce on the cake. Then start layering the apples side by side, until all the cake is covered with the apples.
Drizzle a little more of the sauce on top (not too much or it will be too sweet). You can always serve the sauce on the side.
Decorate the sides with whipped cream (1 c heavy Cream, 2T Powdered Sugar, ½ T Vanilla).
Options: Try with chocolate cake, pears instead of apples, add a vanilla pudding on the cake before putting the layer of apples (you can even use the other ½ of the cake and make the pudding, apple filling, then decorate the top of the 2nd cake- so it will be cake, pudding, apples, cake)


