Posted by Alessandra on Wednesday May 20, 2015
Filed under :Uncategorized
As it is with many Brazilian desserts, everyone has their favorite twists on the same basic recipe. Pudim is one of those. There are some that are light and airy, some are dense and have a strong caramel taste, some are fruity and jello-ish. This recipe is one of those dense, no holes, solid pudim. It is very sweet, but definitely a delicious one to try. My dad is very famous in my city for his pudim. He started making pudim during the winter months when not much ice cream is sold in Brasil. For those who don’t know, my dad owns an ice cream factory in Brasil. Anyways, the pudim was a hit. I cannot share his recipe, (I am afraid of being disowned) j/k. He keeps the recipe pretty secret. This recipe is my second choice. It is just as creamy and rich as my dad’s recipe and the caramel sauce is perfect. Hope you enjoy!
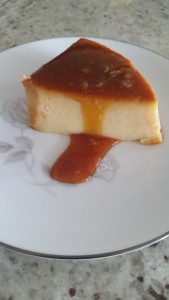
Brazilian Flan
For the caramel sauce:
3 cups sugar
1/2 c water
In a sauce pan melt the sugar until it gets to a medium brown, caramel color. Add the water. Please be careful, it will splatter hot sugar, but just add the water quickly and wait a couple seconds then mix it until everything dissolves. Take off the heat and let is rest.
For the Pudim:
2 cans sweetened condensed milk
2 cups milk
1 can crème de leite (table cream)
3 eggs
1 T corn starch
Mix it all in a blender for at least 6 minutes.
1. Spread the caramel sauce in a pudim pan.
2.Then, add the pudim liquid.
3.Cover the pan with foil. Put it in the oven (350 F) in a water bath. I use a larger pan filled with hot water, then put the pudim pan inside the water pan.
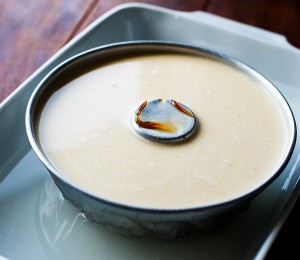
Bake for 45-60 minutes or until it browns a little on top .
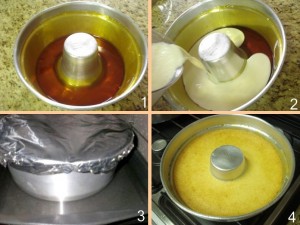
4. Let it cool. I like to let it cool on the counter for a few hours and then put it in the refrigerator overnight. When you’re ready to serve it, you’ll flip it onto a large plate or platter. A little trick to flip it without breaking it, is to first go around the outside edges, as well as the center, of the pudim with a knife. Then, while still sitting on the counter, turn it back and forth (right to left) a few times prior to picking it up and flipping it.
*If you aren’t familiar with table cream, this post has a picture of it. I find it in any supermarket in the Spanish Isle.
*You can find pudim pans here.
Posted by Alessandra on Tuesday Dec 2, 2014
Filed under :Uncategorized
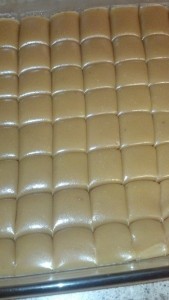
Homemade caramel is delicious, soft and sweet. A nice treat for the holidays! Enjoy
1 cup butter 2 1/4 cups brown sugar , firmly packed
1/8 teaspoon salt
1 cup light corn syrup
1 (14 ounce) can sweetened condensed milk
1 teaspoon vanilla
Directions:
Melt butter; add brown sugar and salt, mixing well. Stir in corn syrup. Gradually add milk, stirring constantly. Cook and stir over medium heat until candy reaches firm ball stage (245 degrees). This will take 12-15 minutes approx. Remove from heat and stir in vanilla. Pour into greased 9×13 pan. Let cool. Cut into 48 pieces with a sharp knife.
Optional: Dip caramel squares in chocolate! YUM
Posted by Alessandra on Sunday Sep 29, 2013
Filed under :Uncategorized
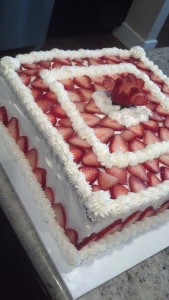
Inma of la Galletika was our Sept. 2013 Daring Bakers’ hostess and WOW did she bring us something decadent and delicious! Pastel de Tres Leches or Three Milk Cake, creamy yet airy, super moist but not soggy… just plain delish!
This month’s daring bakers challenge was the tres leches cake recipe. I have been making tres leches for quite some time now, and every time I make I think: ” I really want to try a chocolate version” so when I saw this challenge that is exactly what I did. I used their recipe for the chocolate tres leches and it was really good. I thought the cake was a little dense than what I am used to, but the milk mixture was delicious. Cooking it made it a bit thicker and it was really good. Thanks Inma for the challenge.
Coconut Three Milks Cake (recipe from daring baker’s challenge)
Ingredients for sponge cake
5 large eggs (separated)
½ cup sugar
2 teaspoons vanilla extract
1 cup all-purpose (plain) flour (sifted)
¼ cup water
3 tablespoons unsweetened cocoa powder
For the coconut syrup
1 can (14 oz) sweetened condensed milk
1 can coconut milk
1 cup heavy cream (about 35% fat)
Topping and filling
2 cups of whipping cream (about 30% fat)
½ cup sugar
1 cup shredded coconut
Directions for the sponge cake:
Preheat oven to moderate 350°F. Prepare a square 9”x9” pan or 9” round cake pan
Separate the egg whites from the yolks. Beat the egg whites on medium speed, 3 – 5 minutes. When soft peaks form slowly add the sugar in small batches. Whip until stiff peaks form about 5 minutes. Set aside.
In a medium bowl beat egg yolks at medium-high speed for about 5 to 6 minutes, or until the egg yolks become pale colored, creamy and puffy. Stir in vanilla. Pour the egg yolks over the egg whites, gently fold until just combined trying not to lose any volume from the mixture. Fold in the flour little by little in the form of rain. Mix until just combined (over-beating will result in a denser, flatter cake). After folding in the flour you have to fold in the cocoa powder dissolved in the ¼ cup of water (it should be a thick paste) and then bake in the preheated moderate oven for 25 minutes or until the toothpick comes out clean
Let it cool. Once cool, split the cake in half, flip the top of the cake and place it on a base. Poke using a fork holes all over the cake to better absorb the three milk soaking liquid.
Directions for the coconut syrup
- In a saucepan add the sweetened condensed milk, coconut milk and heavy cream, bring to a boil, reduce the heat and continue boiling for 5 minutes. Remove it and let it cool.
- Cut the cake in half and brush the syrup on both sides until totally absorbed.
Directions for the decoration
1. In a skillet, over medium heat, toast the coconut 2. Cover the cake with whipping cream and spread the coconut on the top. Enjoy!
Posted by Alessandra on Saturday Jul 27, 2013
Filed under :Uncategorized
We love to make this brazilian limeade, also known in Brasil as swiss limeade (limonada suíça). It is refreshing and perfect for summer days! Enjoy
for each liter of water you will need:
2 large limes (you can use 3 medium size or 3 large is you like it really strong)
1 heaping tablespoon of sweetened condensed milk
1/2 c sugar
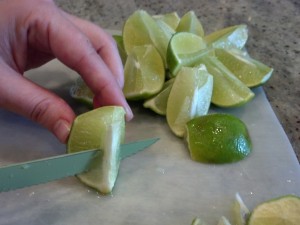
First you want to cut the limes into 4 pieces. You will use the entire lime. Just make sure to take that middle (white part) and the seeds out. (just like the picture)
In a blender add 1 liter of water, sugar and sweetened condensed milk. Blend until all the sugar is dissolved.
Then add the cut limes and pulse 3-4 times. The limes will be chopped into smaller pieces.
Strain it and serve with ice.

Options:
You can change the flavor a little by adding other fruits into the mixture. Here are some ideas: raspberry, pineapple, oranges, blueberry and strawberry. Make it a little more interesting with some splashed of coconut cream. It is also refreshing with a bit of mint, or even some leaves of sweet basil. 😉
YUM
Posted by Alessandra on Friday Jul 19, 2013
Filed under :Uncategorized
Craftsy Sale
As you all know I love craftsy. Here is a link for a sale they are having until 07/21/2013. I usually buy my classes during sale times and then take them at my leisure later on. Enjoy!

Posted by Alessandra on Tuesday Jun 11, 2013
Filed under :Uncategorized
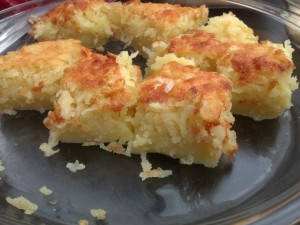
COCADA DE FORNO (BAKED COCONUT)
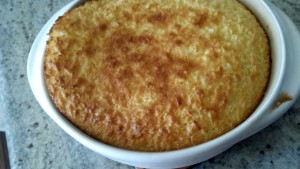
I found this recipe while looking through some old cookbooks I have. It was delicious. Once baked the botton layer will be almost like a thick custard topped with the sweet coconut flakes. YUM
8 Tbs butter (1/2 cup), at room temperature
1/2 cup granulated sugar
3 eggs
1/3 cup coconut milk
1/3 cup sweetened, condensed milk
1 + 1/2 cups grated coconut
2 Tbs all-purpose flour, sifted
Heat the oven to 350F. Lightly grease baking dish with butter or cooking spray.
Place the butter and the sugar in the bowl of an electric mixer fitted with the paddle attachment, and beat them together at medium speed until creamy, about 5 minutes. Add the eggs, one at a time, and continue to mix. Scrape the sides of the bowl after each addition.
Add the coconut milk, the condensed milk, continue to mix until well blended (about one more minute). Add the coconut and mix until incorporated. Fold the flour with a rubber spatula, and spread the batter into the prepared baking dish.
Bake in the 350 F oven until the top looks golden brown, the edges are set, but the center is slightly jiggly, about 20 minutes (or if you prefer a firmer consistency, bake until set, 30 to 35 minutes). Remove it from the oven and let it rest for 10 minutes.
We served with a side of passion fruit mousse. Delicious!
Posted by Alessandra on Thursday Apr 4, 2013
Filed under :Uncategorized
Craftsy spring sale! Starting April 5th through April 8th, a different set of Craftsy classes will be on sale each day, up to 75% off their normal price.
There are a lot of classes to choose from. It begins tomorrow! Enjoy 😀
If you want to see some of my craftsy projects, check out this post: Craftsy Classes
Posted by Alessandra on Monday Jan 7, 2013
Filed under :Uncategorized
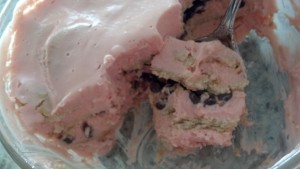
You may have noticed that I started a little business bringing Brazilian items to Utah. We are still in the baby steps of starting it, but I thought I would share some of the items we have available. I made this dessert for a dinner party we had and everyone enjoyed it. I love having some of the Brazilian ingredients available and now you can have it as well. Enjoy!
Pave Sensação:
1 pkg of biscoito maisena (can be substituted for graham crackers or animal crackers)
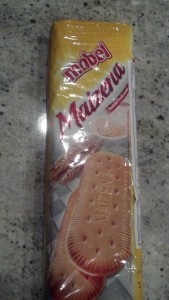
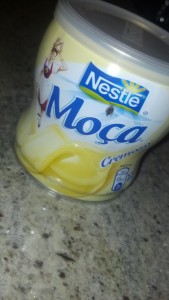
1 can leite condensado cremoso (creamed sweetened condensed milk- not found in the stores yet, but Brazilian Pantry sells it 😉 and it is delicious. It is not the normal sweetened condensed milk. It is much thicker and creamier) Worth to try it!
1 can table cream (also called creme de leite -found at the grocery stores)
1/8 c milk
2 t strawberry flavor (ice cream flavoring)
chocolate chips (I used mini dark chocolate chips, but a milk chocolate chip would also be good)
In a blender, mix milk, creamed sweetened condensed milk, table cream and flavoring for about 5 minutes.
In a trifle dish layer the crackers, then the strawberry mousse, crackers, mousse, chocolate chips, crackers, mousse, crackers and last layer mousse.
Refrigerate for about 4 hours 😉

Posted by Alessandra on Sunday Dec 23, 2012
Filed under :Uncategorized
Craftsy is having an AMAZING sale. Check it out!
Craftsy is a community of crafters from around the world. They offer online classes on everything from quilting & knitting to gardening & cake decorating.
I have taken many classes from them and I always learn something new. I also enjoy the networking. I can ask questions to the teacher, post pictures of my finished projects and connect with other crafters.
Here is a picture of the last class I took with them. It was on making classic croissants at home from Colette Christian.

If you would like to see other pictures from my previous classes, check out this post. Thanks
Posted by Alessandra on Wednesday Oct 31, 2012
Filed under :Uncategorized
Happy Halloween everyone… Saw this picture and had to share, what a cute idea!
