Posted by Alessandra on Tuesday Sep 27, 2011
Filed under :Breads, The Dairing Kitchen
The Daring Bakers go retro this month! Thanks to one of our very talented non-blogging members, Sarah, the Daring Bakers were challenged to make Croissants using a recipe from the Queen of French Cooking, none other than Julia Child!

Ingredients
1¼ teaspoon of dry-active yeast (about ½ sachet)
3 tablespoons warm water
1 teaspoon sugar
1 3/4 cups of flour
2 teaspoons sugar
1½ teaspoon salt
½ cup milk
2 tablespoons oil
½ cup chilled, unsalted butter
1 egg, for egg wash
Directions:
1. Mix the yeast, warm water, and first teaspoon of sugar in a small bowl. Leave aside for the yeast and sugar to dissolve and the yeast to foam up a little.
2. Measure out the other ingredients
3. Heat the milk until tepid (either in the microwave or a saucepan), and dissolve in the salt and remaining sugar
4. Place the flour in a large bowl.
5. Add the oil, yeast mixture, and milk mixture to the flour
6. Mix all the ingredients together using the rubber spatula, just until all the flour is incorporated
7. Turn the dough out onto a floured surface, and let it rest a minute while you wash out the bowl
8. Knead the dough eight to ten times only. The best way is as Julia Child does it in the video (see below). It’s a little difficult to explain, but essentially involves smacking the dough on the counter (lots of fun if you are mad at someone) and removing it from the counter using the pastry scraper.
9. Place the dough back in the bowl, and place the bowl in the plastic bag
10. Leave the bowl at approximately 75°F for three hours, or until the dough has tripled in size.
11. After the dough has tripled in size, remove it gently from the bowl, pulling it away from the sides of the bowl with your fingertips.
12. Place the dough on a lightly floured board or countertop, and use your hands to press it out into a rectangle about 8 by 12 inches
13. Fold the dough rectangle in three, like a letter (fold the top third down, and then the bottom third up)
14. Place the dough letter back in the bowl, and the bowl back in the plastic bag.
15. Leave the dough to rise for another 1.5 hours, or until it has doubled in size. This second rise can be done overnight in the fridge
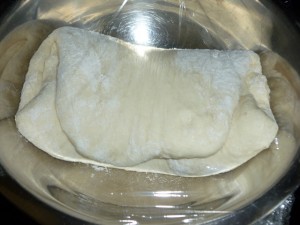
16. Place the double-risen dough onto a plate and cover tightly with plastic wrap. Place the plate in the fridge while you prepare the butter.
17. Once the dough has doubled, it’s time to incorporate the butter
18. Place the block of chilled butter on a chopping board.
19. Using the rolling pin, beat the butter down a little, till it is quite flat.
20. Use the heel of your hand to continue to spread the butter until it is smooth. You want the butter to stay cool, but spread easily.
21. Remove the dough from the fridge and place it on a lightly floured board or counter. Let it rest for a minute or two.
22. Spread the dough using your hands into a rectangle about 14 by 8 inches
23. Remove the butter from the board, and place it on the top half of the dough rectangle
24. Spread the butter all across the top two-thirds of the dough rectangle, but keep it ¼ inch across from all the edges.
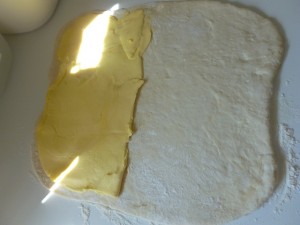
25. Fold the top third of the dough down, and the bottom third of the dough up.
26. Turn the dough package 90 degrees, so that the top flap is to your right (like a book).
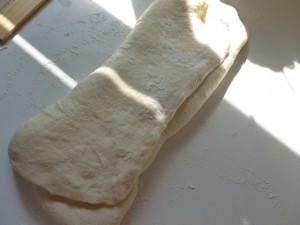
27. Roll out the dough package (gently, so you don’t push the butter out of the dough) until it is again about 14 by 8 inches (35 cm by 20 cm).
28. Again, fold the top third down and the bottom third up.
29. Wrap the dough package in plastic wrap, and place it in the fridge for 2 hours.
30. After two hours have passed, take the dough out of the fridge and place it again on the lightly floured board or counter.
31. Tap the dough with the rolling pin, to deflate it a little
32. Let the dough rest for 8 to 10 minutes
33. Roll the dough package out till it is 14 by 8 inches (35 cm by 20 cm).
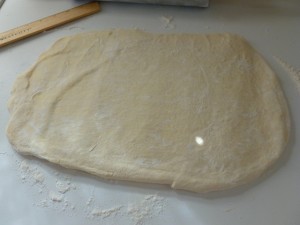
34. Fold in three, as before
35. Turn 90 degrees, and roll out again to 14 by 8 inches (35 cm by 20 cm).
36. Fold in three for the last time, wrap in plastic, and return the dough package to the fridge for two more hours (or overnight, with something heavy on top to stop it from rising)
37. It’s now time to cut the dough and shape the croissants
38. First, lightly butter your baking sheet so that it is ready
39. Take the dough out of the fridge and let it rest for ten minutes on the lightly floured board or counter
40. Roll the dough out into a 20 by 5 inch rectangle (51 cm by 12½ cm).
41. Cut the dough into two rectangles (each 10 by 5 inches)
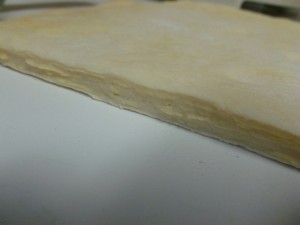
42. Place one of the rectangles in the fridge, to keep the butter cold
43. Roll the second rectangle out until it is 15 by 5 inches
44. Cut the rectangle into three squares (each 5 by 5 inches
45. Place two of the squares in the fridge
46. The remaining square may have shrunk up a little bit in the meantime. Roll it out again till it is nearly square
47. Cut the square diagonally into two triangles.
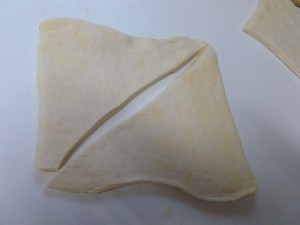
48. Stretch the triangle out a little, so it is not a right-angle triangle, but more of an isosceles.
49. Starting at the wide end, roll the triangle up towards the point, and curve into a crescent shape.
50. Place the unbaked croissant on the baking sheet
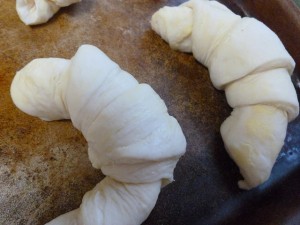
51. Repeat the process with the remaining squares of dough, creating 12 croissants in total.
52. Leave the tray of croissants, covered lightly with plastic wrap, to rise for 1 hour
53. Preheat the oven to very hot 475°F.
54. Mix the egg with a teaspoon of water
55. Spread the egg wash across the tops of the croissants.
56. Put the croissants in the oven for 12 to 15 minutes, until the tops are browned nicely
57. Take the croissants out of the oven, and place them on a rack to cool for 10 minutes before serving.
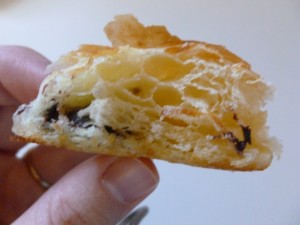
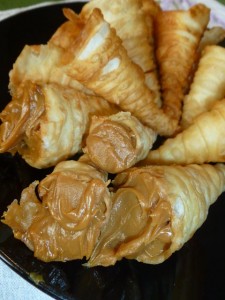
This one I filled it with chocolate! YUM
Posted by Alessandra on Saturday Aug 27, 2011
Filed under :Desserts, The Dairing Kitchen
The August 2011 Daring Bakers’ Challenge was hosted by Lisa of Parsley, Sage, Desserts and Line Drive and Mandy of What the Fruitcake?!. These two sugar mavens challenged us to make sinfully delicious candies! This was a special challenge for the Daring Bakers because the good folks at http://www.chocoley.com offered an amazing prize for the winner of the most creative and delicious candy!
For this month’s challenge, I decided to make some passion fruit bombons, passion fruit truffles and dove dark chocolate bombons! I enjoyed playing with chocolate and learning the technique used to make the filled chocolates painted with cocoa butter.

Passion Fruit Caramel Chocolates aka Bonbons
Ingredients
Dark or milk chocolate melted, preferably tempered, about 1 lb
1 cup Granulated White Sugar
1/2 cup Light Corn Syrup
1/2 cup Water
4 Tbs Unsalted Butter
2 Tbsp Heavy Cream
1/4 cup Passion Fruit Puree
Painting the moulds with coloured cocoa butter.
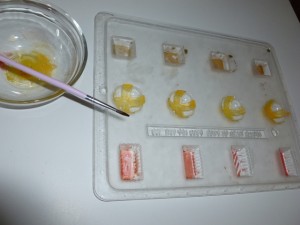
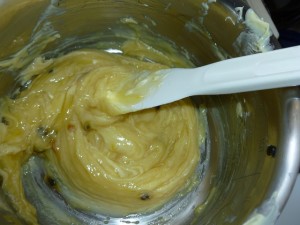
Pouring in the chocolate, filling with caramel and finishing off with chocolate
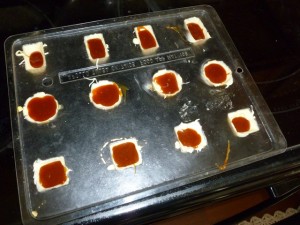
Directions:
1. Place the sugar, corn syrup and water in a medium saucepan.
2. Set over medium-high heat and stir to combine.
3. Bring the mixture to a boil and cook until dark amber in color 310°F-315°F / 155°C-158°C, about 5 minutes.
4. Use a pastry brush, dipped in water, to wash down sides of pan to prevent crystallization as the mixture boils.
5. Remove saucepan from the heat and gradually whisk in the passion fruit puree, heavy cream and butter.
6. Transfer to a medium bowl and let cool.
7. Transfer cooled caramel to a pastry bag fitted with a medium plain tip or a squeeze bottle.
8. Coat the molds with chocolate using the method mentioned above.
9. Fill chocolate coated molds with caramel. You can use a spoon too but it’s less messy and goes a lot quicker with either of the two aforementioned methods.
10. Finish off with a layer of chocolate as mentioned in the method above for making filled chocolates with molds
11. Once fully set, carefully knock the chocolates out of the mold
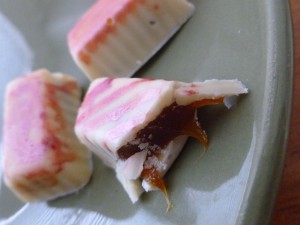
Passion Fruit Trufles
Make the ganache:
1. Finely chop or grate the chocolate
2. Place in a heatproof bowl
3. In a saucepan, heat cream until just about to boil (it will start bubbling around the edges of the pot)
4. Pour the cream over the chocolate
5. Gently stir the mixture until all the chocolate has melted and it is smooth
6. Stir in your desired flavorings
For rolled truffles
1. Allow the ganache to firm up in a container of choice, preferably deep rather than shallow
2. Using a teaspoon or melon baller, scoop up room temperature ganache
3. With gloved hands, roll the balls between your palms to round them off
4. Dip in tempered chocolate or roll in various ingredients like cocoa or chopped nuts as desired
Tip: If dipping in chocolate, it’s best to refrigerate the ganache balls before dipping so that they’re firm and don’t melt from the warm chocolate
Tip: For a thicker chocolate shell, dip once in tempered chocolate and allow to set. Then do a second dipping or smear a small amount of chocolate over the truffle and roll in desired ingredients
5. Place on parchment paper until set
Posted by Alessandra on Monday Aug 22, 2011
Filed under :Appetizers, Brazilian Recipes, Breads
It has been a bit crazy around the house lately. I am loving the new addition to the family, my little baby boy! He is a lot of fun. My parents were visiting from Brasil, so you can just imagine all the cooking that went on. Here is one of the recipes we made recently. Hope you enjoy it!
Esfihas
1 c milk
1 egg
1/2 c oil
1 T sugar
1 t salt
1 T yeast (I used the instant dry yeast)
Flour until the dough is soft and stays together. (it was about 3-4 cups or so of flour. I just add until it forms a dough)
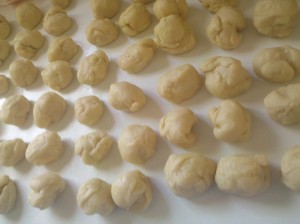
Mix it all together, then make small balls (or big ones depending on the size of esfihas you want)
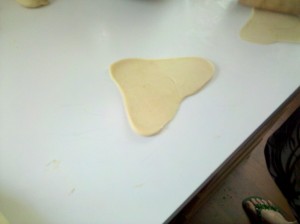
Open the dough flat into a triangle.
Fill with the meat filling (recipe bellow) or any other filling you may like.

Close the dough into a triangle shape.
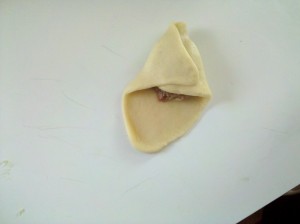
Brush with egg wash and bake for about 20 minutes at 350 F or until golden brown. This recipe will be around 40 small esfihas.
For the meat filling:
1 lb ground beef
salt
pepper
2 tomatoes (diced)
1 diced onion (diced very small, or you can shred it)
2 T ketchup or tomato paste
4 small potatoes (shred them using the cheese shredder)
drizzle oil
1-2 limes (drizzle juice on top)
Mix it all together and fill the bread with this mixture.
If you would like you can also make esfihas abertas (open esfihas). Follow the recipe until you turn them into balls, then open them into a circle, leaving the sides a little thicker.
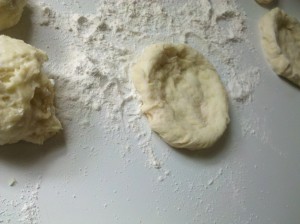
Fill (meat, or cheese) and Bake.
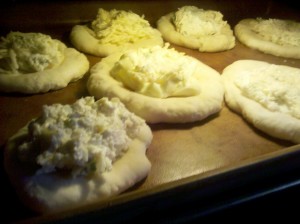
YUM

This was a cheese filled one topped with a bit of fresh salsa!
Posted by Alessandra on Sunday Aug 14, 2011
Filed under :Desserts, The Dairing Kitchen
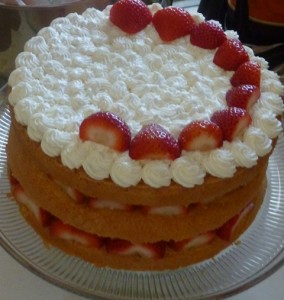
Jana of Cherry Tea Cakes was our July Daring Bakers’ host and she challenges us to make Fresh Frasiers inspired by recipes written by Elisabeth M. Prueitt and Chad Robertson in the beautiful cookbook Tartine.

Basic Chiffon Cake:
1 cup + 2 tablespoons all-purpose flour
1 teaspoon baking powder
3/4 cups sugar
1/2 teaspoon salt
1/4 cup vegetable oil
3 large egg yolks
⅓ cup + 1 tablespoon water
1 teaspoon pure vanilla extract
3/4 teaspoon lemon zest, grated
5 large egg whites
¼ teaspoon cream of tartar
1.Preheat the oven to moderate 325°F.
2.Line the bottom of an 8-inch spring form pan with parchment paper. Do not grease the sides of the pan.
3.In a large mixing bowl, stir together the flour and baking powder. Add in all but 3 tablespoons of sugar, and all of the salt. Stir to combine.
4.In a small bowl combine the oil, egg yolks, water, vanilla and lemon zest. Whisk thoroughly.
5.Combine with the dry ingredients and mix thoroughly for about one minute, or until very smooth.
6.Put the egg whites into a stand mixer, and beat on medium speed using a whisk attachment on a medium speed, until frothy. Add cream of tartar and beat on a medium speed until the whites hold soft peaks. Slowly add the remaining sugar and beat on a medium-high speed until the whites hold firm and form shiny peaks.
7.Using a grease free rubber spatula, scoop about ⅓ of the whites into the yolk mixture and fold in gently. Gently fold in the remaining whites just until combined.
8.Pour the batter into the prepared pan. Bake for 45 to 55 minutes or until toothpick inserted into the center comes out clean.
9.Removed the cake from the oven and allow to cool in the pan on a wire rack.
10.To unmold, run a knife around the sides to loosen the cake from the pan and remove the spring form sides. Invert the cake and peel off the parchment paper. Refrigerate for up to four days.
Pastry Cream Filling:
1 cup whole milk
1/2 teaspoon pure vanilla extract
1/8 teaspoon salt
2 tablespoons cornstarch
1/4 cup sugar
1 large egg
2 tablespoons unsalted butter
3/4 teaspoon gelatin
1/2 tablespoon water
1 cup heavy cream
1.Pour the milk, vanilla, and salt into a heavy sauce pan. Place over medium-high heat and scald, bringing it to a near boiling point. Stir occasionally.
2.Meanwhile, in a stand mixer add the cornstarch and sugar. Whisk to combine
3.Add the eggs to the sugar and cornstarch and whisk until smooth.
4.When the milk is ready, gently and slowly while the stand mixer is whisking, pour the heated milk down the side of the bowl into the egg mixture.
5.Pour the mixture back into the warm pot and continue to cook over a medium heat until the custard is thick, just about to boil and coats the back of a spoon.
6.Remove from heat and pass through a fine mesh sieve into a large mixing bowl. Allow to cool for ten minutes stirring occasionally.
7.Cut the butter into four pieces and whisk into the pastry cream a piece at a time until smooth.
8.Cover the cream with plastic wrap, pressing the plastic wrap onto the top of the cream to prevent a skin from forming. Chill in the refrigerator for up to five days.
9.In a small dish, sprinkle the gelatin over the water and let stand for a few minutes to soften.
10.Put two inches of water into a small sauce pan and bring to a simmer over a medium heat.
11.Measure 1/4 cup of the chilled pastry cream into a small stainless steel bowl that will sit across the sauce pan with the simmering water, without touching the water.
12.Heat the cream until it is 120 F . Add the gelatin and whisk until smooth. Remove from the water bath, and whisk the remaining cold pastry cream in to incorporate in two batches.
13.In a stand mixer, fitted with the whisk attachment, whip the cream until it holds medium-stiff peaks. Immediately fold the whipped cream into the pastry cream with a rubber spatula.
Simple Syrup:
1/3 cup of sugar
1/3 cup of water
Directions:
1.Combine the water and sugar in a medium saucepan.
2.Bring the mixture to a boil and let the sugar dissolve. Stirring is not necessary, but will not harm the syrup.
3.Remove the syrup from the heat and cool slightly.
4.Transfer syrup to a lidded container or jar that can be stored in the refrigerator. Simple syrup can be stored for up to one month.
Fraisier Assembly:
1 baked chiffon cake
1 recipe pastry cream filling
⅓ cup simple syrup or flavored syrup
2 lbs (900 g) strawberries
Directions:
1.Cut cake into 3 layers
2. Use one of the layers and moisten it evenly with the simple syrup.
3.Hull and slice in half enough strawberries to arrange around the sides. Place them on the side of the cake to form a ring.
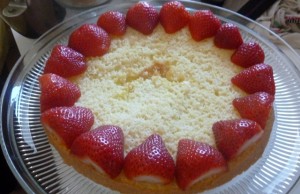
4. Spread or pipe cream in the middle.
5. Repeate process until all the layers are used.
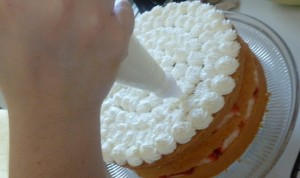
6. Spread or pipe the remaining pastry cream on the top of the cake. Refigerate.
Posted by Alessandra on Sunday Jul 3, 2011
Filed under :Brazilian Recipes, Desserts
Erica of Erica’s Edibles was our host for the Daring Baker’s June challenge. Erica challenged us to be truly DARING by making homemade phyllo dough and then to use that homemade dough to make Baklava
I decided to make phyllo dough and use it to make a Brasilian treat (canudinhos) filled with doce de leite. It turned out amazing! I was a bit skeptical with this recipe to use for Baklava, but I think this dough will be perfect. It rolls out so thin and it is super easy to make it. Thanks Erica for sharing it with us!
Ingredients:
1 1/3 cups unbleached all purpose (plain) flour
1/8 teaspoon salt
1/2 cup less 1 tablespoon water, plus more if needed
2 tablespoons vegetable oil, plus additional for coating the dough
1/2 teaspoon cider vinegar, (could substitute white wine vinegar or red wine vinegar, but could affect the taste)
Directions:
1. In the bowl of your stand mixer combine flour and salt
2. Mix with paddle attachment
3. Combine water, oil and vinegar in a small bowl.
4. Add water & oil mixture with mixer on low speed, mix until you get a soft dough, if it appears dry add a little more water (I had to add a tablespoon more)
5. Change to the dough hook and let knead approximately 10 minutes. You will end up with beautiful smooth dough. If you are kneading by hand, knead approx. 20 minutes.
6. Remove the dough from mixer and continue to knead for 2 more minutes. Pick up the dough and through it down hard on the counter a few times during the kneading process.
7. Shape the dough into a ball and lightly cover with oil
8. Wrap tightly in plastic wrap and let rest 30-90 minutes, longer is best ( I let mine rest 2 hours and it was perfect)
Rolling your Phyllo
* Remove all rings and jewelry so it does not snag the dough*
Use whatever means you have to get the dough as thin as you can. I have included a fantastic video at the end of the post on how to roll out your phyllo dough, using a wooden dowel, which worked perfectly for me. You may also use a pasta machine if you have one, or a normal rolling pin whatever works for you.
1. Unwrap your dough and cut off a chunk slightly larger then a golf ball. While you are rolling be sure to keep the other dough covered so it doesn’t dry out.
2. Be sure to flour your hands, rolling pin and counter. As you roll you will need to keep adding, don’t worry, you can’t over-flour.
3. Roll out the dough a bit to flatten it out.
4. Wrap the dough around your rolling pin/dowel
5. Roll back and forth quickly with the dough remaining on the dowel (see attached video for a visual, its much easier then it sounds)
6. Remove; notice how much bigger it is!
7. Rotate and repeat until it is as thin as you can it. Don’t worry if you get rips in the dough, as long as you have one perfect one for the top you will never notice.
8. When you get it as thin as you can with the rolling pin, carefully pick it up with well floured hands and stretch it on the backs of your hands as you would a pizza dough, just helps make it that much thinner. Roll out your dough until it is transparent. NOTE: you will not get it as thin as the frozen phyllo dough you purchase at the store, it is made by machine
9. Set aside on a well-floured surface. Repeat the process until your dough is used up. Between each sheet again flower well. You will not need to cover your dough with a wet cloth, as you do with boxed dough, it is moist enough that it will not try out.
To make the canudinhos, cut the dough into one inch strips, roll them in the cone shaped canudo makers. Fry in medium hot oil. Fill them with your favorite filling. I used doce de leite and nutella. YUM
Posted by Alessandra on Monday May 30, 2011
Filed under :Brazilian Recipes
What to say about Brasilian hot dogs… they are amazing! That is the word. Just a bit different than American hot dogs, but delicious just the same. There are many places in Brasil where you find hot dog stands, and they all offer many options of toppings. However there are 2 kinds that I really like and every time we go to Brasil they are a MUST. One of them is a hotdog that has shredded chicken and mayo. This is pressed and served hot. Delicious, but it will be a recipe for another day. Today I want to share the recipe for what they call Passaporte. It was given to me by my sister and it is always a crowd favorite.
For Brasilian Passaporte Hot dogs you will need:
Corn (fresh or canned)
Peas
Diced tomatoes mixed with a little bit of mayo
Potato sticks (batata palha)
Parmesan Cheese
Ground beef (recipe at the end of the post)
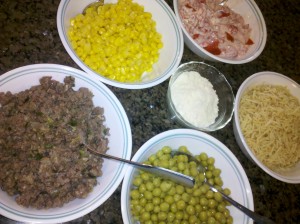
Needless to say you will need a bigger hot dog bun. I usually find the hoagie rolls work very well. I find them at my local grocery store, or you could make your own buns.
Cook the hot dog (boil and then grill them) and assemble the meal!
Bun, grilled hot dog, corn, peas, ground beef, tomato mix, potato and Parmesan cheese.
You can serve mayo, ketchup and mustard on the side. This is very good! YUM

Ps: For the ground beef I usually fry about 1/4 of diced onion with 2 gloves of garlic in 2 T of oil. When translucent add about 1 lb of ground beef and cook. Add salt and pepper to taste. I also like a bit of cut green onions on top. YUM
Posted by Alessandra on Friday May 20, 2011
Filed under :Salads
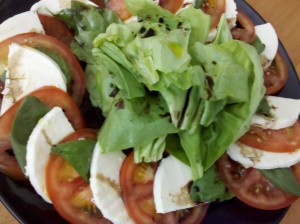
We planted some basil this week,which always makes me crave this salad. This is one of my favorite salads. It tastes fresh and it is delicious with tomatoes from the garden! There are no measurements. I just slice tomatoes, fresh mozzarella and basil (whole leaves). Layer them nicely in that order.
Then you want to drizzle just a little bit of olive oil and balsamic vinegar on top. Add a sprinkle some salt and pepper and voila! It is delicious and it is always a hit as an appetizer for parties!
Enjoy
Posted by Alessandra on Thursday May 12, 2011
Filed under :Brazilian Recipes, Desserts
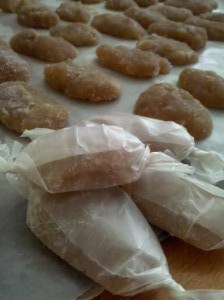
I remember this candy from my childhood. My mom used to love them. They have a texture of a caramel, but taste like sugar and bananas. I decided to try to make it from home and see how they turned out. I have to say I like the homemade a bit more than the ones we can buy packaged in Brasil. Hope you enjoy them as well:
4 ripened bananas about 400 grms
1 3/4 c sugar
1 T butter
1 T lemon juice
1 T Nesquik chocolate
In a sauce pan, mix all together (slice the bananas). You want to cook it on medium high heat for about about 8-10 minutes.
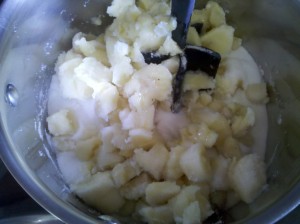
It will start to turn into a caramel color and the bananas will melt. Then lower the heat to about medium to medium-low. Cook for another 10-15 or until the mixture is thicken and comes loose from pan.
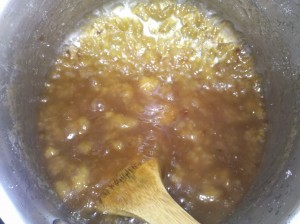
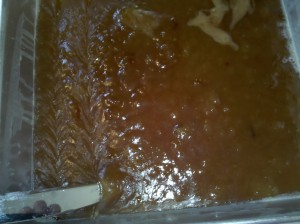
Spread mixture into a buttered pan ( I used a square cake pan)
Refrigerate it over night. Cut into rectangular slices or any shape you may like.
Roll each individual shape into some sugar and set them aside in a cookie sheet lined with wax paper.
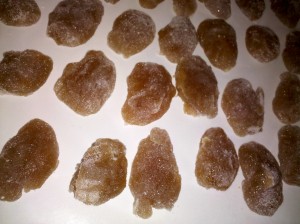
Leave it out (room temp) for at least 1 day until it hardens a bit.
I then rolled each candy into a piece of wax paper. You can use any type of candy wrapper to make it more fun! Enjoy

Posted by Alessandra on Monday Apr 25, 2011
Filed under :Brazilian Recipes, Pastas

2 cups cooked pumpkin (I baked the pumpkin, then scrapped the meaty part out)
1/2-1 c flour
1 egg
1 T butter
salt and pepper
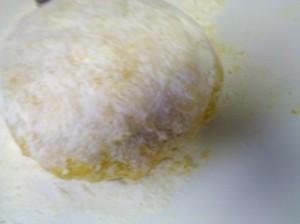
Mix ingredients adding flour little by little until desired consistency. You want the dough to be soft but able to holds its shape.
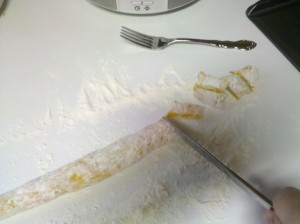
Divide the dough into 4 and roll it into long snake like strand. Cut into small rectangles.
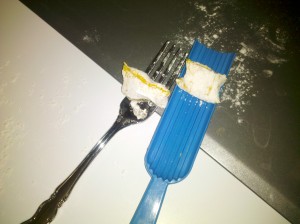
Using a fork or a Gnocchi maker, indent the gnocchi. Press gently while rolling it off the fork.
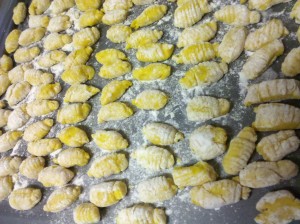
You may freeze them on a cookie sheet then transfer to a Ziploc bag. When ready, fresh or frozen, boil water with a little salt and drizzle of olive oil. Drop gnocchi into boiling water. (not all at the same time. I usually do about 6-10 at a time) Wait until they surface. About 4 minutes. Drain the gnocchi and once finished serve with your favorite sauce. For the picture below I use about 2 T of butter in a frying pan, and as the gnocchi were coming out of the boiling water I would drop them in to the frying pan. Then I served it with shredded cheese, crispy bacon and fresh basil. Simple and delicious!
Posted by Alessandra on Monday Apr 18, 2011
Filed under :Uncategorized

Taste of Home Cooking School is coming to Provo Marriott tomorrow. They will have a boutique that is always full of fun ideas, and then the cooking show where you will see easy to cook recipes and demostrations. It is also FULL of giveaways. A fun way to spend the night. Boutique shopping opens at 3 p.m. Cooking School Starts at 7 p.m.
To purchase tickets in advance (cheaper) go to:
$10 Ticket : entry ticket for the show, giveaways and the boutiques
$20 Ticket : entry ticket for the show, giveaways, boutiques and an all you can eat Soup and Salad Bar dinner at the Marriott before the show.
You can also purchase tickets at the door. Enjoy!


