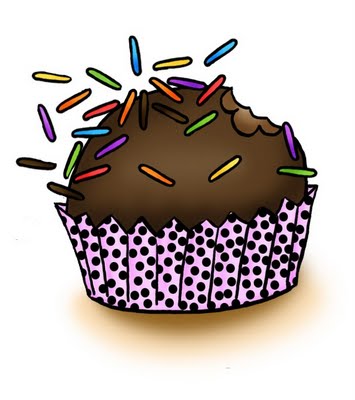
Brigadeiros, a delicious Brasilian chocolate truffles. Created in the 1940s and still popular today. This candy is found in many brasilian parties such as birthdays, weddings, and get togethers. I love brigadeiros, because it is easy to make and also the basic recipe can be used to create many other flavors. Check out this video from Marcela, the sweet brigadier to learn more about brigadeiro’s history and how to order this and other delicious treat right to your home.
In a bowl add flour, corn starch, and baking powder -set aside. In a cup add the milk and vanilla. Set aside. In a mixer, beat the egg yolks and sugar until fluffy. Add the butter, mix until it comes together. Add rest 1/3 of flour mix, 1/2 of milk mix then flour, milk and flour. Mix well, set aside. Beat in egg whites until soft/medium peaks. Fold into cake batter. Pour into greased cake pan and bake at 350 until done. (I check by inserting a cake tester in the middle of the cake, if it comes out clean , it is done)
For the Ganache:
250 grms melted chocolate
1/8-1/4 c passion fruit juice
1/4 c heavy whipping cream
Mix all ingredients. Pour this mixture on top of the already baked cake.
Since it is June, I thought I would post a traditional food from the Brasilian celebration of Festa Junina. During this party you will find many flavorful brasilian dishes made of corn, coconuts, peanuts, cassava and many others. It is a celebration that once experienced will never be forgotten. The music, dances and costumes are definitely something to remember. Here is a little nostalgic recipe I share with you. Hope you like it:
Bolo de Milho Molhadinho
1 can corn (rinse and can and use it for the next measurements)
1 can of corn meal (fuba)
2 eggs
1/2 can oil
1 1/2 can sugar
1 can milk
100 grms parmesan cheese
salt
1 T baking powder
Add all ingredients into the blender. Blend until smooth. Butter and flower a cake pan (i used a 10 inch round cake pan).
Preheat the oven to 350. Bake it until a tooth pick inserted in the middle comes out clean. Once the cake is done drizzle the following mixture on top:
1/2 can sweetened condensed milk
1/4 c milk
Mix well, pour on top of baked cake. Sprinkle the cake with shredded coconut.
If you know me, you know that I love to bake and decorate cakes. Because of this hobby I usually am left with odd pieces of cakes. Most of the time I end up making cake balls with these pieces, but this time I wanted to try something different. Since my mom doesn’t understand English, I feel safe saying this. Once, a long long time ago, she made a beautiful cake. As she was moving it from the kitchen table to the fridge, the cake just collapsed. It was a mess. She took all the pieces and just threw everything inside of a Tupperware container. This was the BEST cake she ever made. It had no shape or form, but it was delicious. I made this dessert inspired by this memory. We will never forget that cake mom.
You will need:
Left over cake pieces (for this particular one I had chocolate cake and yellow cake -cuts from the top )
For the cream:
1 can sweetened condensed milk
same measure of milk
100 ml of coconut milk (if you don’t like coconut milk, just substitute this with milk)
2 egg yolks
1 T corn startch (dissolved in a little bit of water)
In a sauce pan (medium high heat), add sweetened condensed milk, milk, coconut milk and yolks. Mix it until bubbly. Then add the dissolved corn starch. Cook until this mixture thickens up.
Divide this into two. In on the the creams add a hand full of chocolate chips, while cream still warm, mix it to melt.
In a container, layer the creams and cakes like this: white cream, chocolate cake pieces, chocolate cream and white cake pieces. Refrigerate while you make the top.
For the top cream:
2 egg whites
4 T sugar
1 can of table cream
In a mixer, beat the whites until fluffy adding the sugar slowly. When you have soft to hard peaks, mix in gently the table cream.
Add this to the top of reserved dessert. Refrigerate. You can decorate the top with chocolate or fresh fruits.
I also found out that this is really good if you freeze it for a couple of hours before serving it. I put mine in the freezer overnight, then took it out about 1 hour before serving. It was nice, cold and delicious! Enjoy!
Posted by Alessandra on Saturday Feb 11, 2012
Filed under :Desserts
I got this cool donut maker machine for Christmas from a friend of mine. My son and I had some fun today trying it out. It is super easy to use and the recipe that came with the donut machine was really yummy. This treat would be great for a kids birthday party, or just a get together. You can be creative with the toppings, let the kids help out and just have fun!
In separate bowl whisk together remaining ingredients, except glaze or topping. Pour liquid ingredients into dry ingredients. Using a mixer on medium speed, blend until smooth.
Fill each cooking reservoir with about 2 tablespoons of batter.
Bake about 4 to 5 minutes or until a toothpick inserted into donut comes out clean.
Glaze or coat with powdered sugar or cinnamon-sugar, as desired.
For the toppings I used a mixture of:
cinammon and powder sugar
sugar glaze made with water and powder sugar
and the last one a mascarpone cheese frosting
I can’t wait to try the chocolate donuts. This is a great machine I would recommend it!!!
If you like the donut baby cake maker you may also enjoy these ones! Some of them are on sale at amazon!!! Sweet 😀
In a bowl add flour, sugar, baking soda, salt, cinnamon and baking powder- set aside
In your mixer add oil, eggs, vanilla and mashed banana. Mix well. Add 1/3 cup of flour mixture and half of milk. Mix. Keep adding flour and milk until it is all done.
Pour into flouered pan. Bake at 350 for about 40-50 minutes.
This fruit pie is very common in brasil. I remember making this with passion fruit, strawberries, chocolate and lemon cream. The dough is basic and can be used for anything your imagination can create. It is a thick, almost like a short bread cookie dough. The fillings are creamy and delicious. For this strawberry pie I used 2 fillings. The first one is a lemony creamy filling and the second one (most common in brasil) is a sweetened condensed milk cream. You can do both like I did, or just add one or the other. It is delicious. Enjoy!
For the dough:
2 1/4 c flour
1/4 c water
2 T butter
1 t baking powder
pinch of salt
1 egg
Mix everything together. I usually like to add the water last, that way i can control how much it needs. Sometimes it won’t take all of the water. This recipe will make enough for two 9 inch pie or one pie if you choose to cover it. I like to make the dough, then let it rest in the refrigerator for a little while. When ready cover the pie pan with half of the dough. Prickle with a fork and bake it at 350 for about 15 minutes. Let it cool, then add fillings.
For cream #1:
4 T sugar
2 yolks
2 T lime juice
1 T corn starch (dissolved in 1/2 c water)
In a sauce pan over medium heat, mix all ingredients until thick. This will be a yellow, lemony taste cream. Pour into prepared pie pan and refrigerate.
For cream #2:
1 can sweetened condensed milk
1 can (same measure of the sweetened condensed milk) of milk
2 T corn starch (dissolved in 1/4 c water)
Mix milks together in a sauce pan, when warm add the dissolved corn starch. Cook, mixing it constantly until it thickens it up. Add on top of first cream. Refrigerate.
For the strawberries:
Wash and slice strawberries. Add 3-5 T of sugar on top. (Depending on the sweetness of the strawberries). Let it sit for about 1 hour. Drain the liquid it forms into a sauce pan. Reserve the strawberries to top your pie. When cream is cold, pour strawberries on top. With the reserved liquid, boil it until it thickens a little bit, then brush the top of the pie with this sauce.
The August 2011 Daring Bakers’ Challenge was hosted by Lisa of Parsley, Sage, Desserts and Line Drive and Mandy of What the Fruitcake?!. These two sugar mavens challenged us to make sinfully delicious candies! This was a special challenge for the Daring Bakers because the good folks at http://www.chocoley.com offered an amazing prize for the winner of the most creative and delicious candy!
For this month’s challenge, I decided to make some passion fruit bombons, passion fruit truffles and dove dark chocolate bombons! I enjoyed playing with chocolate and learning the technique used to make the filled chocolates painted with cocoa butter.
Passion Fruit Caramel Chocolates aka Bonbons
Ingredients
Dark or milk chocolate melted, preferably tempered, about 1 lb
1 cup Granulated White Sugar
1/2 cup Light Corn Syrup
1/2 cup Water
4 Tbs Unsalted Butter
2 Tbsp Heavy Cream
1/4 cup Passion Fruit Puree
Painting the moulds with coloured cocoa butter.
Pouring in the chocolate, filling with caramel and finishing off with chocolate
Directions:
1. Place the sugar, corn syrup and water in a medium saucepan.
2. Set over medium-high heat and stir to combine.
3. Bring the mixture to a boil and cook until dark amber in color 310°F-315°F / 155°C-158°C, about 5 minutes.
4. Use a pastry brush, dipped in water, to wash down sides of pan to prevent crystallization as the mixture boils.
5. Remove saucepan from the heat and gradually whisk in the passion fruit puree, heavy cream and butter.
6. Transfer to a medium bowl and let cool.
7. Transfer cooled caramel to a pastry bag fitted with a medium plain tip or a squeeze bottle.
8. Coat the molds with chocolate using the method mentioned above.
9. Fill chocolate coated molds with caramel. You can use a spoon too but it’s less messy and goes a lot quicker with either of the two aforementioned methods.
10. Finish off with a layer of chocolate as mentioned in the method above for making filled chocolates with molds
11. Once fully set, carefully knock the chocolates out of the mold
Passion Fruit Trufles
Make the ganache:
1. Finely chop or grate the chocolate
2. Place in a heatproof bowl
3. In a saucepan, heat cream until just about to boil (it will start bubbling around the edges of the pot)
4. Pour the cream over the chocolate
5. Gently stir the mixture until all the chocolate has melted and it is smooth
6. Stir in your desired flavorings
For rolled truffles
1. Allow the ganache to firm up in a container of choice, preferably deep rather than shallow
2. Using a teaspoon or melon baller, scoop up room temperature ganache
3. With gloved hands, roll the balls between your palms to round them off
4. Dip in tempered chocolate or roll in various ingredients like cocoa or chopped nuts as desired
Tip: If dipping in chocolate, it’s best to refrigerate the ganache balls before dipping so that they’re firm and don’t melt from the warm chocolate
Tip: For a thicker chocolate shell, dip once in tempered chocolate and allow to set. Then do a second dipping or smear a small amount of chocolate over the truffle and roll in desired ingredients
5. Place on parchment paper until set
Jana of Cherry Tea Cakes was our July Daring Bakers’ host and she challenges us to make Fresh Frasiers inspired by recipes written by Elisabeth M. Prueitt and Chad Robertson in the beautiful cookbook Tartine.
Basic Chiffon Cake:
1 cup + 2 tablespoons all-purpose flour
1 teaspoon baking powder
3/4 cups sugar
1/2 teaspoon salt
1/4 cup vegetable oil
3 large egg yolks
⅓ cup + 1 tablespoon water
1 teaspoon pure vanilla extract
3/4 teaspoon lemon zest, grated
5 large egg whites
¼ teaspoon cream of tartar
1.Preheat the oven to moderate 325°F.
2.Line the bottom of an 8-inch spring form pan with parchment paper. Do not grease the sides of the pan.
3.In a large mixing bowl, stir together the flour and baking powder. Add in all but 3 tablespoons of sugar, and all of the salt. Stir to combine.
4.In a small bowl combine the oil, egg yolks, water, vanilla and lemon zest. Whisk thoroughly.
5.Combine with the dry ingredients and mix thoroughly for about one minute, or until very smooth.
6.Put the egg whites into a stand mixer, and beat on medium speed using a whisk attachment on a medium speed, until frothy. Add cream of tartar and beat on a medium speed until the whites hold soft peaks. Slowly add the remaining sugar and beat on a medium-high speed until the whites hold firm and form shiny peaks.
7.Using a grease free rubber spatula, scoop about ⅓ of the whites into the yolk mixture and fold in gently. Gently fold in the remaining whites just until combined.
8.Pour the batter into the prepared pan. Bake for 45 to 55 minutes or until toothpick inserted into the center comes out clean.
9.Removed the cake from the oven and allow to cool in the pan on a wire rack.
10.To unmold, run a knife around the sides to loosen the cake from the pan and remove the spring form sides. Invert the cake and peel off the parchment paper. Refrigerate for up to four days.
Pastry Cream Filling:
1 cup whole milk
1/2 teaspoon pure vanilla extract
1/8 teaspoon salt
2 tablespoons cornstarch
1/4 cup sugar
1 large egg
2 tablespoons unsalted butter
3/4 teaspoon gelatin
1/2 tablespoon water
1 cup heavy cream
1.Pour the milk, vanilla, and salt into a heavy sauce pan. Place over medium-high heat and scald, bringing it to a near boiling point. Stir occasionally.
2.Meanwhile, in a stand mixer add the cornstarch and sugar. Whisk to combine
3.Add the eggs to the sugar and cornstarch and whisk until smooth.
4.When the milk is ready, gently and slowly while the stand mixer is whisking, pour the heated milk down the side of the bowl into the egg mixture.
5.Pour the mixture back into the warm pot and continue to cook over a medium heat until the custard is thick, just about to boil and coats the back of a spoon.
6.Remove from heat and pass through a fine mesh sieve into a large mixing bowl. Allow to cool for ten minutes stirring occasionally.
7.Cut the butter into four pieces and whisk into the pastry cream a piece at a time until smooth.
8.Cover the cream with plastic wrap, pressing the plastic wrap onto the top of the cream to prevent a skin from forming. Chill in the refrigerator for up to five days.
9.In a small dish, sprinkle the gelatin over the water and let stand for a few minutes to soften.
10.Put two inches of water into a small sauce pan and bring to a simmer over a medium heat.
11.Measure 1/4 cup of the chilled pastry cream into a small stainless steel bowl that will sit across the sauce pan with the simmering water, without touching the water.
12.Heat the cream until it is 120 F . Add the gelatin and whisk until smooth. Remove from the water bath, and whisk the remaining cold pastry cream in to incorporate in two batches.
13.In a stand mixer, fitted with the whisk attachment, whip the cream until it holds medium-stiff peaks. Immediately fold the whipped cream into the pastry cream with a rubber spatula.
Simple Syrup:
1/3 cup of sugar
1/3 cup of water
Directions:
1.Combine the water and sugar in a medium saucepan.
2.Bring the mixture to a boil and let the sugar dissolve. Stirring is not necessary, but will not harm the syrup.
3.Remove the syrup from the heat and cool slightly.
4.Transfer syrup to a lidded container or jar that can be stored in the refrigerator. Simple syrup can be stored for up to one month.
Fraisier Assembly:
1 baked chiffon cake
1 recipe pastry cream filling
⅓ cup simple syrup or flavored syrup
2 lbs (900 g) strawberries
Directions:
1.Cut cake into 3 layers
2. Use one of the layers and moisten it evenly with the simple syrup.
3.Hull and slice in half enough strawberries to arrange around the sides. Place them on the side of the cake to form a ring.
4. Spread or pipe cream in the middle.
5. Repeate process until all the layers are used.
6. Spread or pipe the remaining pastry cream on the top of the cake. Refigerate.